How to Configure Geo and Time Filters in SaaS MFA Service
Geo and Time Filters in the Protectimus SaaS MFA Service allow you to enforce access control policies for a Resource based on a user’s country (Geo Filter) or login time (Time Filter). This helps strengthen multi-factor authentication security by limiting when and from where users can sign in.
Important Notes:
- A filter works only after it is assigned to a Resource.
- You can assign the same filter to multiple Resources.
- The number of filters you can create depends on your selected Service Plan.
1. How to Create a Geo Filter (Geographic Filter)
A Geo Filter restricts access to a Resource in the Protectimus SaaS MFA Service based on the user’s country. You can configure geographic access control to:
- Allow access only from selected countries (Allowed Countries)
- Deny access from selected countries (Forbidden Countries)
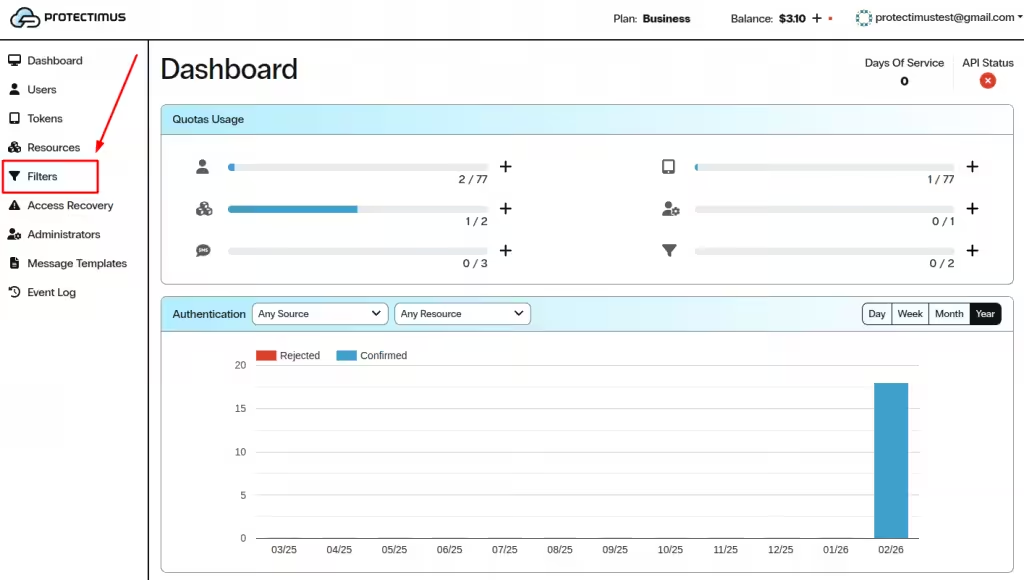
1.1. Open the Filters Page
- Log in to your Protectimus SaaS Service account.
- In the left-side menu, click Filters.
1.2. Start Creating a New Geo Filter
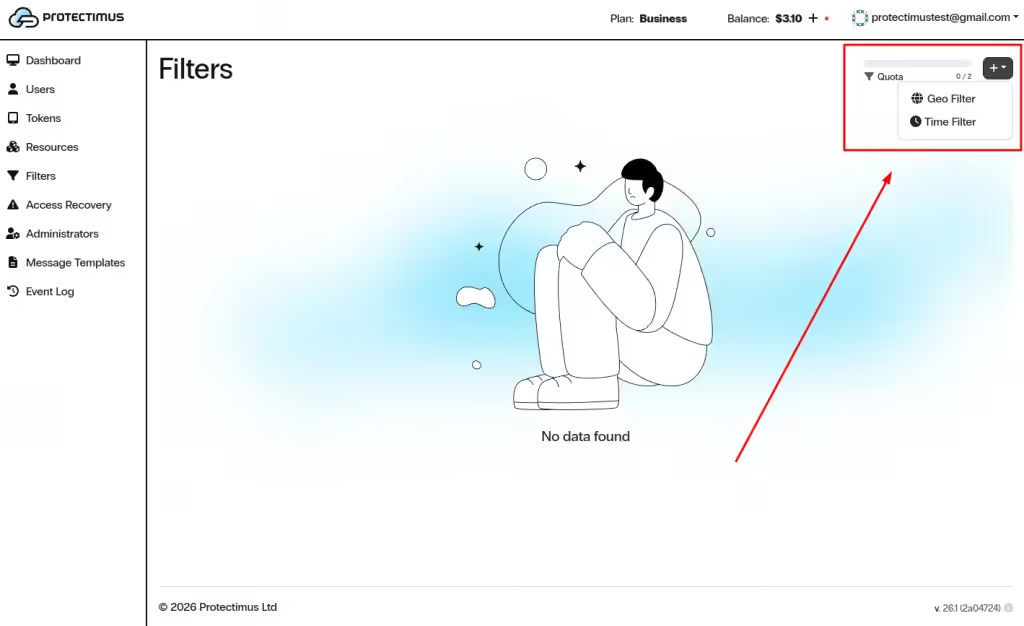
- In the upper-right corner, click the + button.
- Select Geo Filter.
1.3. Configure and Create the Geo Filter
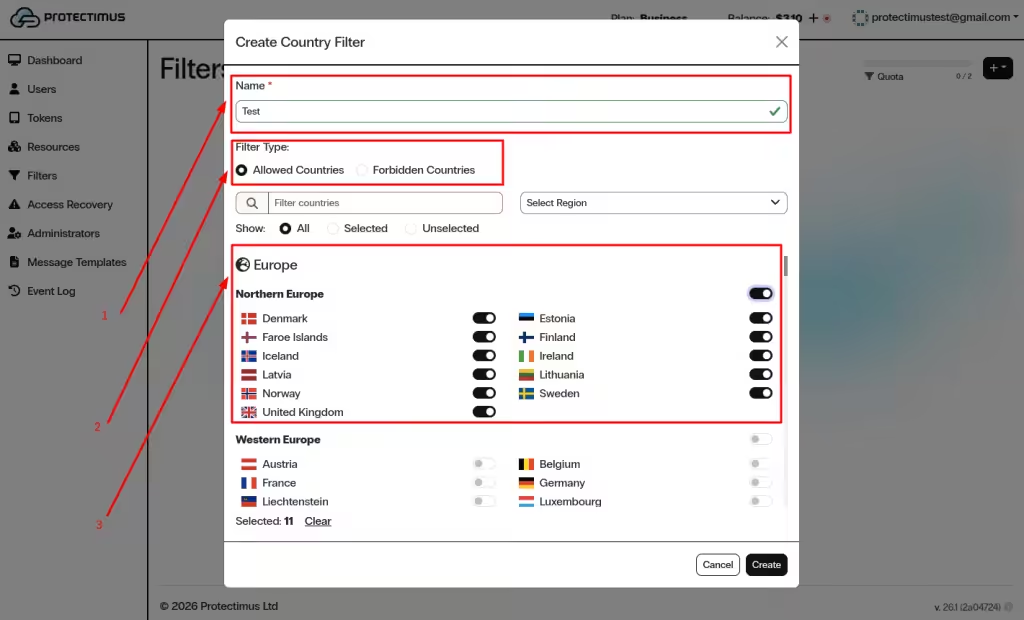
In the Create Country Filter window:
- Enter the Name of the filter.
- Choose the Filter Type:
- Allowed Countries – access is permitted only from selected countries.
- Forbidden Countries – access is denied from selected countries.
- Select countries using the toggles (you can use search and region filters to find countries faster).
- Click Create.
2. How to Create a Time Filter
A Time Filter restricts access to a Resource based on time zone, days of the week, and specific time intervals. This time-based access control is useful for enforcing business-hour authentication policies and reducing unauthorized access outside working hours.
2.1. Start Creating a New Time Filter
- Log in to your Protectimus SaaS Service account.
- In the left-side menu, click Filters.
- In the upper-right corner, click the + button.
- Select Time Filter.
2.2. Configure and Create the Time Filter
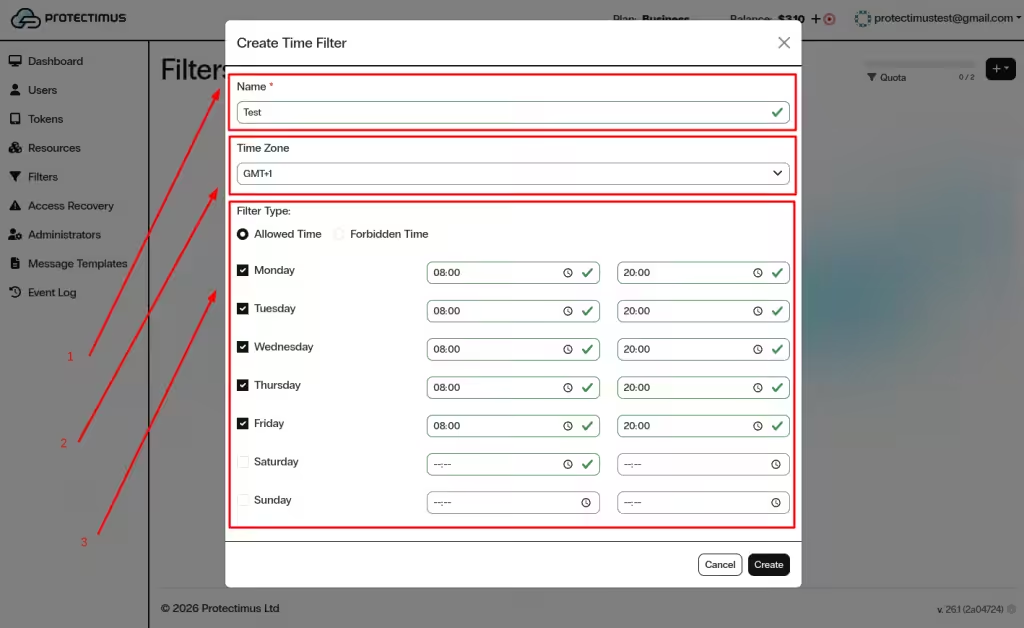
In the Create Time Filter window:
- Enter the Name of the filter.
- Select the Time Zone.
- Choose the Filter Type:
- Allowed Time – access is allowed only during specified hours.
- Forbidden Time – access is denied during specified hours.
- Select the days of the week.
- Set the allowed/forbidden time interval for each selected day.
- Click Create.
3. How to Assign a Filter to a Resource
After creating a Geo Filter or Time Filter, assign it to a Resource to apply country-based or time-based access restrictions.
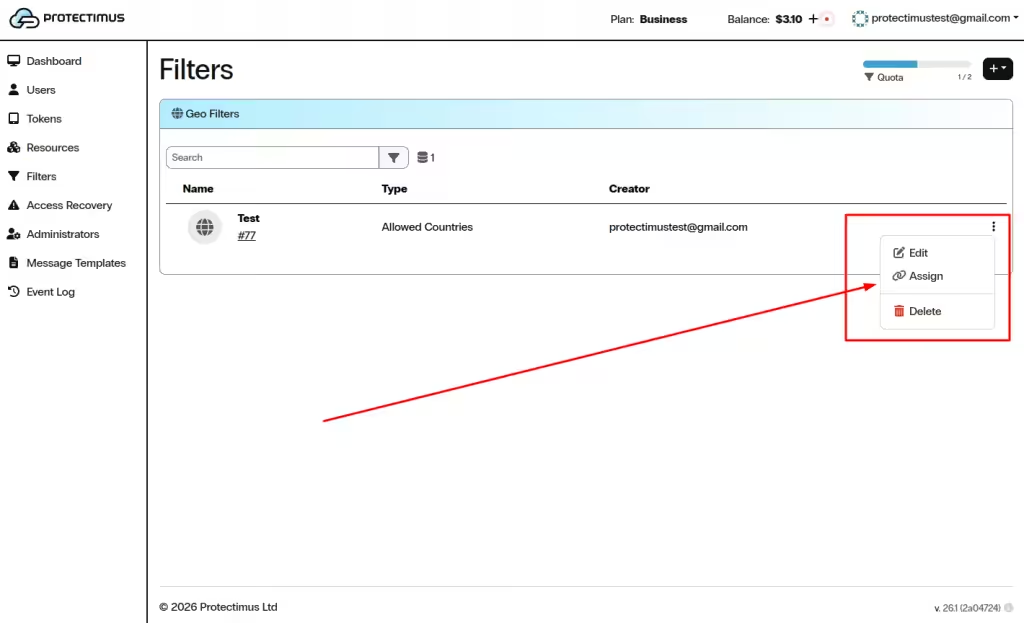
- Go to Filters and find the required filter in the list.
- Click the three dots (⋮) on the right side of the filter.
- Select Assign.
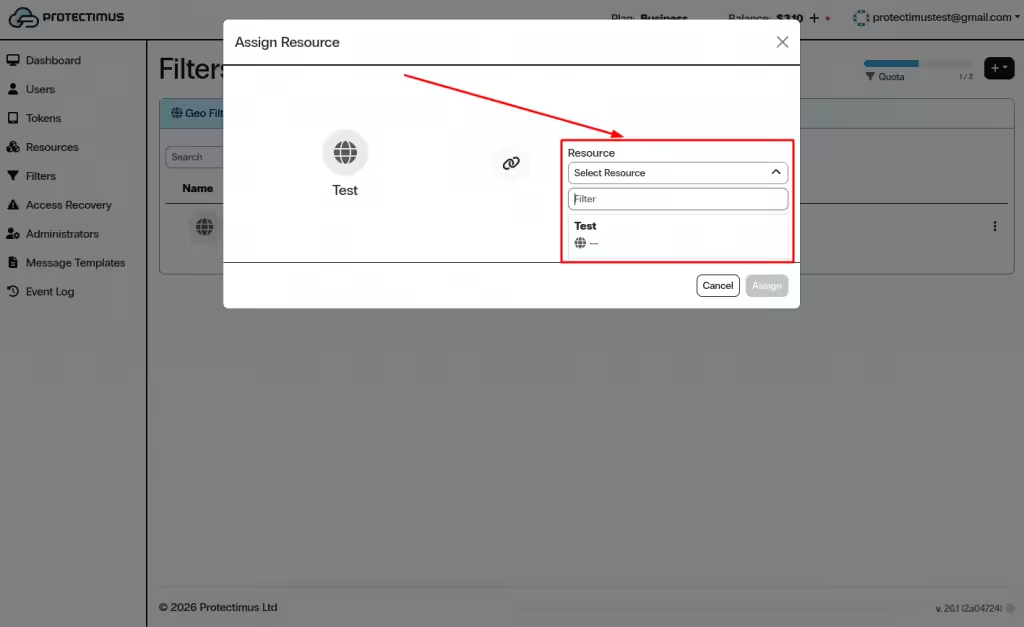
- In the Assign Resource window, open the Select Resource dropdown.
- Choose the required Resource.
- Click Assign.
Using Geo and Time Filters in the Protectimus SaaS MFA Service strengthens multi-factor authentication by enforcing location-based and time-based access control policies. Proper configuration helps reduce unauthorized login attempts and improves overall account security.
If you have any questions, please contact Protectimus customer support.