Setting Up Two-Factor Authentication with Cisco AnyConnect VPN
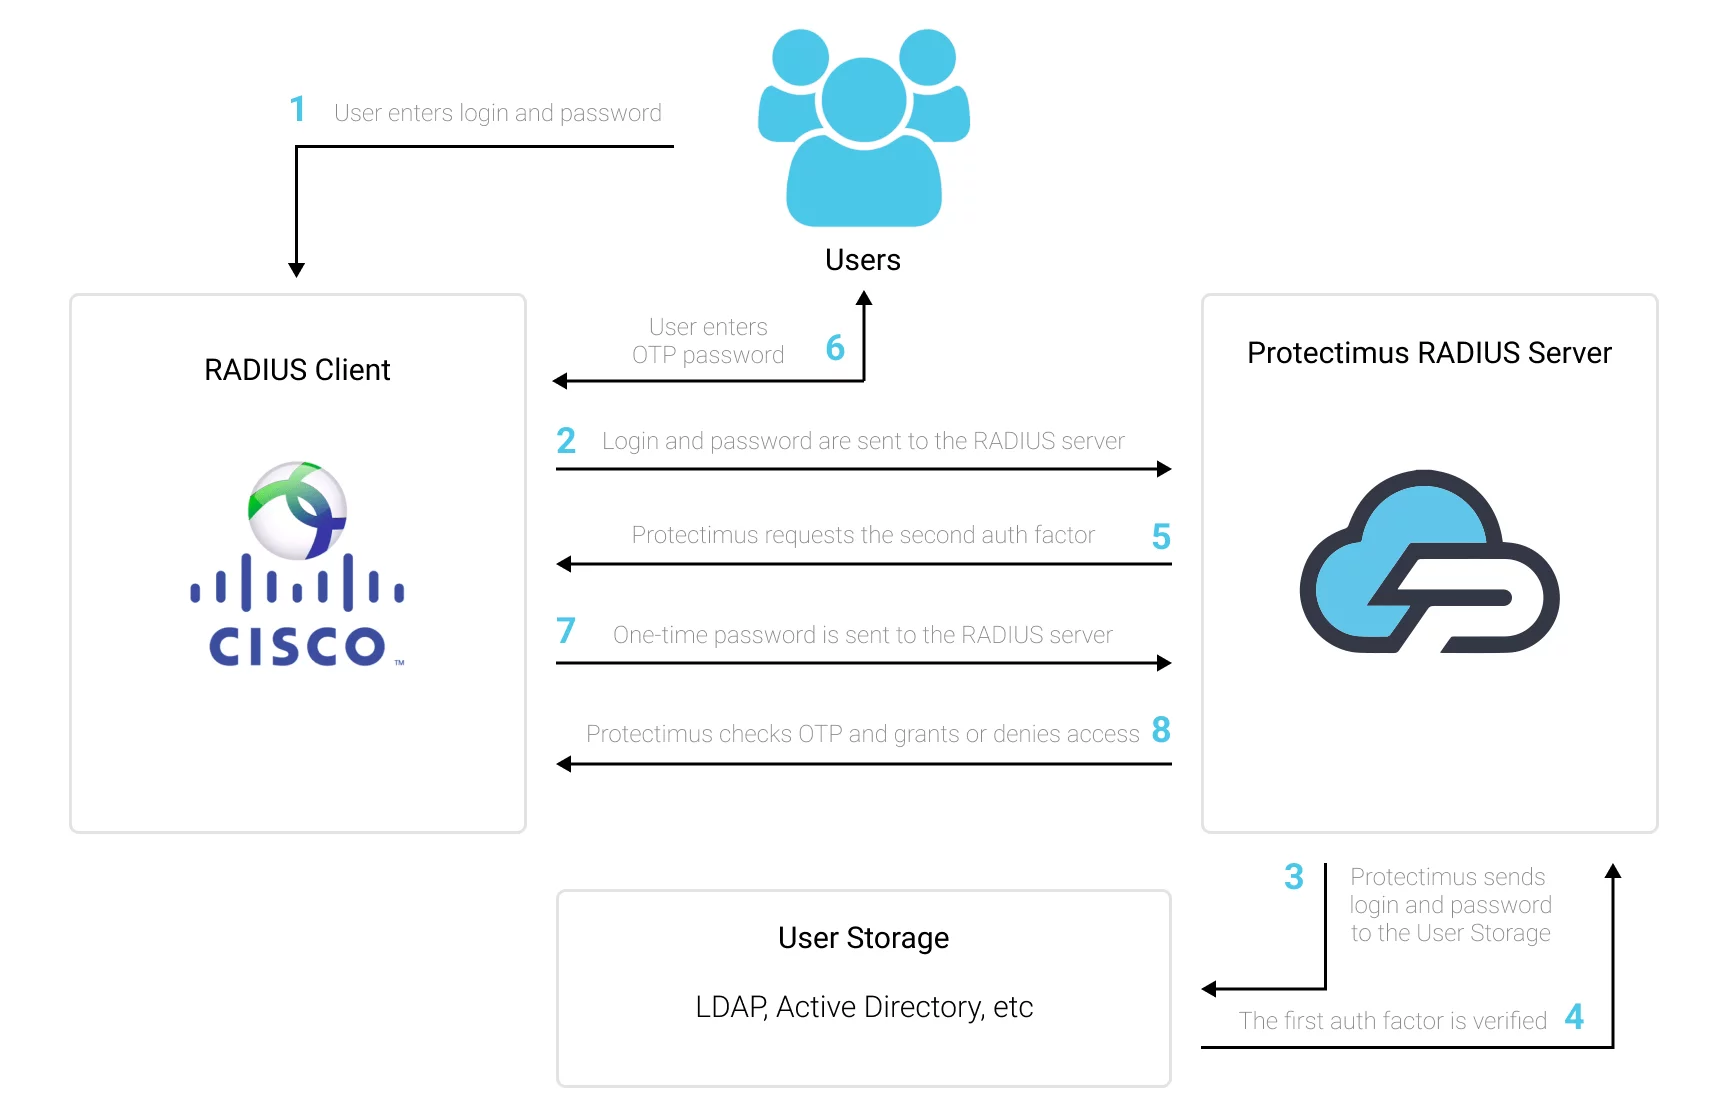
Cisco AnyConnect 2FA can be enabled with Protectimus Two-Factor Authentication System using the RADIUS protocol.
Configuring authentication policies in Cisco AnyConnect allows the transmission of an authentication request over the RADIUS protocol to Protectimus RADIUS Server. Having received the request, the Protectimus RADIUS Server, in its turn, contacts the Protectimus authentication server to verify the one-time password of the user and returns the answer to Cisco AnyConnect using RADIUS.
Check the Cisco AnyConnect 2FA setup scheme showing how Cisco AnyConnect two-factor authentication via RADIUS will work.
To enable Cisco AnyConnect two-factor authentication (2FA):
- Install and configure Protectimus RADIUS Server.
- Get registered with Protectimus SAAS 2FA Service or On-Premise 2FA Platform and configure basic settings.
- Configure Cisco AnyConnect authentication policies.
1. Get Registered and Configure Basic Settings
Choose your deployment option and complete the basic setup:
Protectimus Cloud Service
- Register with the Protectimus Cloud Service and activate API.
- Add a Resource.
- Add Users.
- Add Tokens manually or activate the Users’ Self-Service Portal.
- Assign Tokens to Users.
- Assign Users and Tokens to the Resource.
Protectimus On-Premise Platform
- Install the Protectimus On-Premise Platform. If you install the Protectimus Platform on Windows, select the RADIUS option during installation.
- Add a Resource.
- Add Users.
- Add Tokens manually or activate the Users’ Self Service Portal.
- Assign Tokens to Users.
- Assign Tokens with Users to the Resource.
2. Install and configure Protectimus RADIUS Server
Detailed instructions for installing and configuring the Protectimus RADIUS Server are available in our Protectimus RADIUS Server Installation Guide for Cisco AnyConnect 2FA..
3. Configure Cisco AnyConnect 2FA authentication policies
3.1. Add the RADIUS server group to Cisco ASA configuration:
- Connect to Cisco ASA using Cisco ASDM
- Open Configuration —> Remote Access VPN —> AAA/Local Users —> AAA Server Groups
- Click AAA Server Groups —> Add (1, 2)
- Set the name and parameters as shown in the figure below (3)
- Click OK (4)

3.2. Add the RADIUS Server to a Server Group:
- Select a RADIUS Server Group that you’ve just created (1)
- Click Add (2)
- Set parameters of your RADIUS server (3)
- Click OK (4)

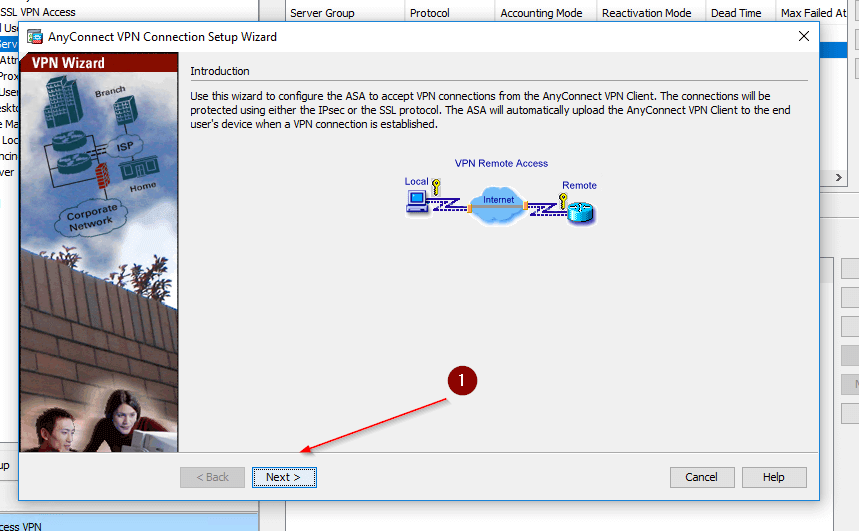
3.3. Set up the AnyConnect VPN Connection:
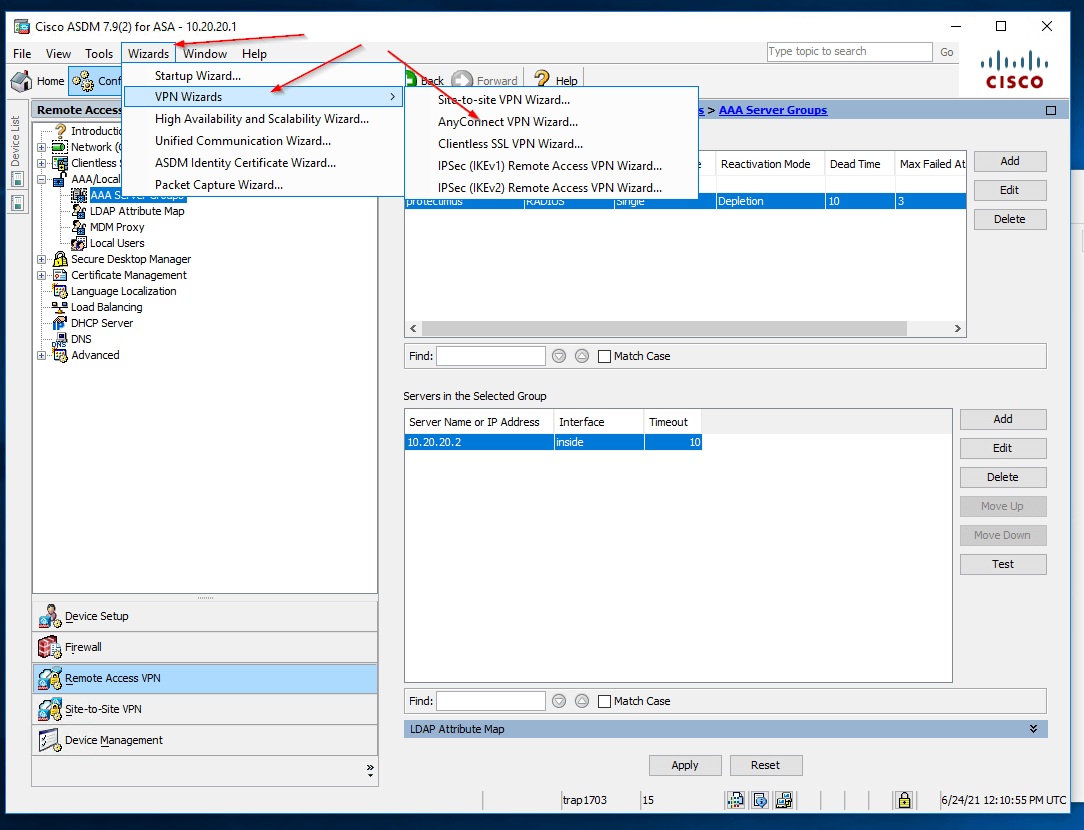
- Open the AnyConnect VPN Wizard
Click Wizards —> VPN Wizards —> AnyConnect VPN Wizard as shown in the figure.
- Then click Next as shown in the figure below.
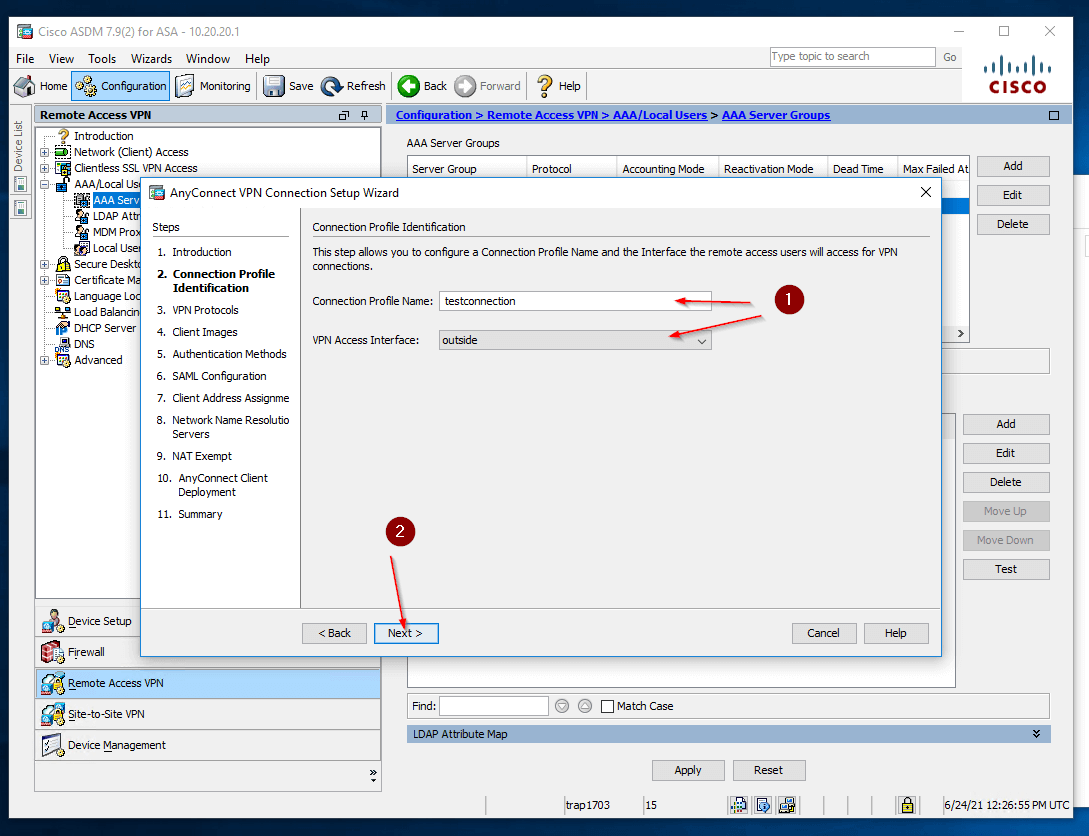
- Specify the Connection Profile Name and VPN Access Interface name (1).
Then click Next (2).
- Configure the VPN Protocols and add a Certificate as shown in the figures below.

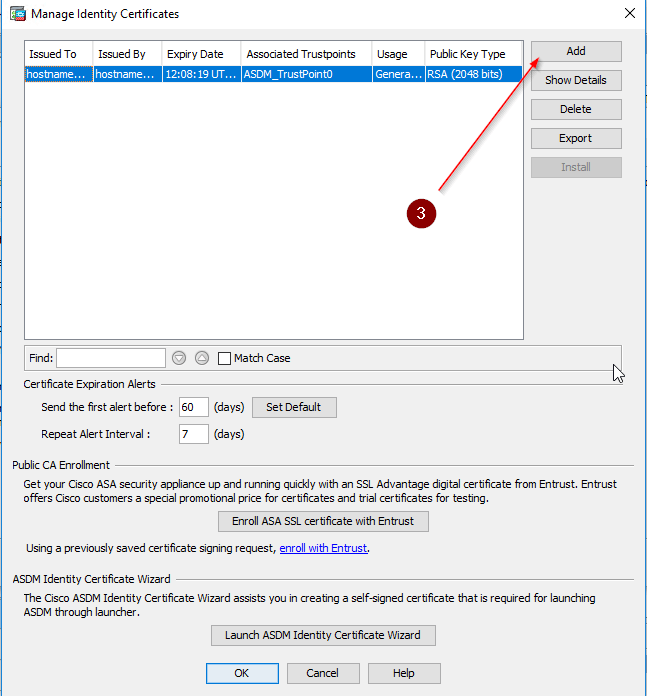
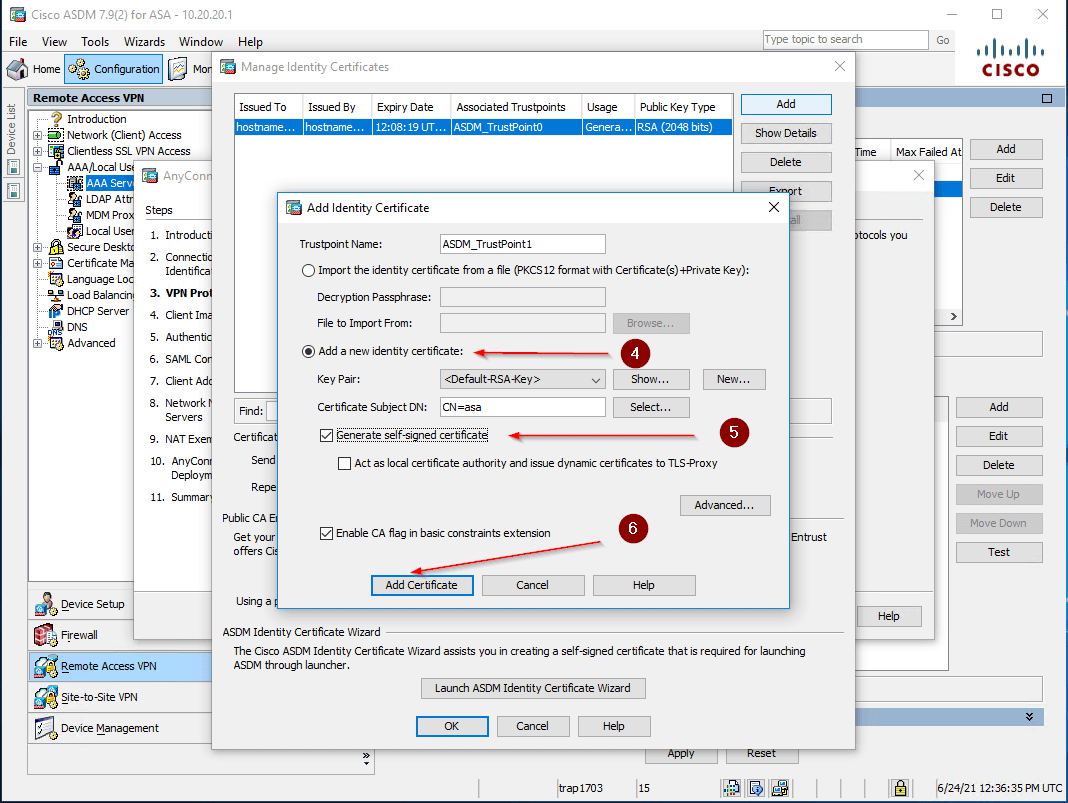
- You can generate and add a self-signed certificate if necessary as shown in the figure below. After that click OK —> OK —> Next.
- Add a VPN client image (*.pkg files)

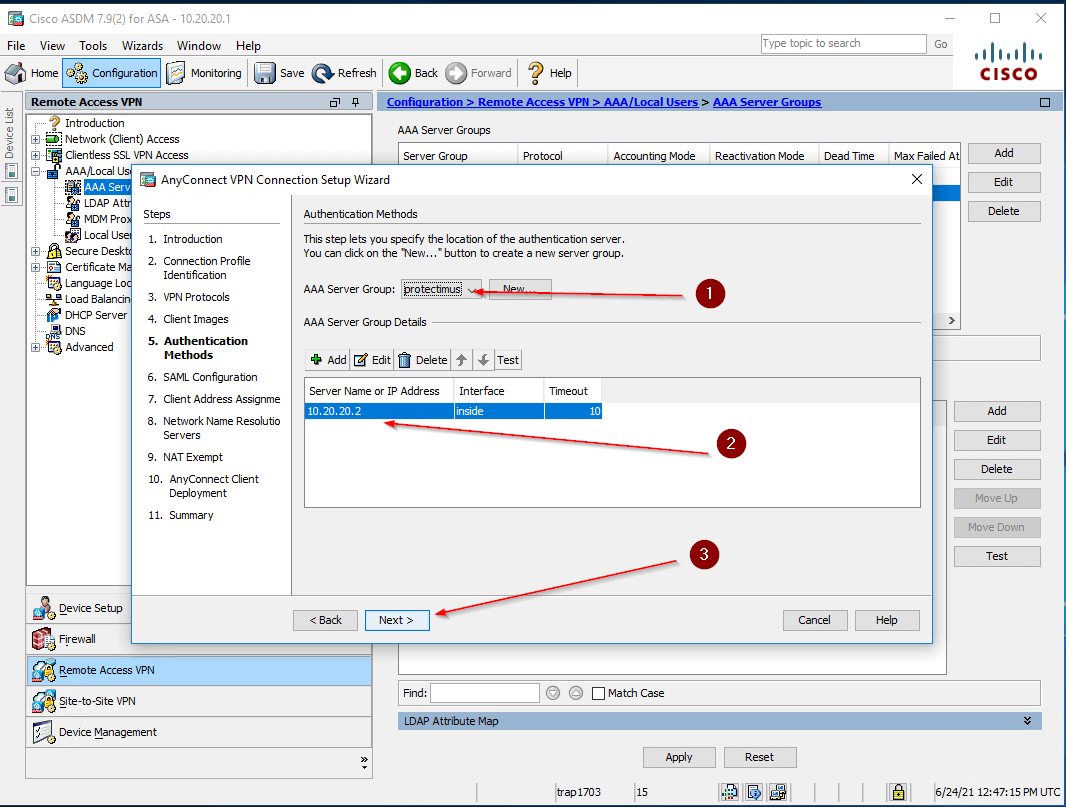
- Set up Authentication Methods:
- Select the RADIUS Server Group that you’ve created as an AAA Server Group (1)
- Modify the server name or IP if necessary (2)
- Click Next (3)
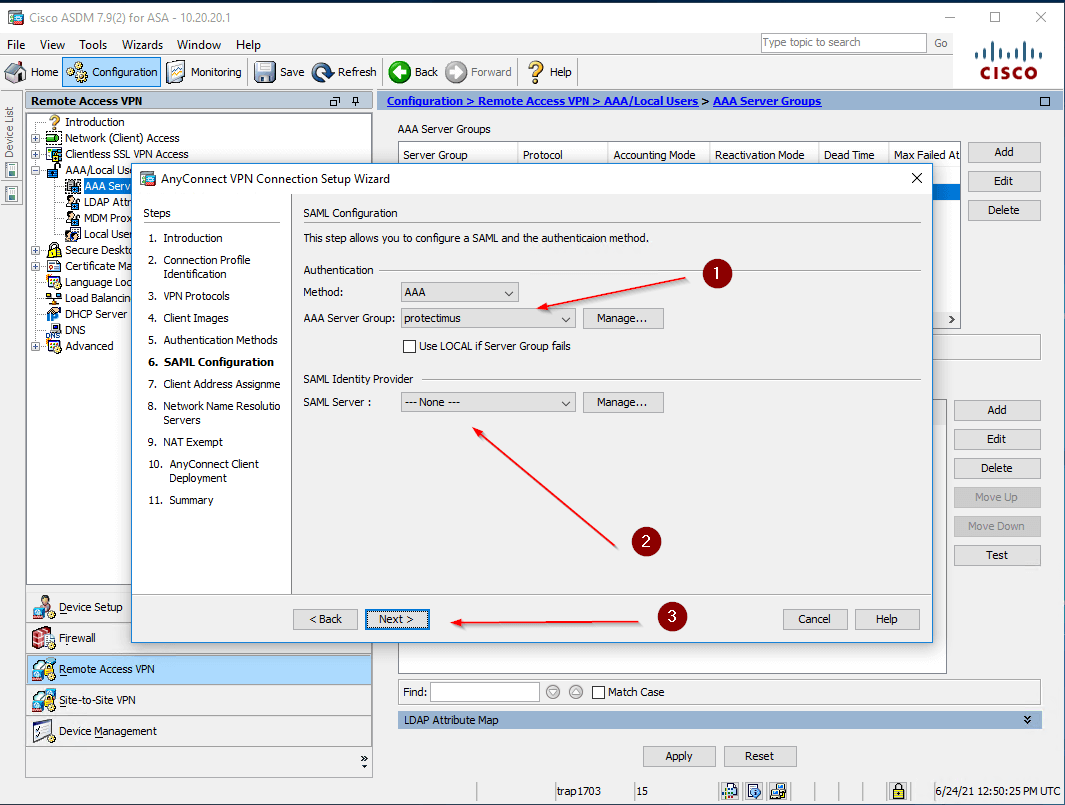
- Configure SAML:
- Select the RADIUS Server Group that you’ve created as an AAA Server Group (1)
- Leave “None” in the SAML Server field (2)
- And click Next (3)
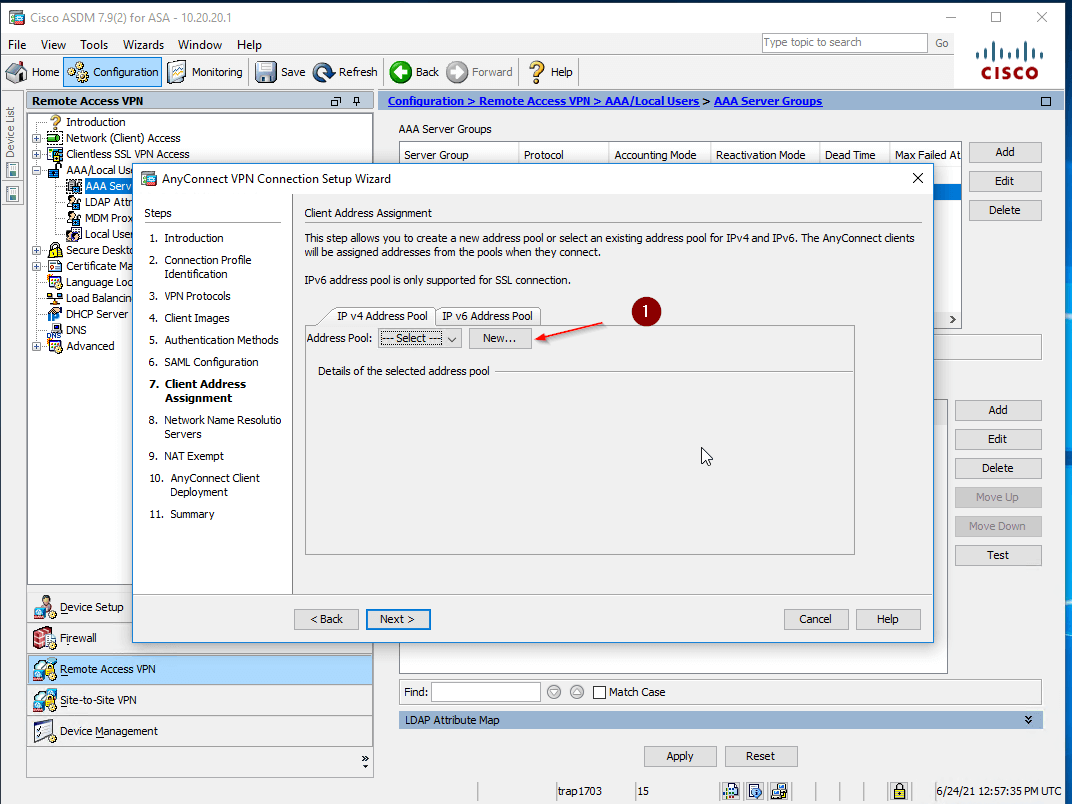
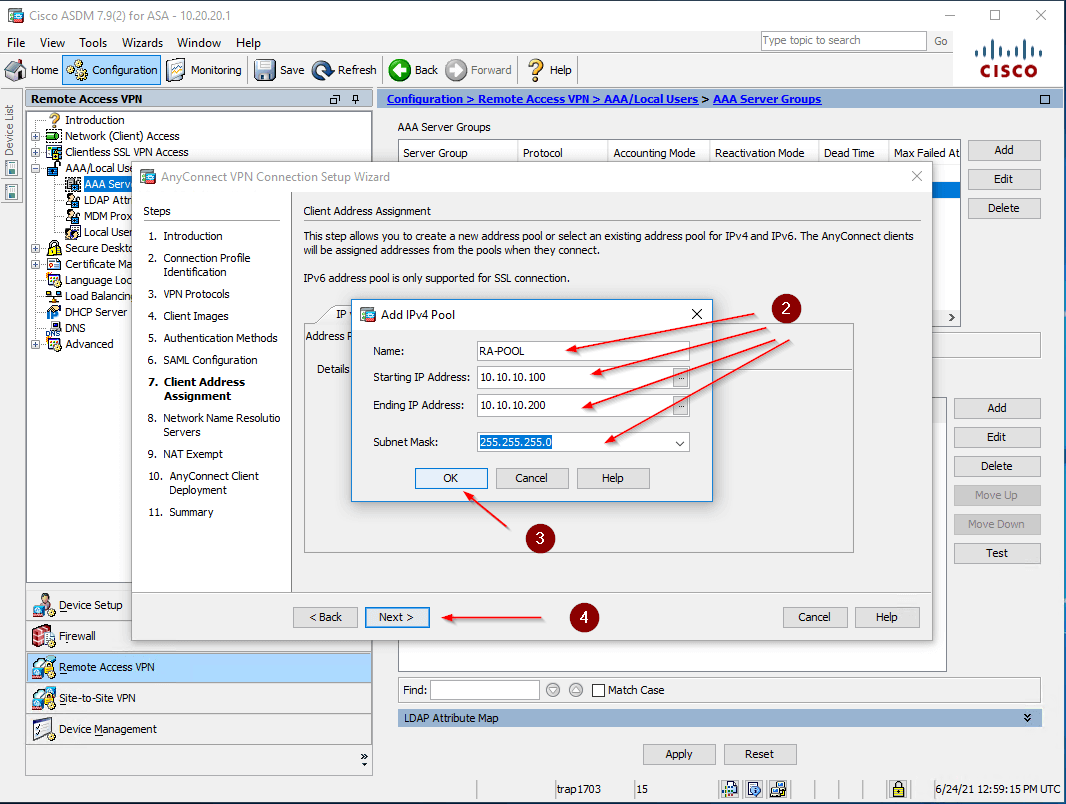
- Configure a Pool of IP addresses that will be assigned to the clients:
- Choose New (1)
- Specify the IP Pool parameters: Name, Starting IP Address, Ending IP Address, and Subnet Mask (2, 3)
- And then click Next (4)
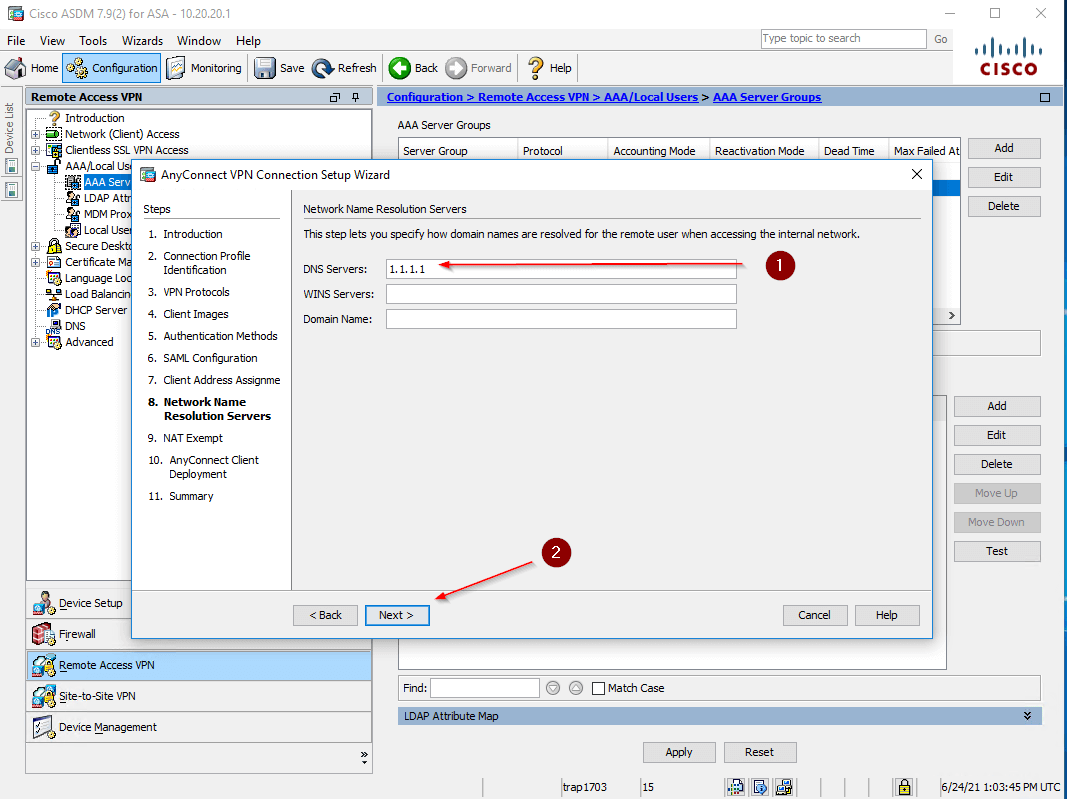
- Specify the DNS Server
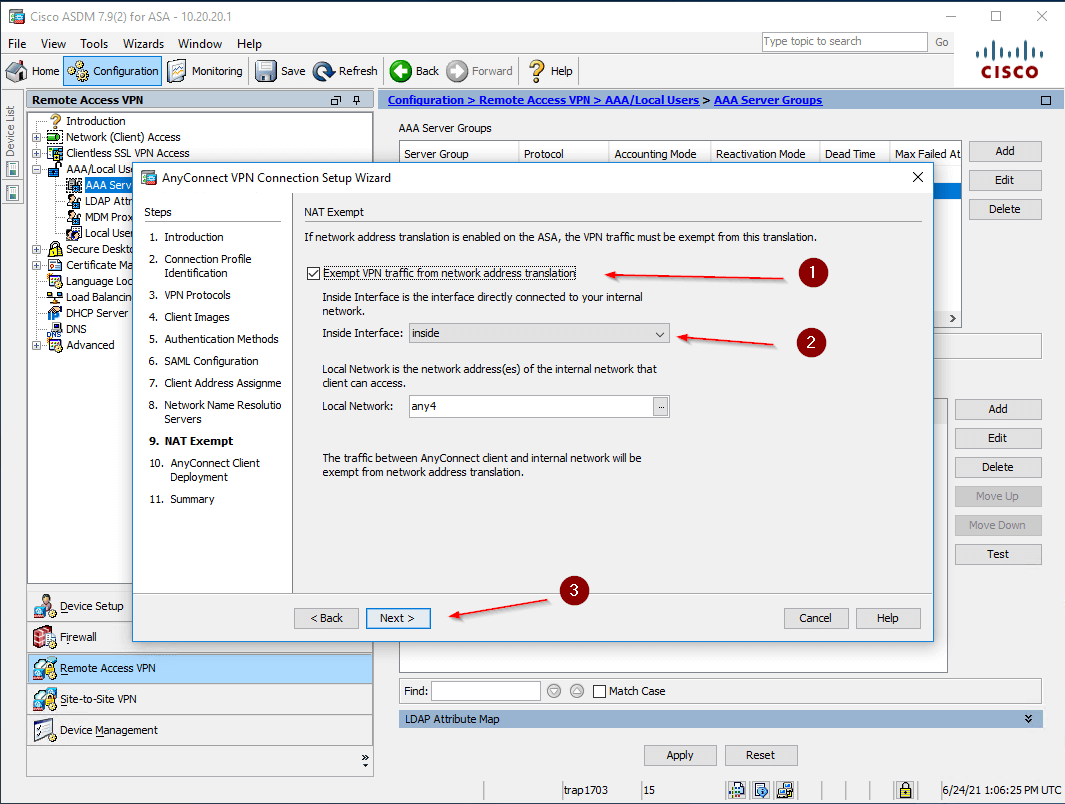
- Configure NAT Exemptions:
- Check the box Exempt VPN traffic from network address translation (1)
- Set up an exemptions for Inside Interface (2)
- And click Next (3)
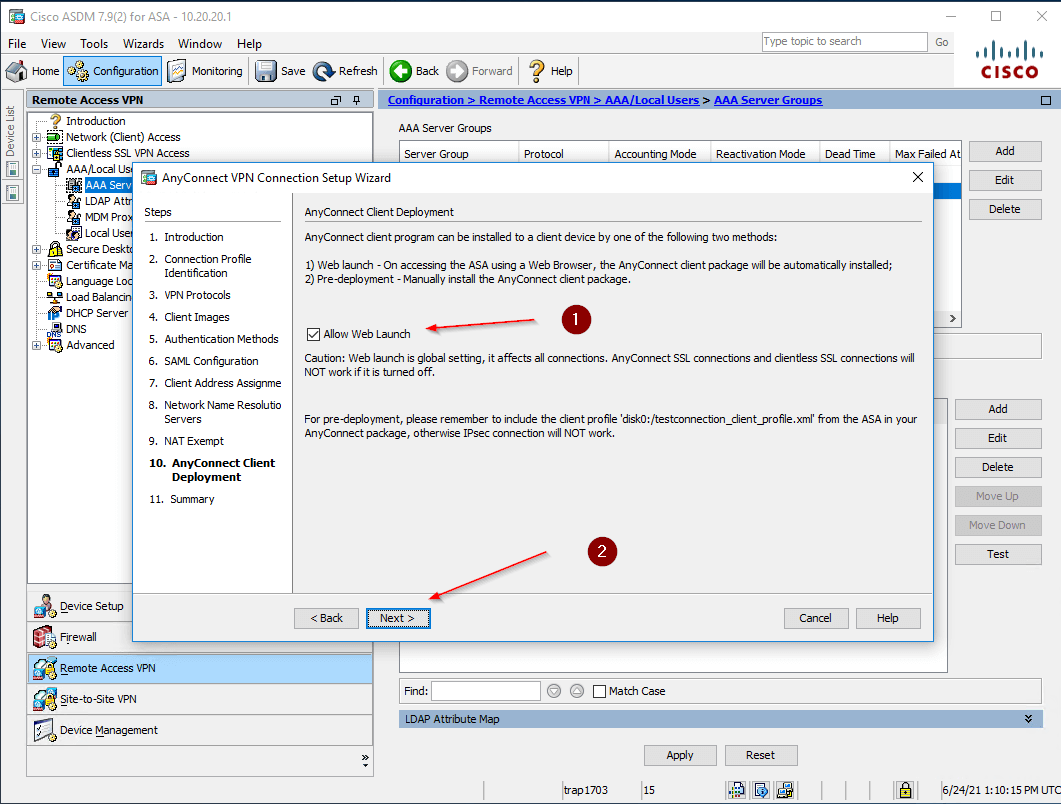
- Allow connection via https, to do this check the box Allow Web Launch (1).
And click Next.
- Check the settings you have specified and click Finish.
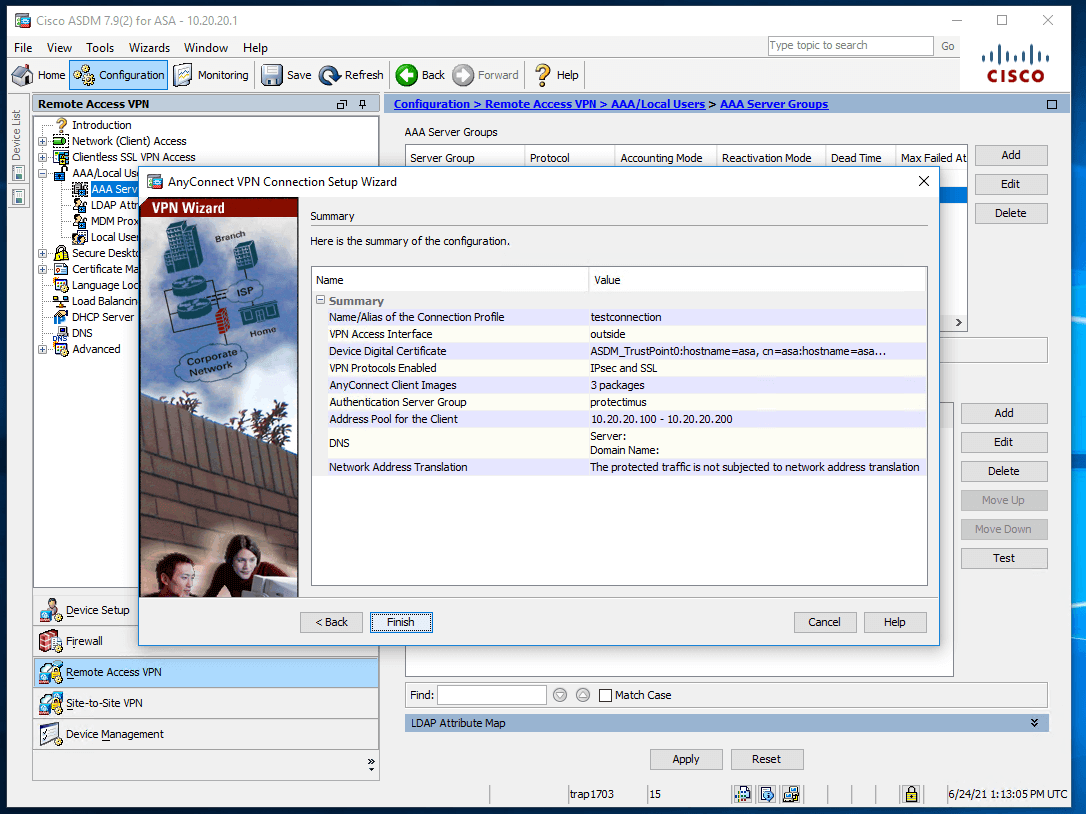
Integration of Cisco AnyConnect 2FA is now complete.
If you have other questions, contact Protectimus customer support service.