This guide shows how to enable multi-factor authentication (MFA / 2FA) for F5 BIG-IP APM VPN with the help of the Protectimus two-factor authentication system.
Protectimus two-factor authentication system integrates with F5 BIG-IP APM VPN via RADIUS authentication protocol. In this scenario, the Protectimus Cloud 2FA Service or On-Premise 2FA Platform takes the role of a RADIUS server, and the F5 BIG-IP VPN performs of a RADIUS client.
The scheme of work of the Protectimus solution for F5 BIG-IP APM VPN 2FA is presented below.
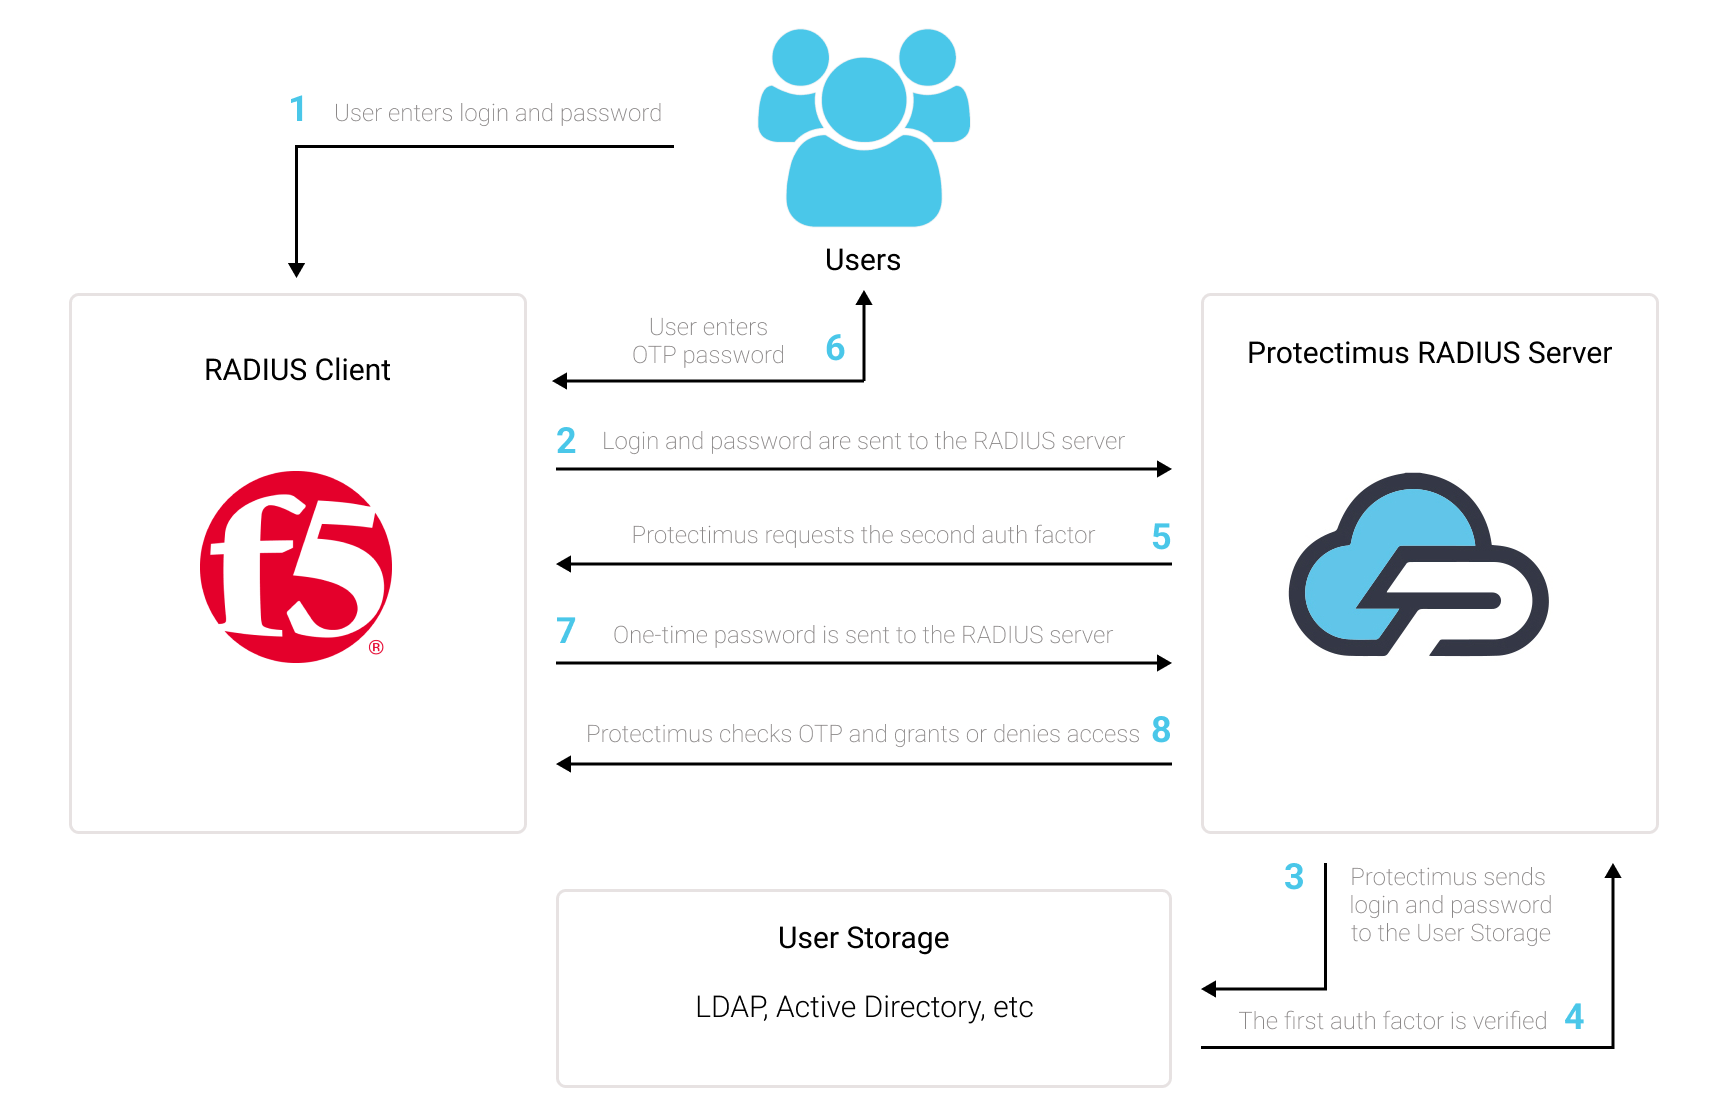
Protectimus Two-Factor Authentication Solution for F5 BIG-IP APM VPN allows you to add an extra layer of security to your F5 BIG-IP VPN logins.
When you add 2FA/MFA for F5 VPN, your users will use two different authentication factors to get access to their accounts.
To hack an F5 BIG-IP APM VPN protected with two-factor authentication, a hacker needs to get a standard password and a one-time password at once. And they only have 30 seconds to hack a one-time password. It is almost impossible, which makes two-factor authentication so effective against brute force, data spoofing, keyloggers, phishing, man-in-the-middle attacks, social engineering, and similar hacking attacks.
You can set up multi-factor authentication (2FA) for F5 BIG-IP VPN with Protectimus using the RADIUS protocol:
- Get registered with Protectimus SAAS Service or install the On-Premise 2FA Platform and configure basic settings.
- Install and configure Protectimus RADIUS Server.
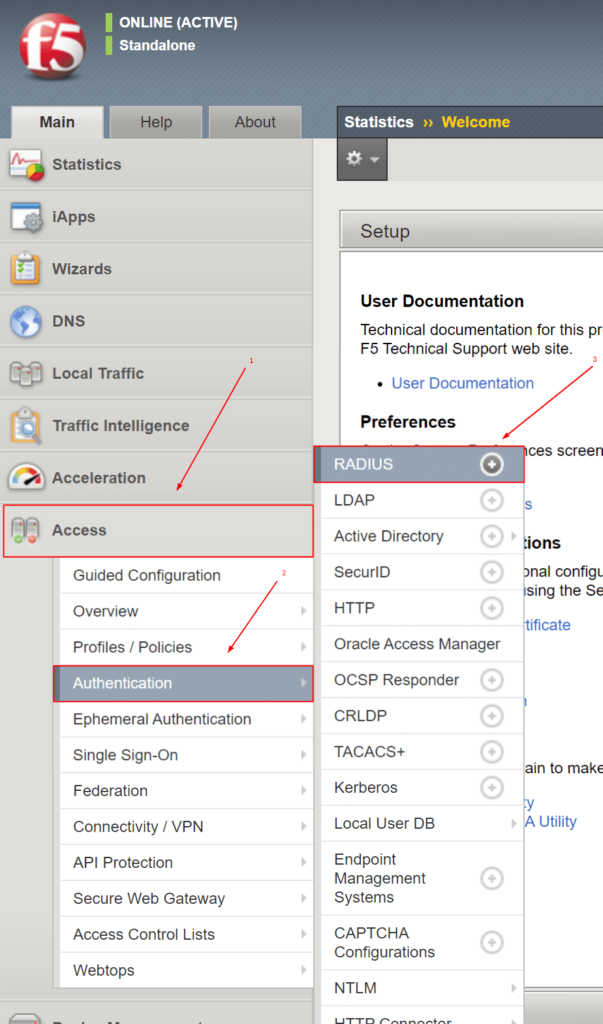
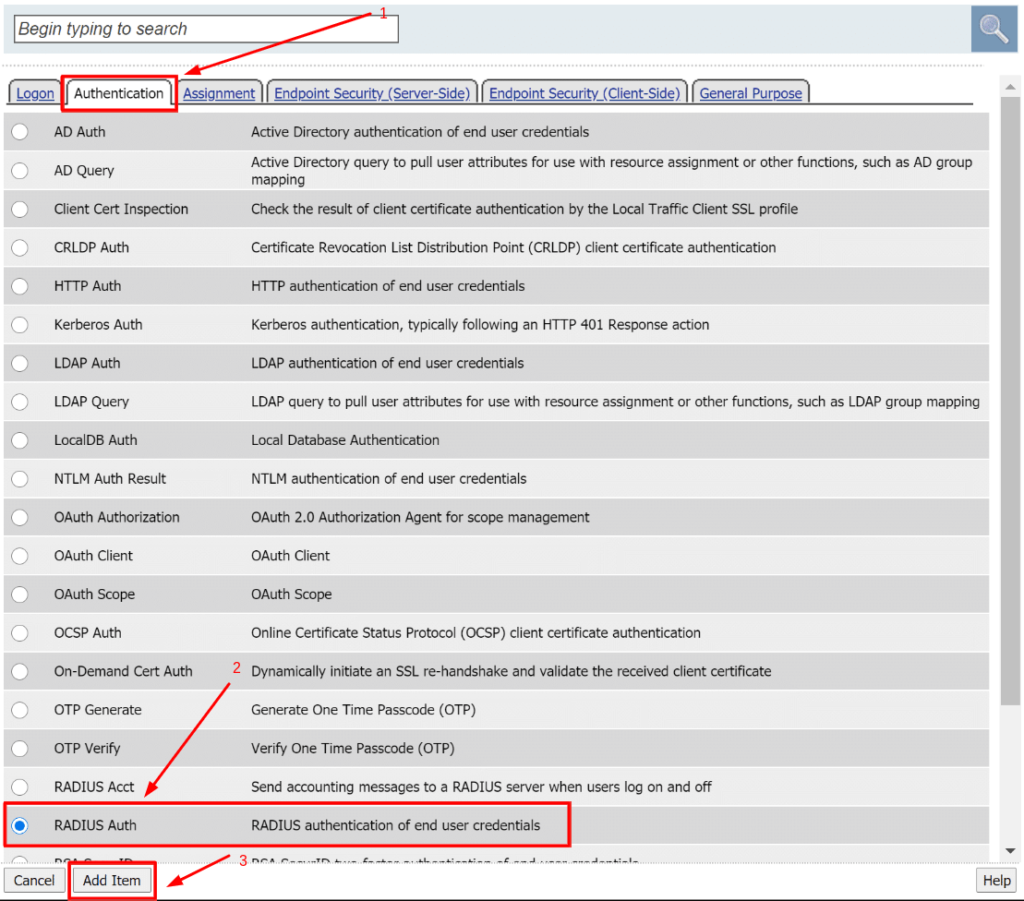
- Add Protectimus as RADIUS Server for F5 BIG-IP APM VPN.
Choose your deployment option and complete the basic setup:
Protectimus Cloud Service
Protectimus On-Premise Platform
Detailed instructions for installing and configuring the Protectimus RADIUS Server for F5 BIG-IP APM VPN two-factor authentication using RADIUS are available in our Protectimus RADIUS Server Installation Guide for F5 BIG-IP APM VPN 2FA.
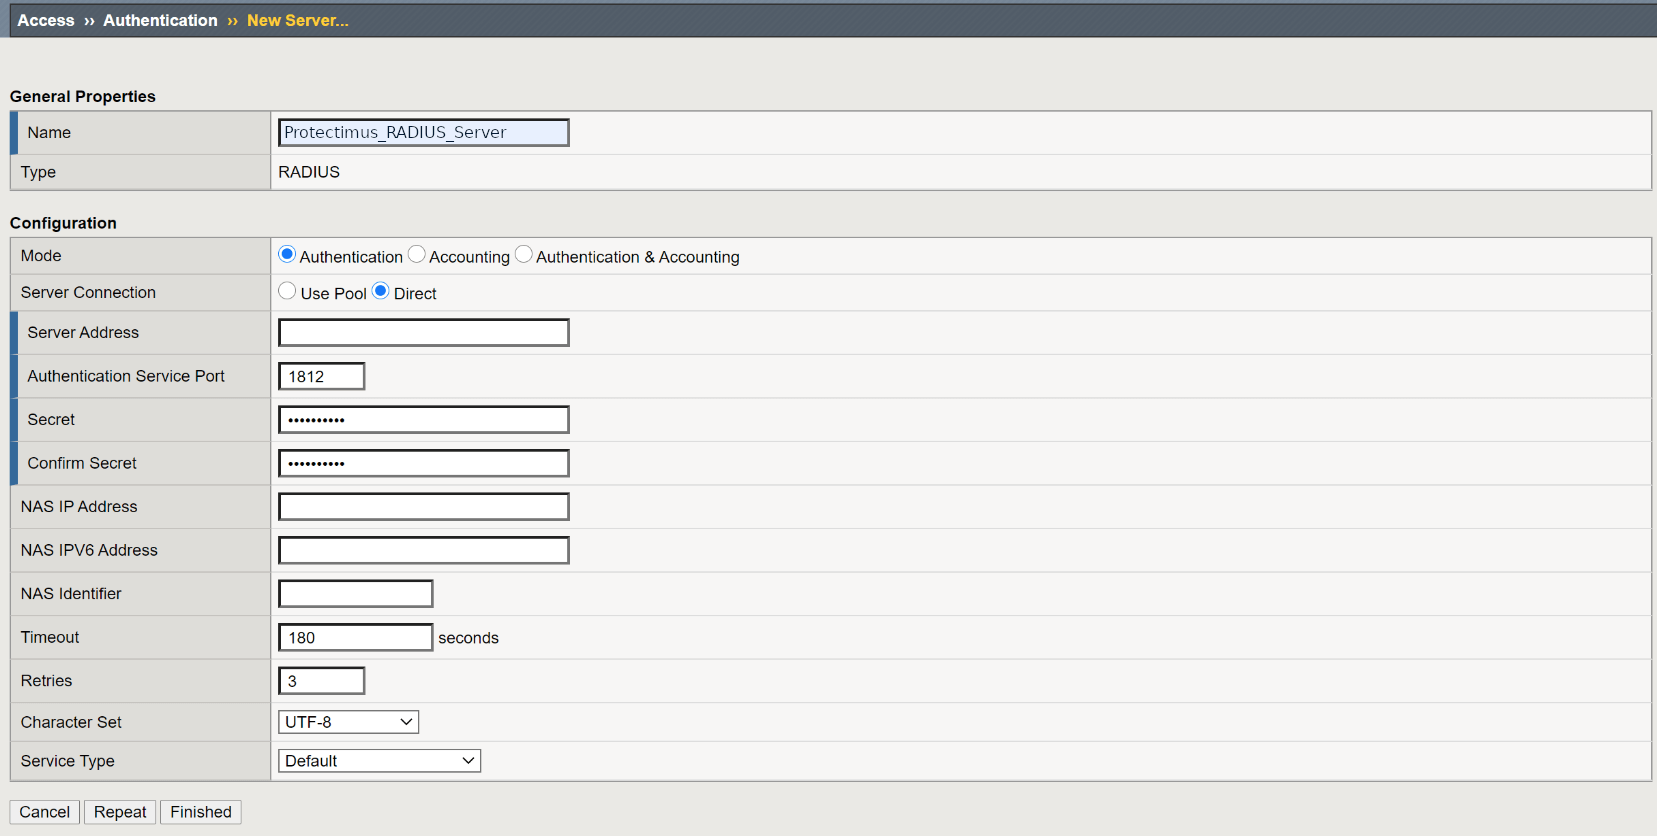
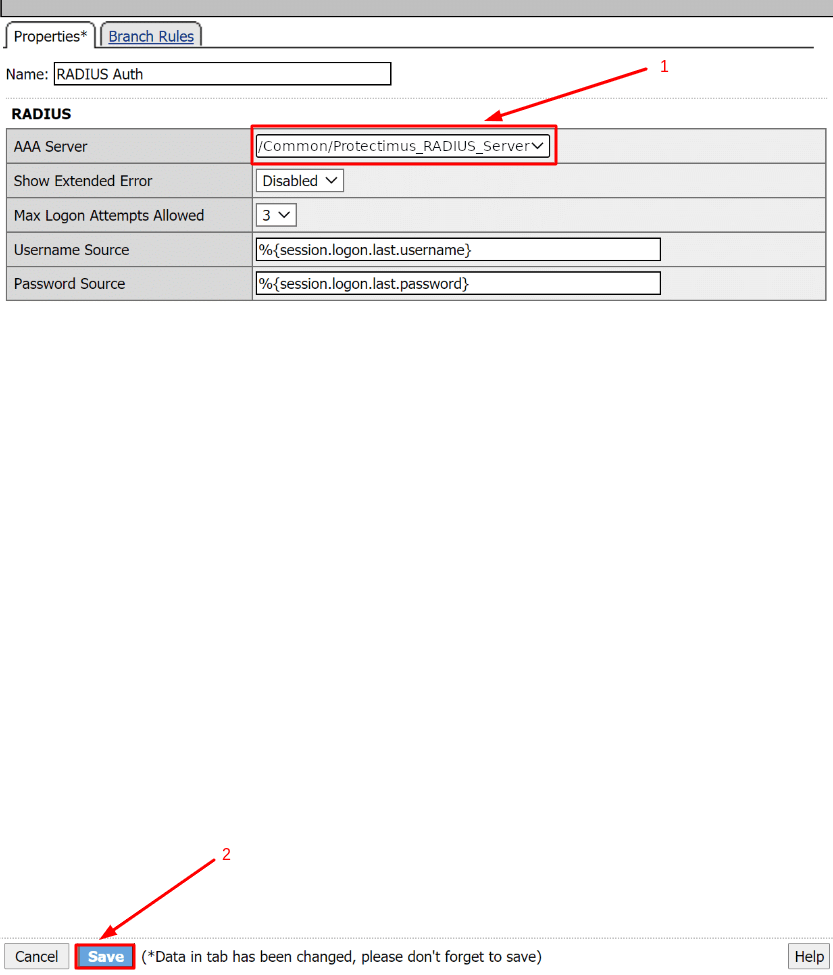
| Name | Type any name for your RADIUS server – enter Protectimus_RADIUS_Server or any other name you wish. |
| Mode | Authentication |
| Server Connection | Direct |
| Server Address | Enter the IP of server where the Protectimus RADIUS Server component is installed. |
| Authentication Service Port | Indicate 1812 (or whichever port you configured in the Protectimus radius.yml file when configuring Protectimus RADIUS Server). |
| Secret | Indicate the shared secret you created in the Protectimus radius.yml file (radius.secret property) when configuring Protectimus RADIUS Server |
| Confirm Secret | Confirn the shared secret. |
| Timeout | Set to 180 seconds. |
| Retries | Set to 3. |
| Character Set | Set to UTF-8. |
| Service Type | Default. |

PLEASE NOTE!
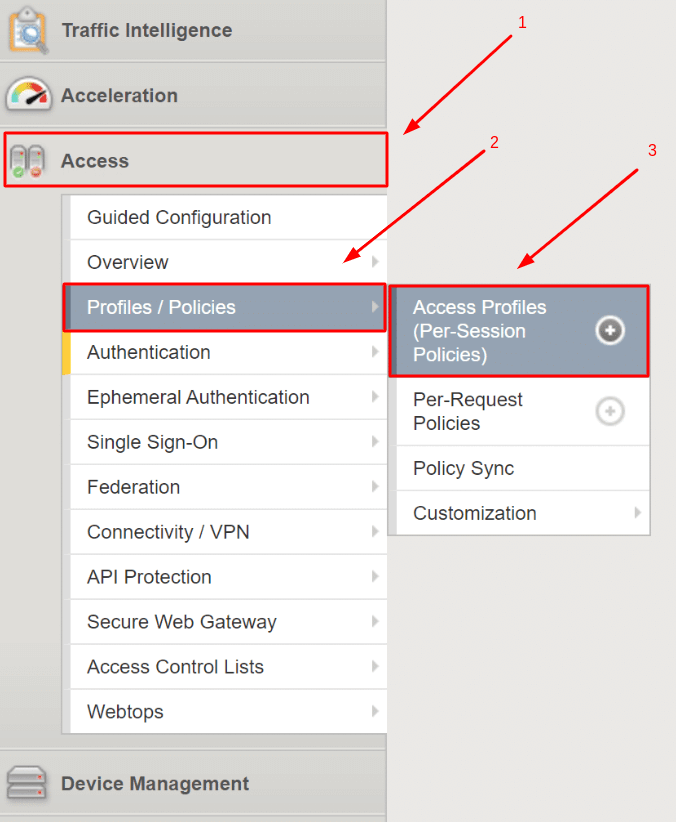
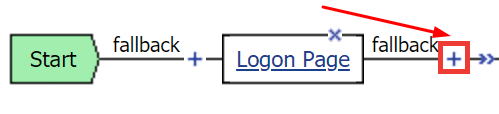
If you have a former authentication method (e.g. Active Directory) you can either remove it or keep it.
You can keep your former authentication method and use Protectimus after or before that authentication method.
To remove it, click X, select Connect previous node to Successful branch, and click Delete.
Integration of two-factor authentication (2FA/MFA) for your F5 BIG-IP APM VPN 2FA is now complete.
If you have other questions, contact Protectimus customer support service.