Implement two-factor authentication (2FA) for pfSense OpenVPN through the use of the Protectimus multi-factor authentication system.
Multi-factor authentication (MFA) stands as a crucial component of cybersecurity, safeguarding user accounts, infrastructure, and sensitive data against unauthorized entry. By integrating 2FA into pfSense OpenVPN, potential threats like brute force attacks, keyloggers, data spoofing, phishing, MITM attacks, and social engineering are mitigated.
Protectimus facilitates a secure approach to pfSense OpenVPN access by employing multi-factor authentication (MFA) via the Protectimus RADIUS server.
The following scheme outlines the operational process of the Protectimus solution designed for implementing two-factor authentication on pfSense OpenVPN.
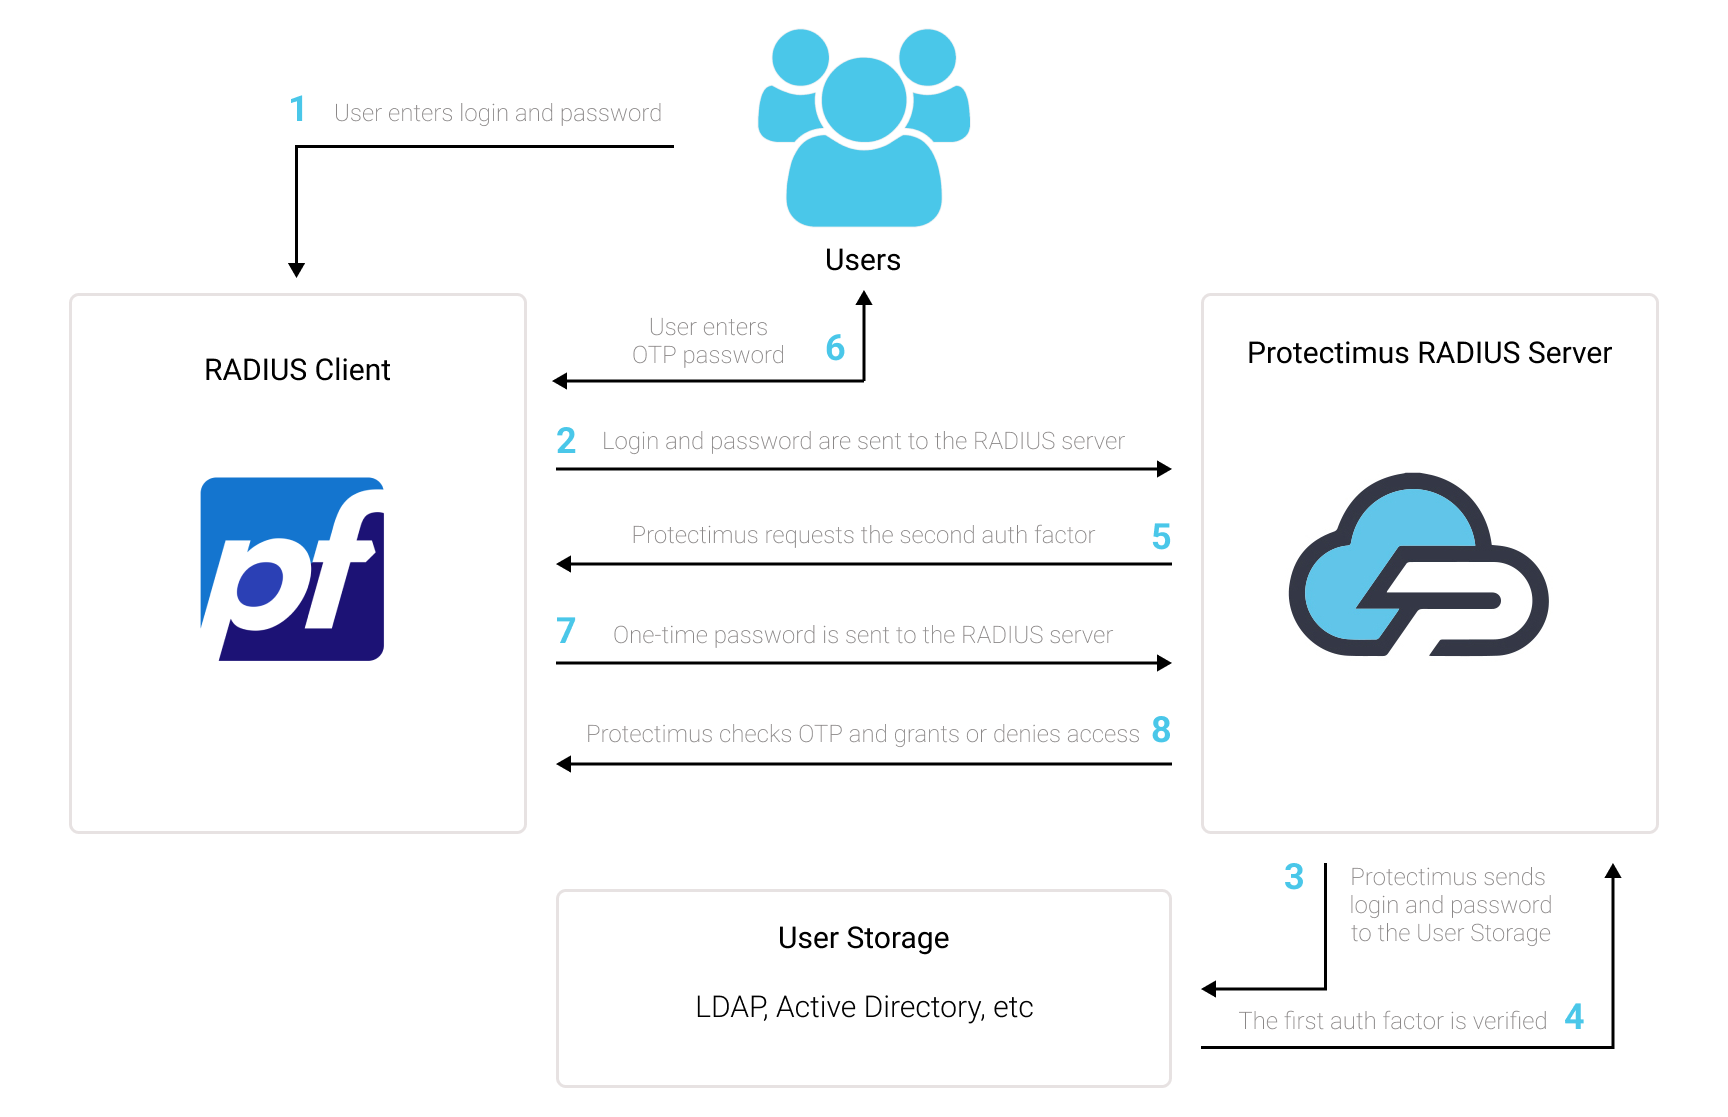
The Two-Factor Authentication Solution by Protectimus enhances the security of pfSense OpenVPN, adding an extra layer of protection that effectively thwarts any unauthorized attempts to access your VPN.
Upon activating pfSense OpenVPN two-factor authentication (2FA), users will be prompted to provide two distinct authentication stages to gain entry to their accounts.
When attempting to access their pfSense OpenVPN accounts protected with 2FA/MFA, users will need to provide:
In order to breach a pfSense OpenVPN fortified with two-factor authentication (2FA/MFA), a hacker must obtain both a regular password and a one-time password simultaneously, within a mere 30-second timeframe to intercept the latter. This challenging feat underscores the exceptional effectiveness of two-factor authentication against the majority of hacking endeavors.
You can set up 2-factor authentication (2FA) for pfSense OpenVPN with Protectimus using the RADIUS protocol:
- Get registered with Protectimus SAAS Service or install the On-Premise 2FA Platform and configure basic settings.
- Install and configure Protectimus RADIUS Server.
- Add Protectimus as RADIUS Server for pfSense OpenVPN.
Choose your deployment option and complete the basic setup:
Protectimus Cloud Service
Protectimus On-Premise Platform
Detailed instructions for installing and configuring the Protectimus RADIUS Server for pfSense OpenVPN two-factor authentication using RADIUS are available in our Protectimus RADIUS Server Installation Guide for OpenVPN pfSense 2FA.
First of all, make sure your authentication source is set up accurately, which involves utilizing an external Identity Provider (IdP) such as OpenLDAP, Microsoft Active Directory, FreeIPA, or a standalone FreeRADIUS.
Important Note:
The built-in FreeRADIUS within pfSense has a limited range of settings and does not permit the specification of the user email attribute. Due to this limitation, you cannot employ the internal FreeRADIUS for this integration. Instead, opt for a separate FreeRADIUS installation or select any other Identity Provider mentioned in the preceding section.
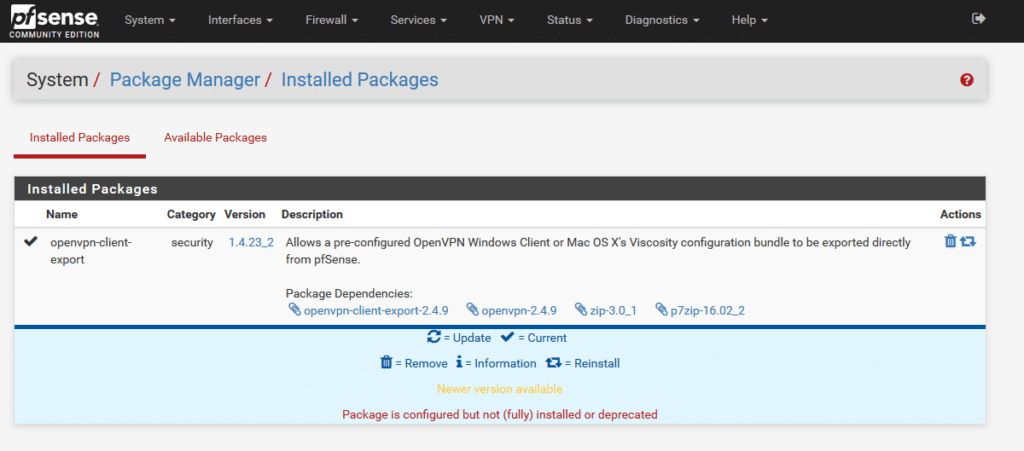
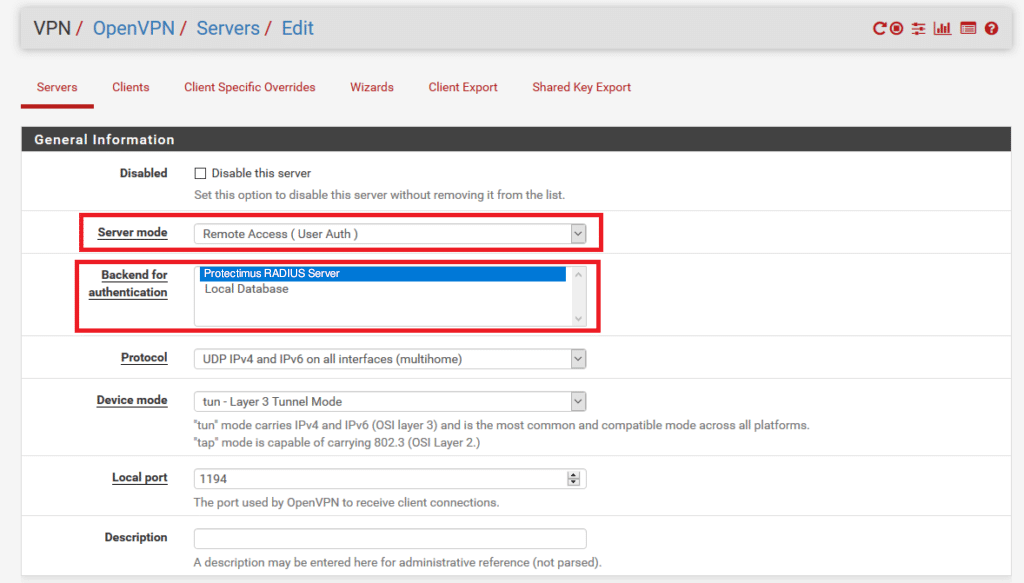
It’s imperative to have a correctly configured pfSense system. We assume that you have already added an OpenVPN Server to pfSense via VPN → OpenVPN. Before proceeding with the implementation of multi-factor authentication through Protectimus, you should have a primary authentication solution configured for your OpenVPN users. Refer to the documentation at pfsense.org if you haven’t installed and configured pfSense yet.
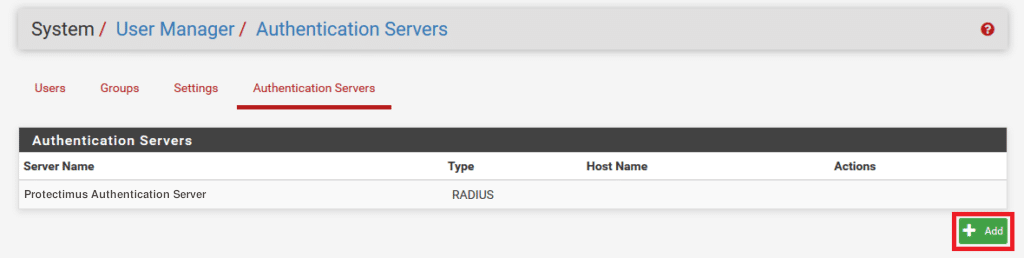
| Descriptive name | Add any name you like, e.g., Protectimus RADIUS Server. |
| Type | Always choose RADIUS. |
| Protocol | Choose PAP. |
| Hostname or IP address | IP of server where the Protectimus RADIUS Server component is installed. |
| Shared Secret | Indicate the shared secret you created in the Protectimus radius.yml file (radius.secret property) when configuring Protectimus RADIUS Server. |
| Services offered | Must be Authentication. |
| Authentication port | Indicate 1812 (or whichever port you configured in the Protectimus radius.yml file when configuring Protectimus RADIUS Server). |
| Accounting port | Retain the preset/default value. |
| Authentication Timeout | Determines the permissible duration for the RADIUS server to respond to an authentication request. Default: 5. Suggested: 60. |
| RADIUS NAS IP Attribute | Input the IP address to be utilized as the “NAS-IP-Address” attribute when sending RADIUS Access-Requests. |

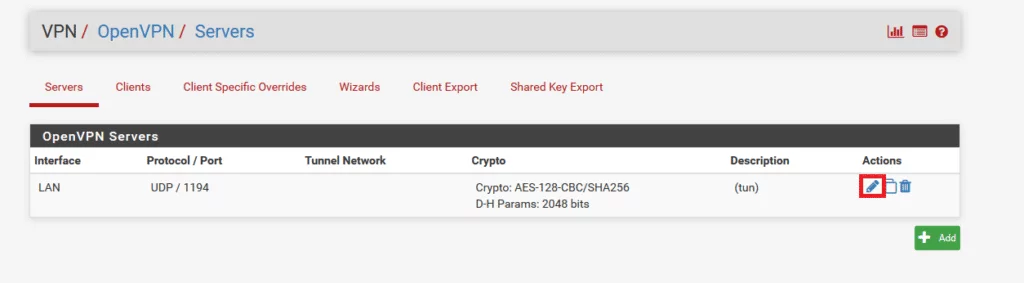
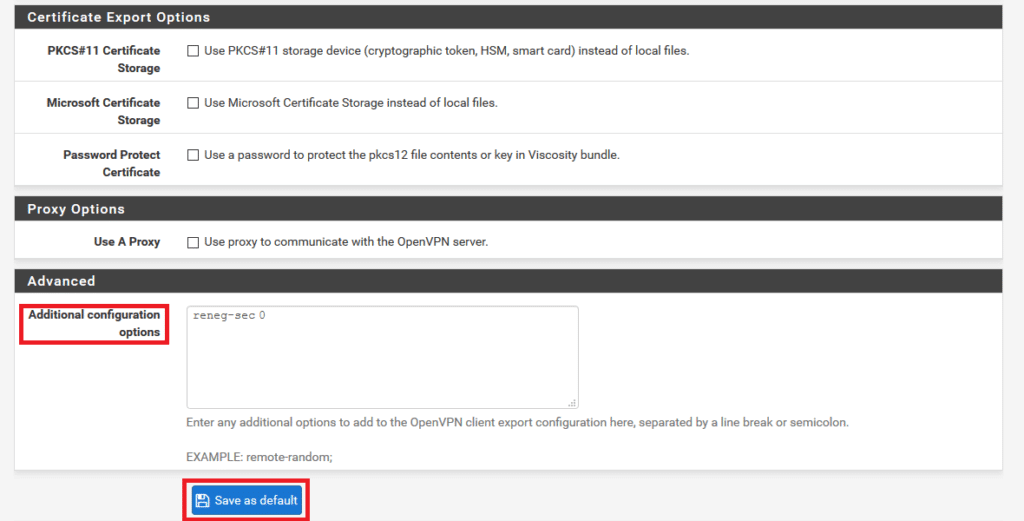
We highly advise configuring reneg-sec as 0. If an alternate value is chosen, there’s a possibility that your users will encounter 2FA reauthentication prompts once the time defined by that value elapses.
By default, this value stands at 3600 seconds. Therefore, without incorporating the reneg-sec 0 option and leaving the Additional configuration options blank, your users will be prompted to reauthenticate every hour.
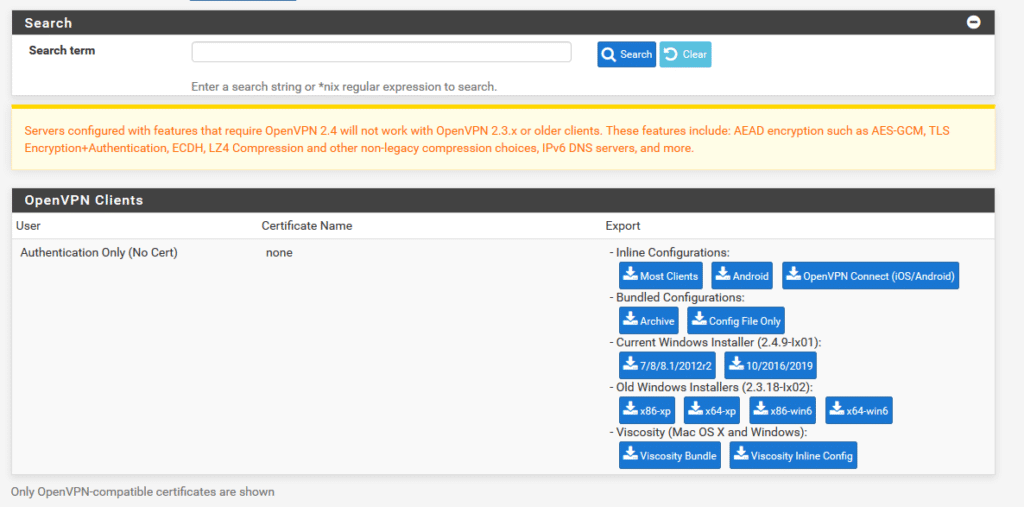
Integration of two-factor authentication (2FA/MFA) for your pfSense OpenVPN is now complete.
If you have other questions, contact Protectimus customer support service.