This guide shows how to enable multi-factor authentication (2FA / MFA) for WatchGuard Mobile VPN with the help of the Protectimus two-factor authentication solution.
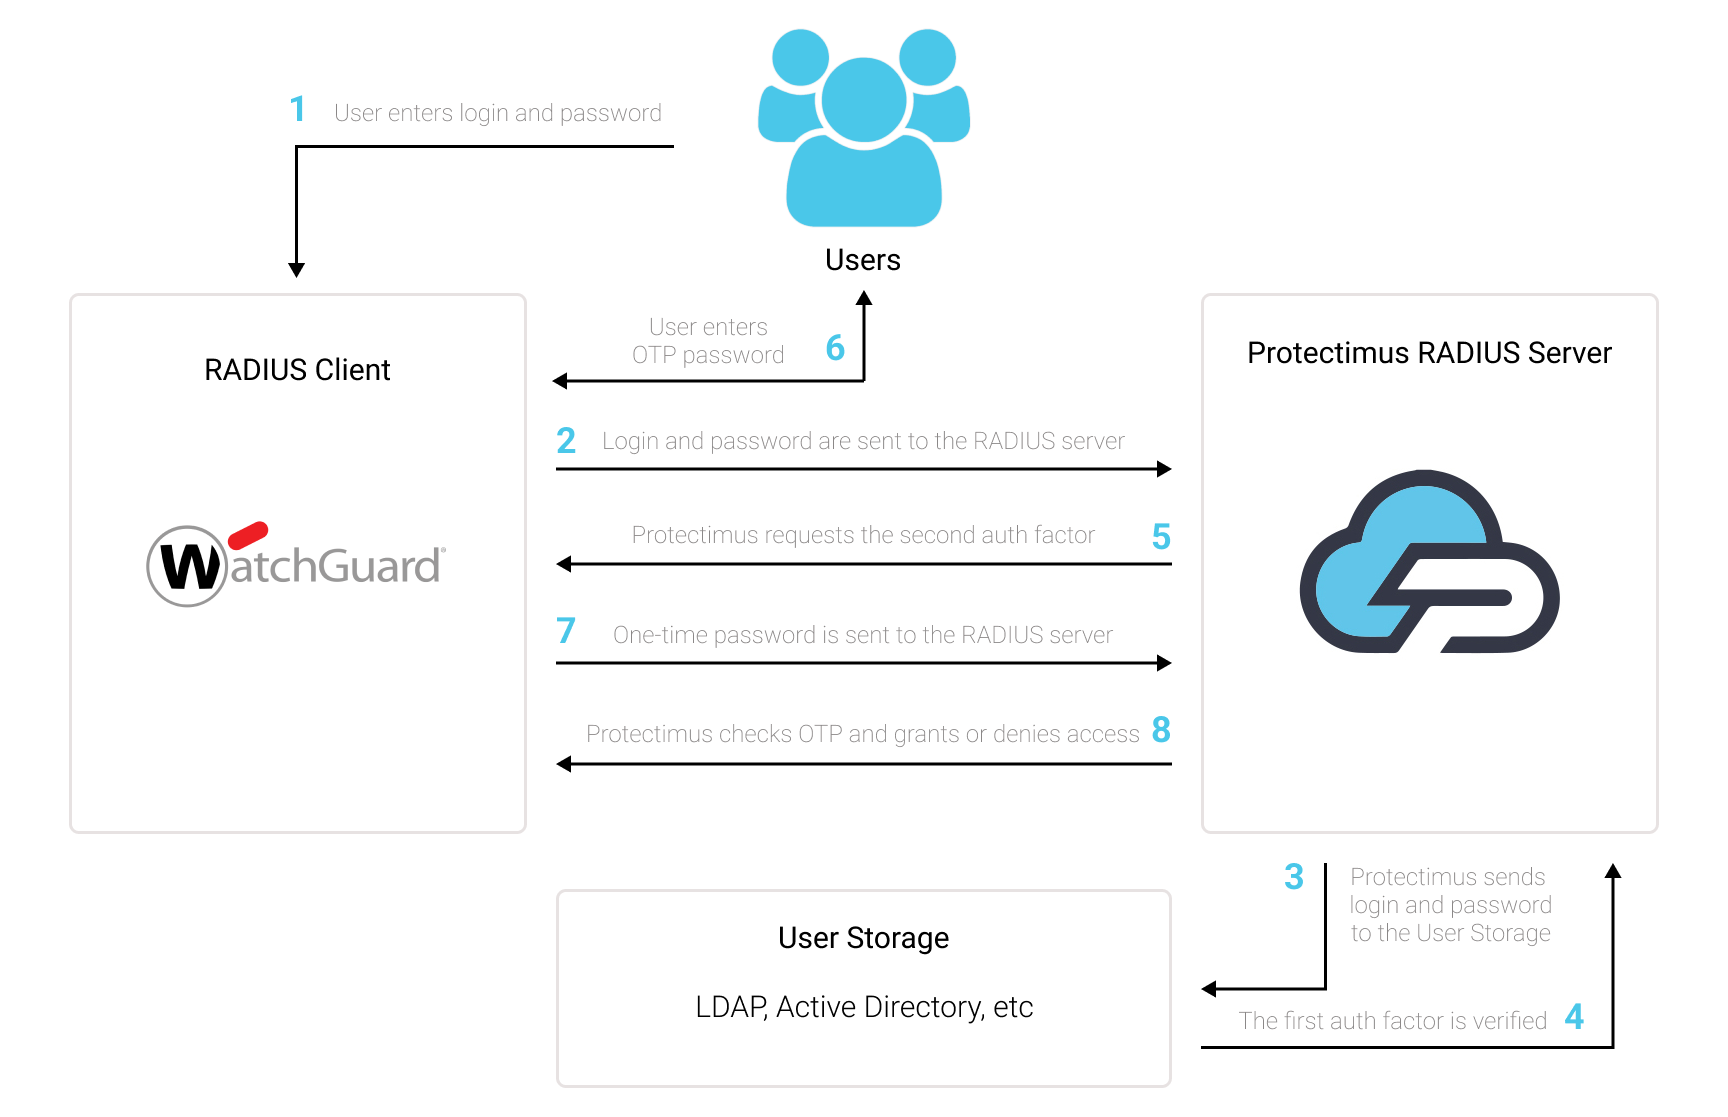
Protectimus multi-factor authentication system integrates with WatchGuard Mobile VPN via RADIUS authentication protocol.
In this scenario, the Protectimus Cloud 2FA Service or On-Premise 2FA Platform performs as a RADIUS server, and the WatchGuard Mobile VPN takes the role of a RADIUS client.
The scheme of work of the Protectimus solution for WatchGuard Mobile VPN two-factor authentication is presented below.
Protectimus Two-Factor Authentication Solution for WatchGuard Mobile VPN allows you to add an extra layer of security to your WatchGuard VPN logins.
Protectimus WatchGuard Mobile VPN 2FA Solution enables 2-factor authentication during WatchGuard connections via IPSec and SSL.
When you add 2FA/MFA for WatchGuard Mobile VPN, your users will use two different authentication factors to get access to their accounts.
To hack a WatchGuard Mobile VPN protected with two-factor authentication, a hacker needs to get a standard password and a one-time password at once. And they only have 30 seconds to intercept a one-time password. It is almost impossible, which makes two-factor authentication so effective against brute force, data spoofing, keyloggers, phishing, man-in-the-middle attacks, social engineering, and similar hacking attacks.
You can set up multi-factor authentication (2FA) for WatchGuard Mobile VPN with Protectimus using the RADIUS protocol:
- Get registered with Protectimus SAAS Service or install the On-Premise 2FA Platform and configure basic settings.
- Install and configure Protectimus RADIUS Server.
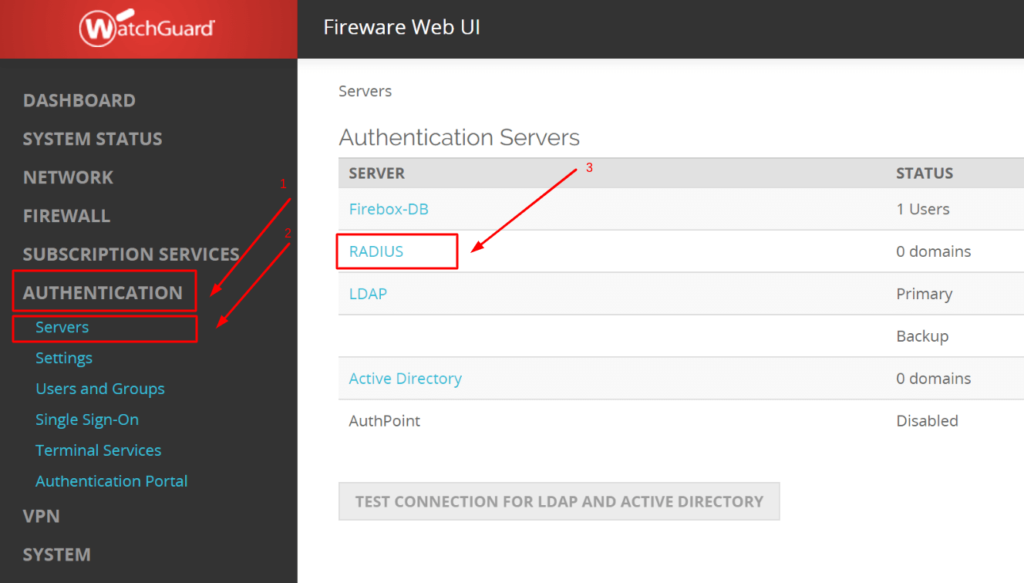
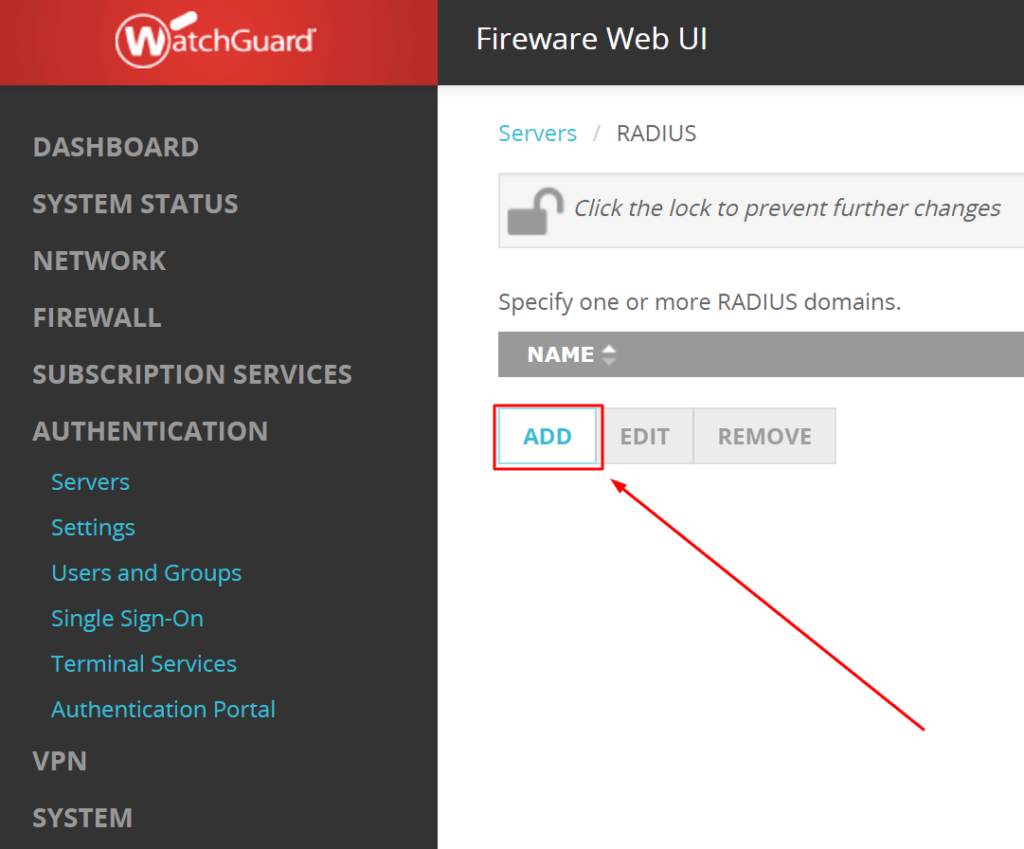
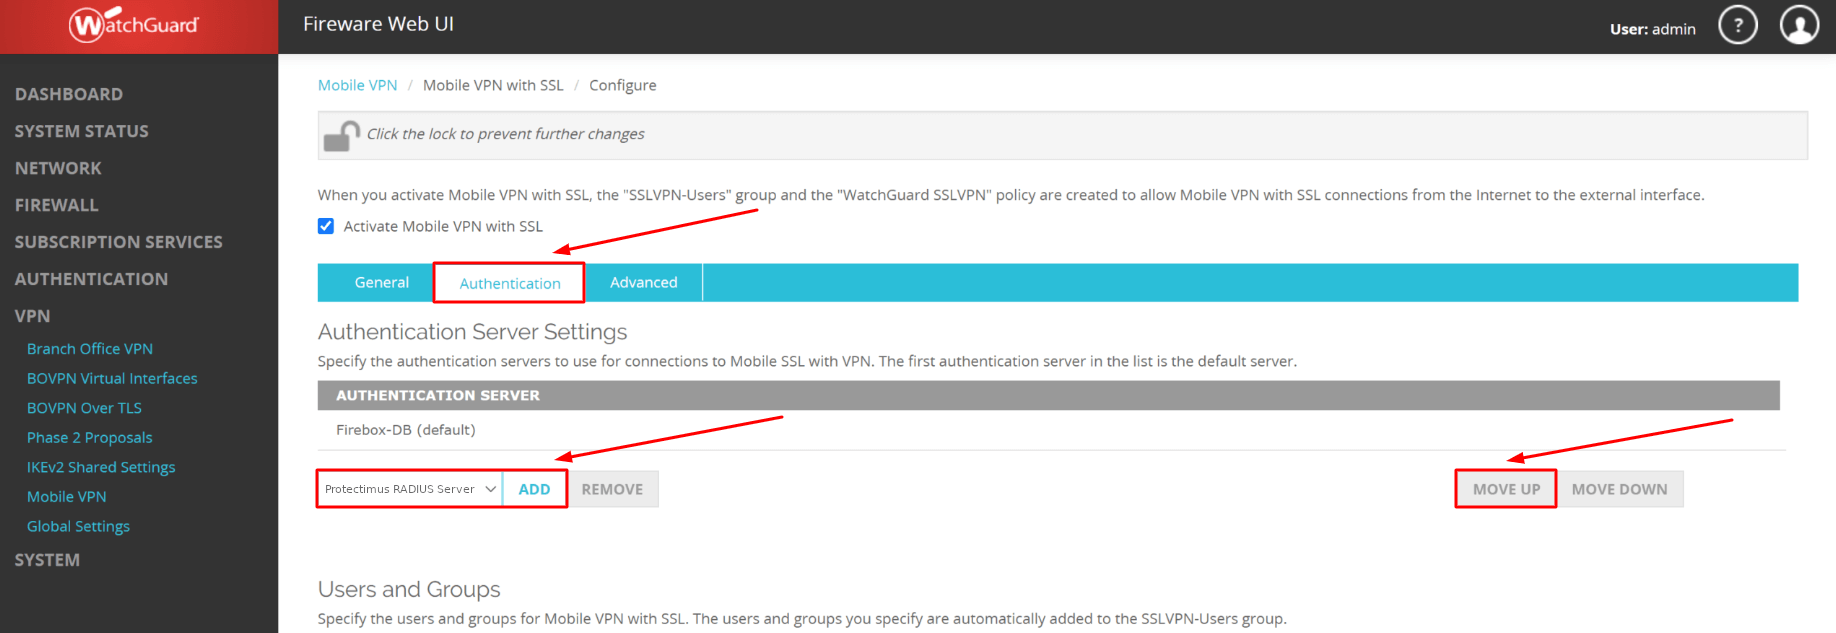
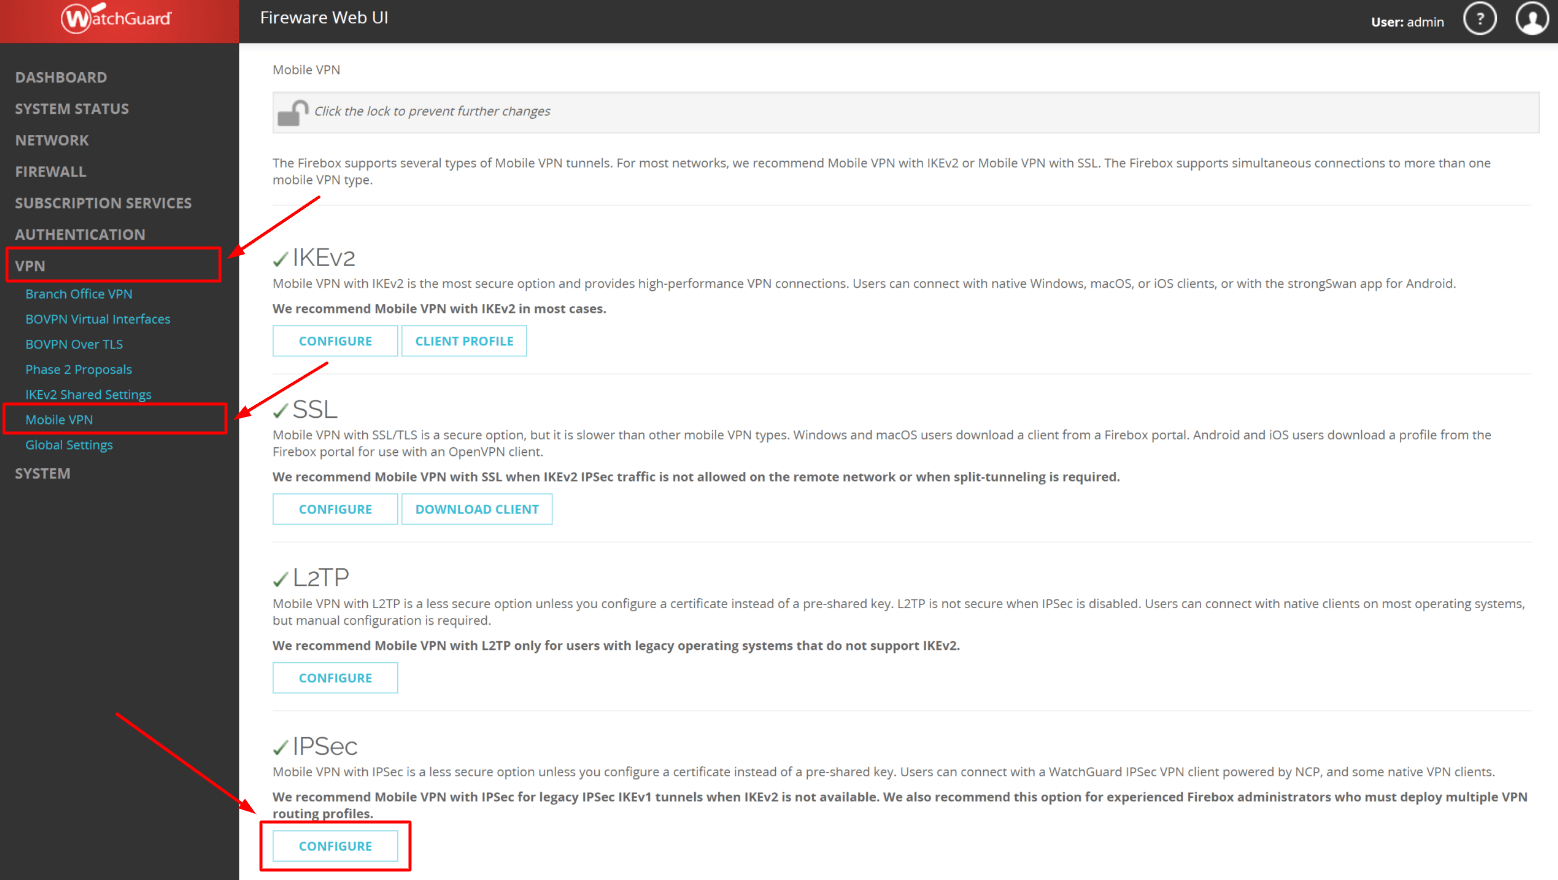
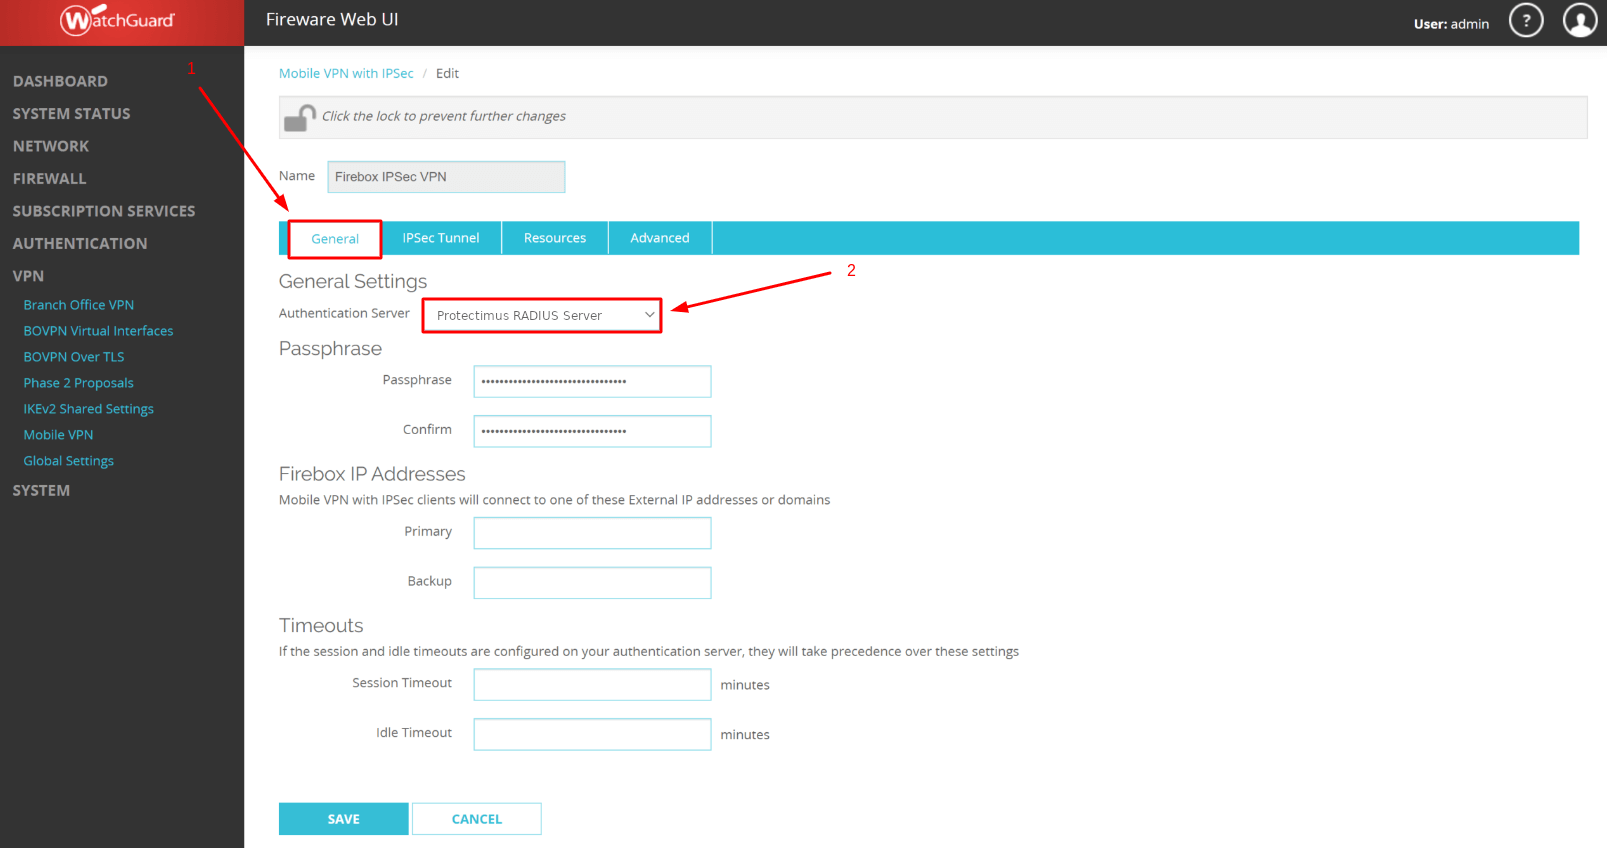
- Add Protectimus as RADIUS Server for WatchGuard Mobile VPN MFA.
- Configure WatchGuard Mobile VPN authentication policies.
Choose your deployment option and complete the basic setup:
Protectimus Cloud Service
Protectimus On-Premise Platform
Detailed instructions for installing and configuring the Protectimus RADIUS Server for WatchGuard Mobile VPN 2-factor authentication using RADIUS are available in our Protectimus RADIUS Server Installation Guide for WatchGuard Mobile VPN 2FA.
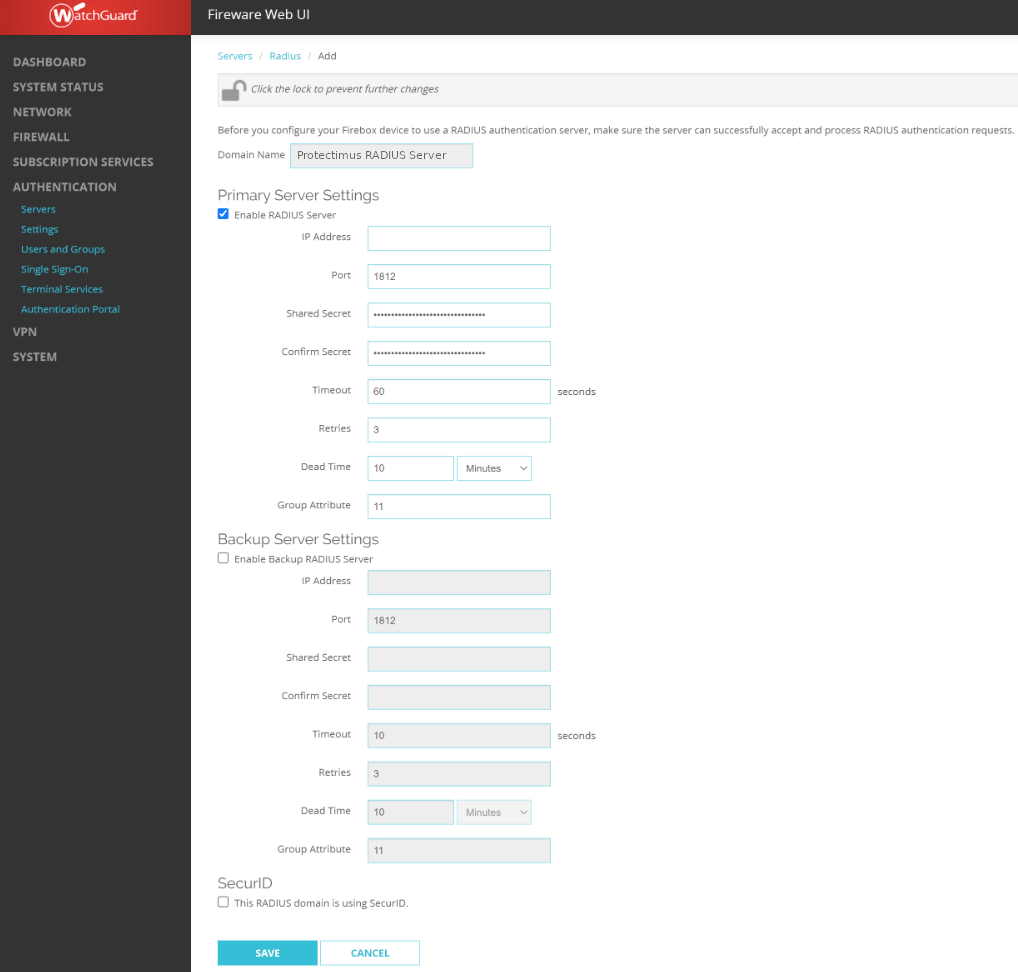
| Domain Name | Come up with a name for your RADIUS domain, e.g. Protectimus RADIUS Server. Note that You cannot change the Domain Name after you save the settings. |
| Enable RADIUS Server | Check the box. |
| IP Address | Enter the IP of server where the Protectimus RADIUS Server component is installed. |
| Port | Indicate 1812 (or whichever port you configured in the Protectimus radius.yml file when configuring Protectimus RADIUS Server). |
| Shared Secret | Indicate the shared secret you created in the Protectimus radius.yml file (radius.secret property) when configuring Protectimus RADIUS Server |
| Confirm Secret | Reenter the shared secret |
| Timeout | Set to 60 seconds. |
| Retries | Set to 3. |
| Dead Time | Set to 10 minutes. |
| Group Attribute | Set to 11. |

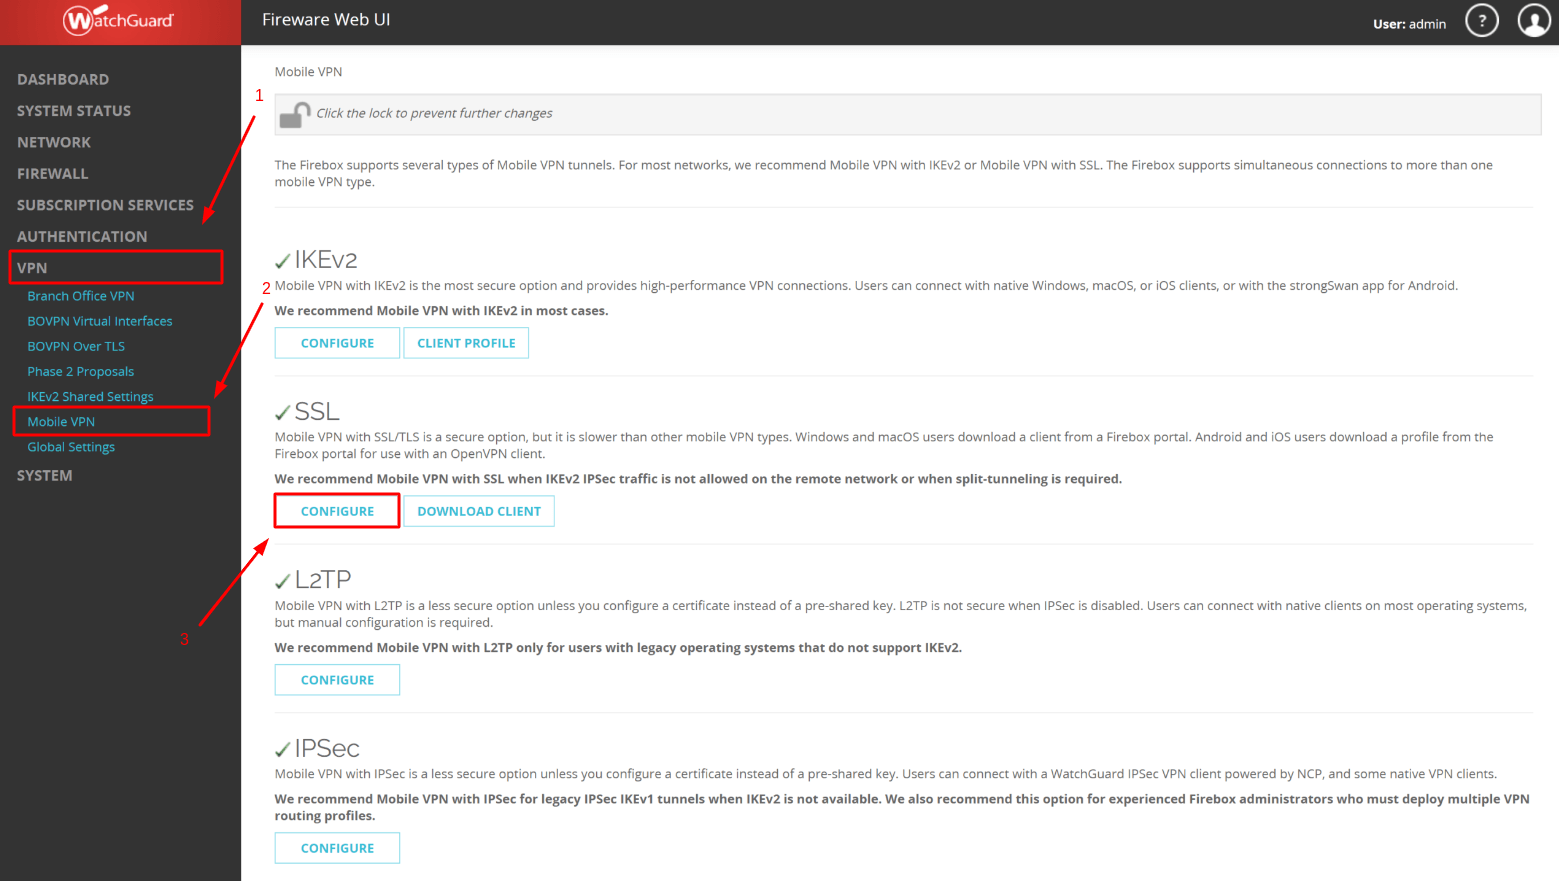
PLEASE NOTE! To enable 2FA for SSL Mobile VPN, you need to manually add all your users to WatchGuard VPN and then allow them to use SSL VPN.
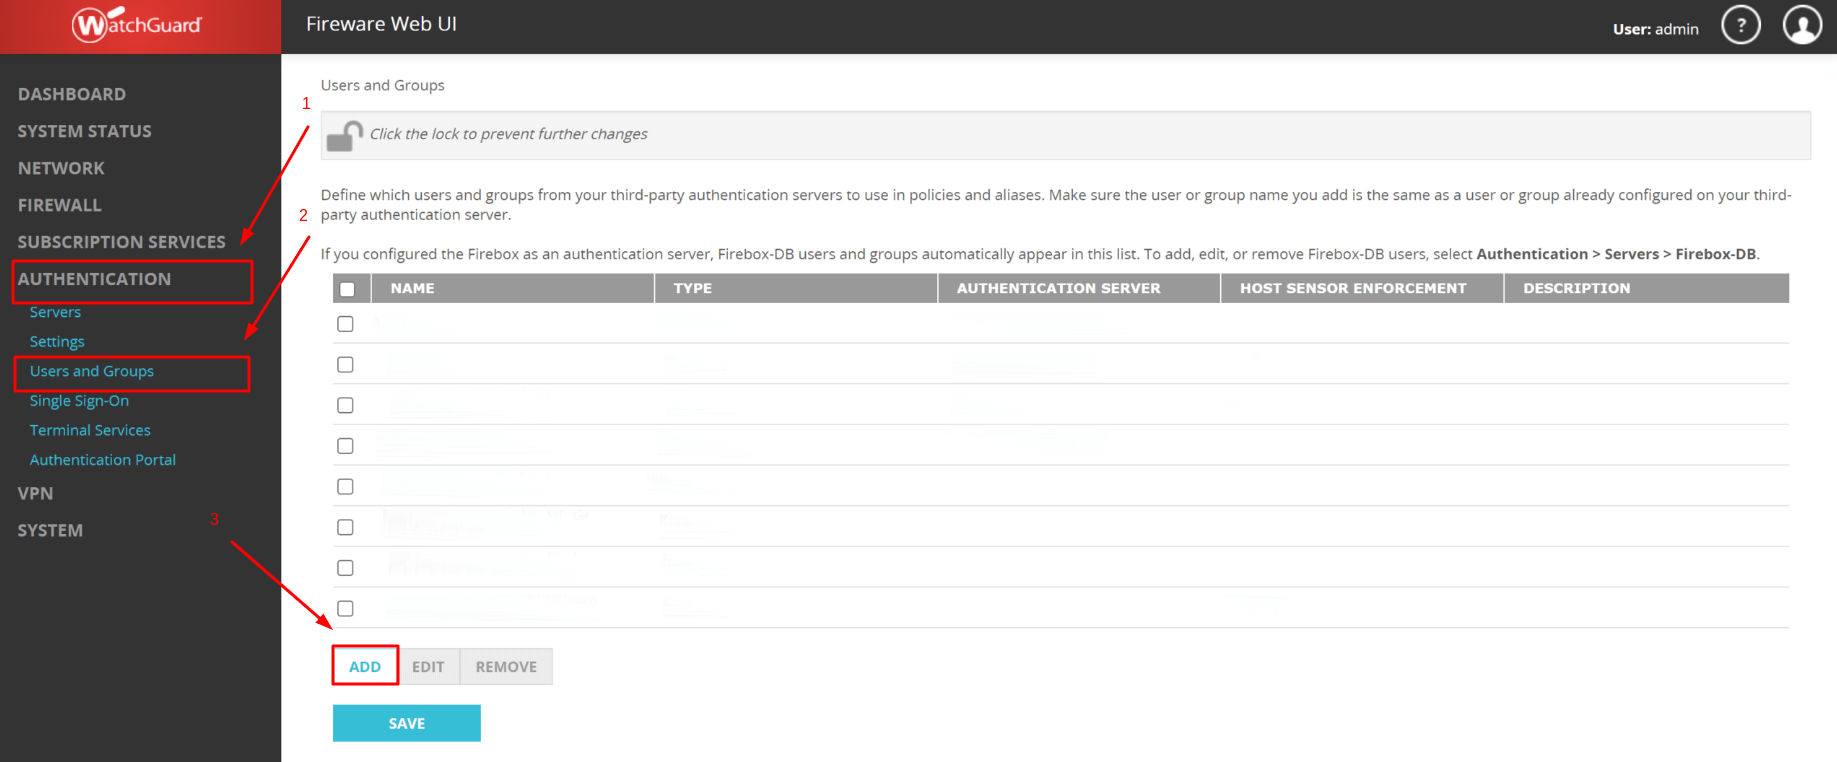
| Type | User |
| Name | Enter the username. |
| Description | Optional, you can enter a description of the user if you want. |
| Authentication Server | Select the server you have created before (Protectimus RADIUS Server). |
PLEASE NOTE! You need to do the above three steps for every user you want to allow to use Mobile VPN with SSL.

Integration of two-factor authentication (2FA/MFA) for your WatchGuard Mobile VPN is now complete.
If you have other questions, contact Protectimus customer support service.