This guide details the steps to set up Protectimus multi-factor authentication (MFA or 2FA) for Nerdio using the RADIUS protocol.
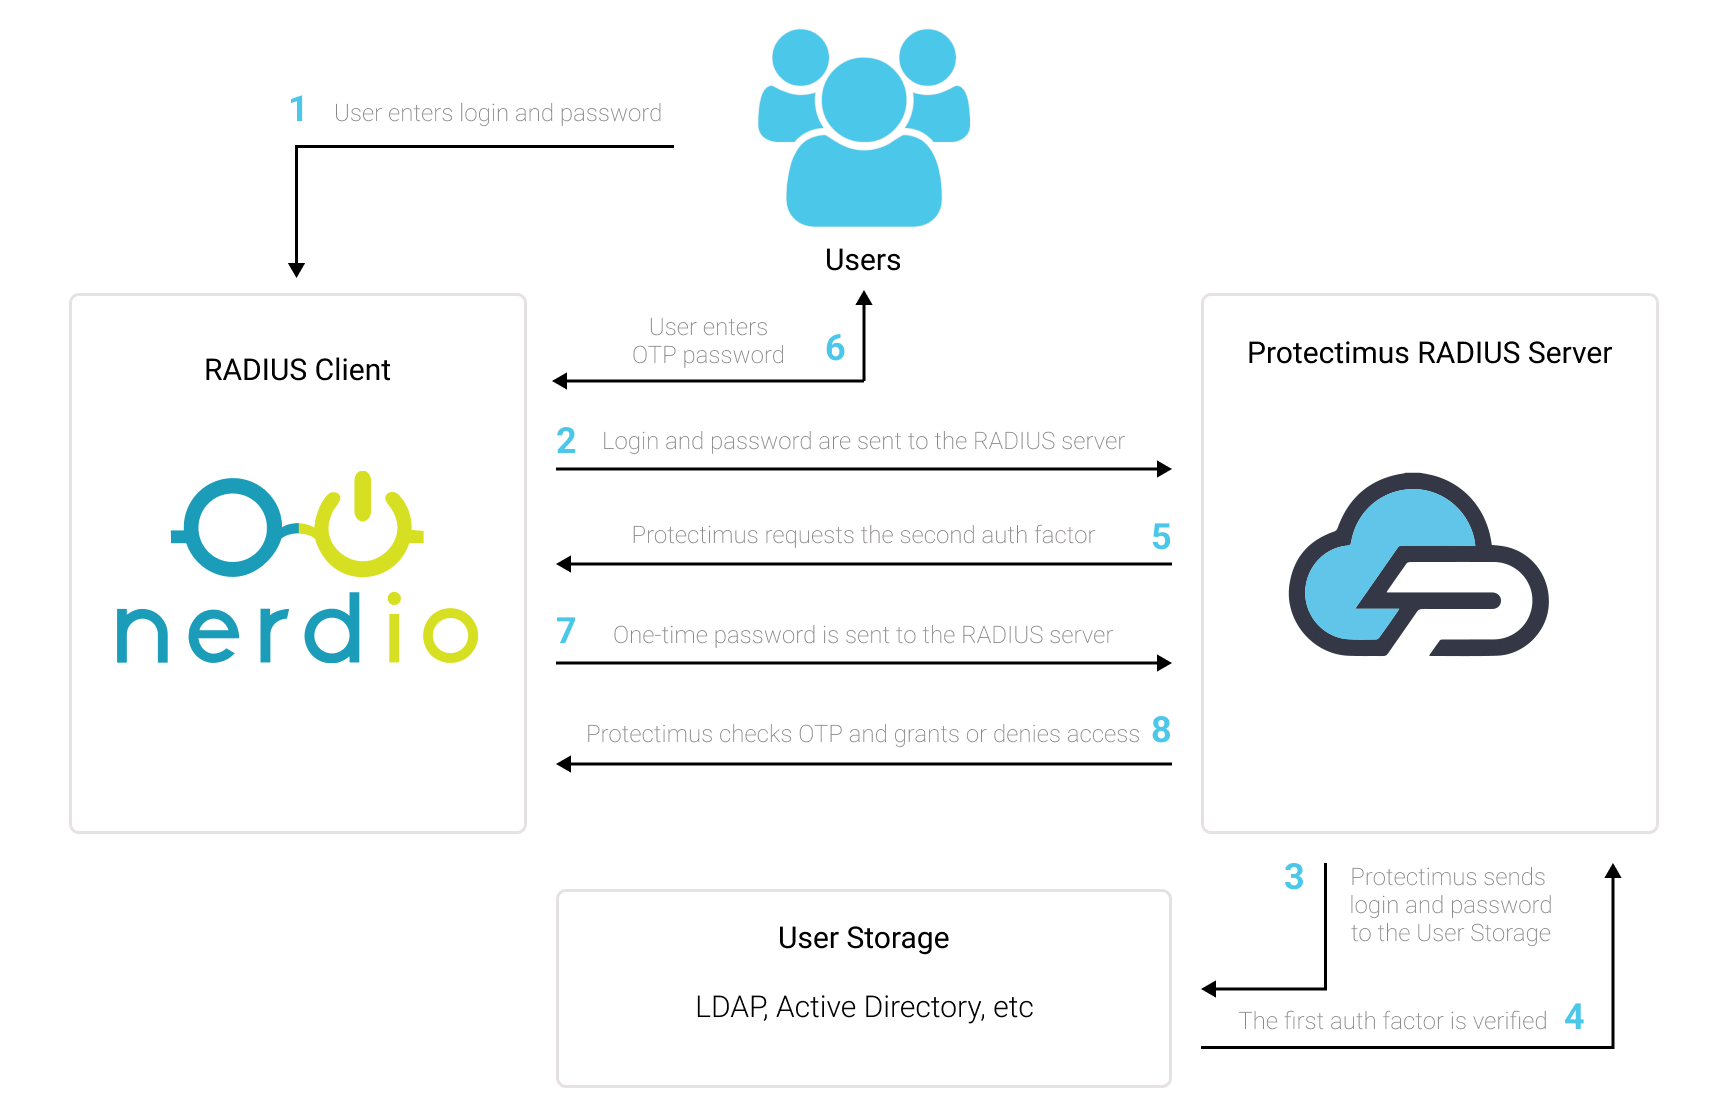
When integrating Protectimus two-factor authentication with Nerdio via RADIUS, the Protectimus Cloud 2FA Service or On-Premise 2FA Platform acts as a RADIUS server through a dedicated connector named Protectimus RADIUS Server. Conversely, Nerdio functions as a RADIUS client.
Here’s how it works: the Protectimus RADIUS Server connector forwards authentication requests from Nerdio to the Protectimus multi-factor authentication (MFA) server. Access is granted or denied based on the response received.
Below, we provide an example of how to integrate Protectimus 2FA with Nerdio.
You can set up multi-factor authentication (2FA) for Nerdio with Protectimus using the RADIUS protocol:
- Get registered with Protectimus SAAS Service or install the On-Premise 2FA Platform and configure basic settings.
- Install and configure Protectimus RADIUS Server.
- Add Protectimus as RADIUS Server for Nerdio.
Choose your deployment option and complete the basic setup:
Detailed instructions for installing and configuring the Protectimus RADIUS Server for Nerdio two-factor authentication using RADIUS are available in our Protectimus RADIUS Server Installation Guide for Nerdio 2FA.
| Label | Come up with a name for your RADIUS server. |
| Hostname/Address | IP of server where the Protectimus RADIUS Server component is installed. |
| Authentication Port | Indicate 1812 (or whichever port you configured in the Protectimus radius.yml file when configuring Protectimus RADIUS Server). |
| Authentication Type | PAP authentication is required. |
| Shared Secret Code | Indicate the shared secret you created in the Protectimus radius.yml file (radius.secret property) when configuring Protectimus RADIUS Server. |
| Server Timeout (in seconds) | Set to 90 seconds. |
| Max Attempts | This specifies how many times the authentication request should be sent. Set to 1. |
Integration of two-factor authentication (2FA/MFA) for your Nerdio is now complete.
If you have other questions, contact Protectimus customer support service.