With Protectimus multi-factor authentication (MFA) solution, you can set up CentOS two-factor authentication (2FA) in a few steps.
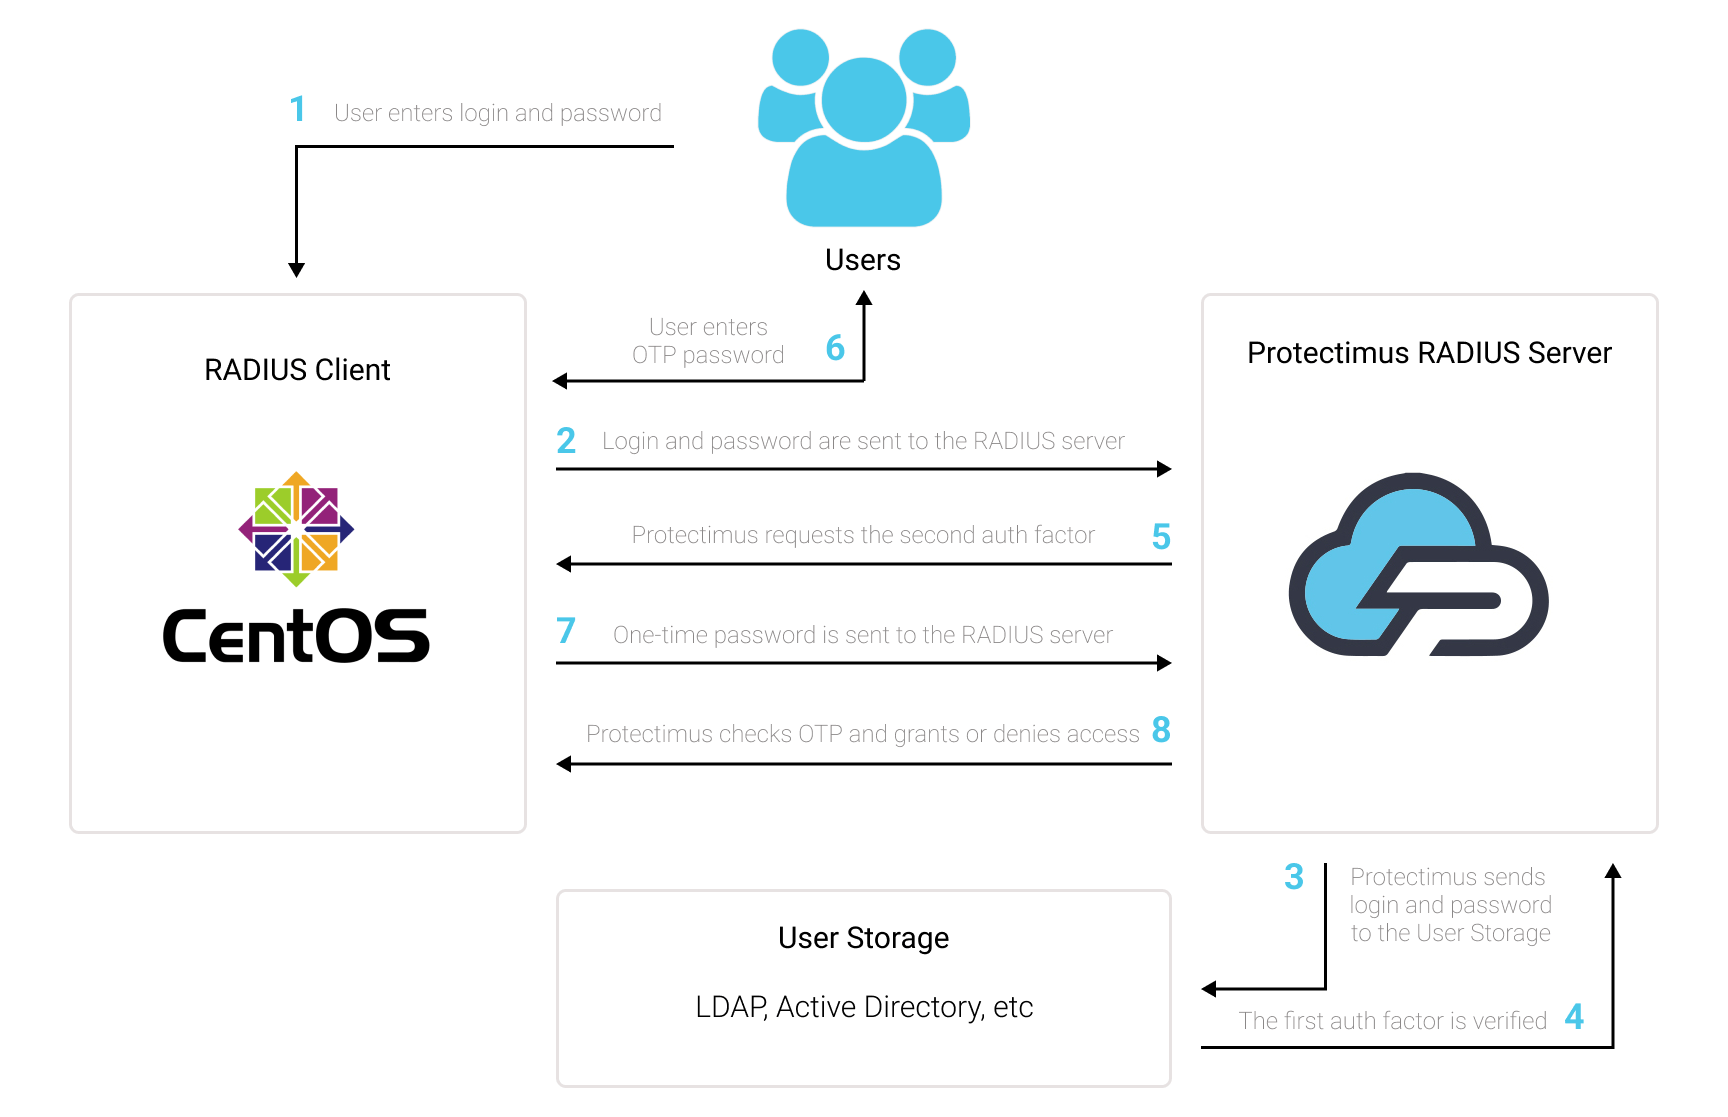
After you enable CentOS 2FA, your users will need to use two authentication passwords to get access to their CentOS accounts:
This way, the CentOS account becomes protected with two different authentication factors. Even if the hacker steals the users’s password using phishing, brute force, social engineering, data spoofing, or any other attack, they can’t access the CentOS account without the one-time password from a user’s 2FA token.
This guide shows how you can set up CentOS two-factor authentication (2FA) using Protectimus RADIUS 2FA component for the integration with Protectimus Cloud 2FA service or Protectimus On-Premise MFA Platform.
You can set up CentOS two-factor authentication (2FA) with Protectimus using the RADIUS protocol:
- Get registered with Protectimus SAAS 2FA Service or On-Premise 2FA Platform and configure basic settings.
- Install Protectimus PAM module for CentOS 2FA
- Install and configure Protectimus RADIUS Server module.
Choose your deployment option and complete the basic setup:
Protectimus Cloud Service
Protectimus On-Premise Platform
yum -y install epel-release
yum -y install pam_radiusgit clone https://github.com/protectimus/platform-linux.git
cd platform-linux/radius
edit config/radius.yml
docker compose up -dradius:
secret: secret
auth-port: 1812
auth:
# Could be :
# - LDAP
# - PROTECTIMUS_PASSWORD
# - PROTECTIMUS_OTP
# - PROTECTIMUS_PUSH
providers:
- PROTECTIMUS_OTP
protectimus-api:
login: login@domain.com
api-key: aslkjdljsdlaskmWpXjT5K0xqLXkd3
url: https://api.protectimus.com/
resource-name: radius
resource-id: 723# server[:port] shared_secret timeout (s)
127.0.0.1 secret 1ChallengeResponseAuthentication yes#%PAM-1.0
auth required pam_sepermit.so
# protectimus pam radius
auth substack password-auth
auth required pam_radius_auth.so
auth include postlogin
# Used with polkit to reauthorize users in remote sessions
-auth optional pam_reauthorize.so prepare