DSPA: Integration with Active Directory for Secure Two-Factor Authentication
The Protectimus DSPA (Dynamic Strong Password Authentication) component integrates the Protectimus MFA platform with Microsoft Active Directory or any other user directory (AD/LDAP, DBMS). After integration, OTP-based authentication can be automatically applied across all services connected to the directory, including Winlogon, RDP, ADFS, OWA, and others.
Protectimus DSPA continuously updates users’ passwords in the directory with dynamic time-based one-time passwords (TOTP). The administrator defines the password rotation interval, which must be a multiple of 30 seconds.
From the end-user perspective, authentication is simple: users authenticate using the current OTP generated by the Protectimus SMART authenticator app or delivered via the Protectimus BOT chatbot.
1. Install Protectimus On-Premise Platform
1.1. Windows
Download the
Protectimus On-Premise Platform installer for Windows.
The Protectimus DSPA component will be installed automatically.
1.2. Another OS
Install the Protectimus On-Premise Platform using the Docker image. Refer to our
step-by-step Docker installation instructions to get started.
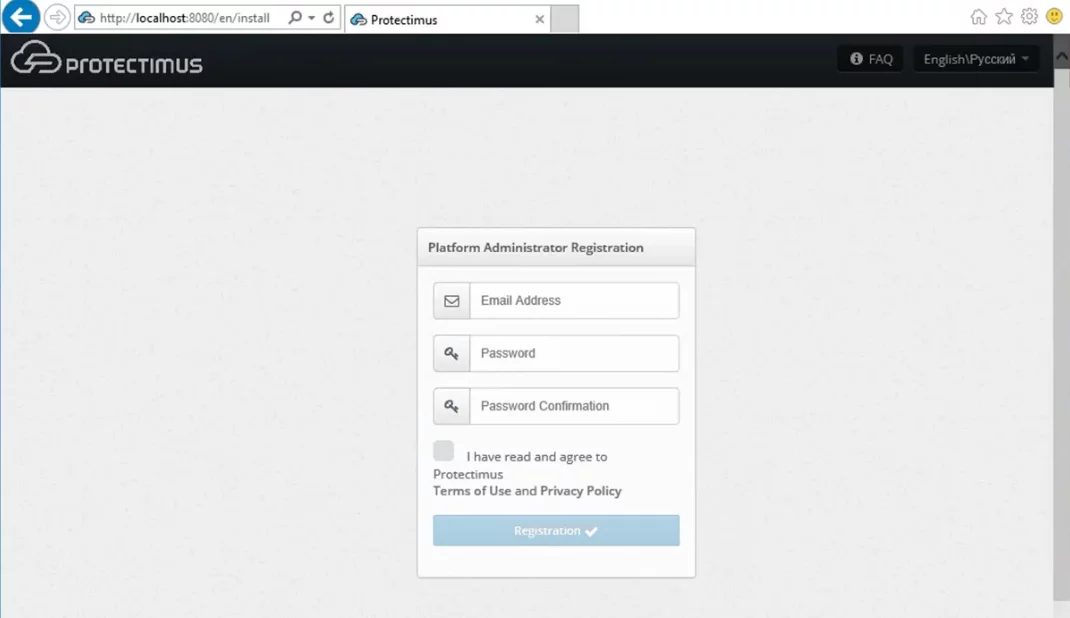
2. Get Registered
Open the Protectimus On-Premise Platform at
http://localhost:8080 or
https://localhost:8443.
Please, create an account and log in to configure the necessary settings.
3. Add User Provider
- After installing the platform and registering in the Protectimus system, log into your account, open the DSPA tab, and select Add task -> Add LDAP user provider.


- Fill in the details about your user directory.
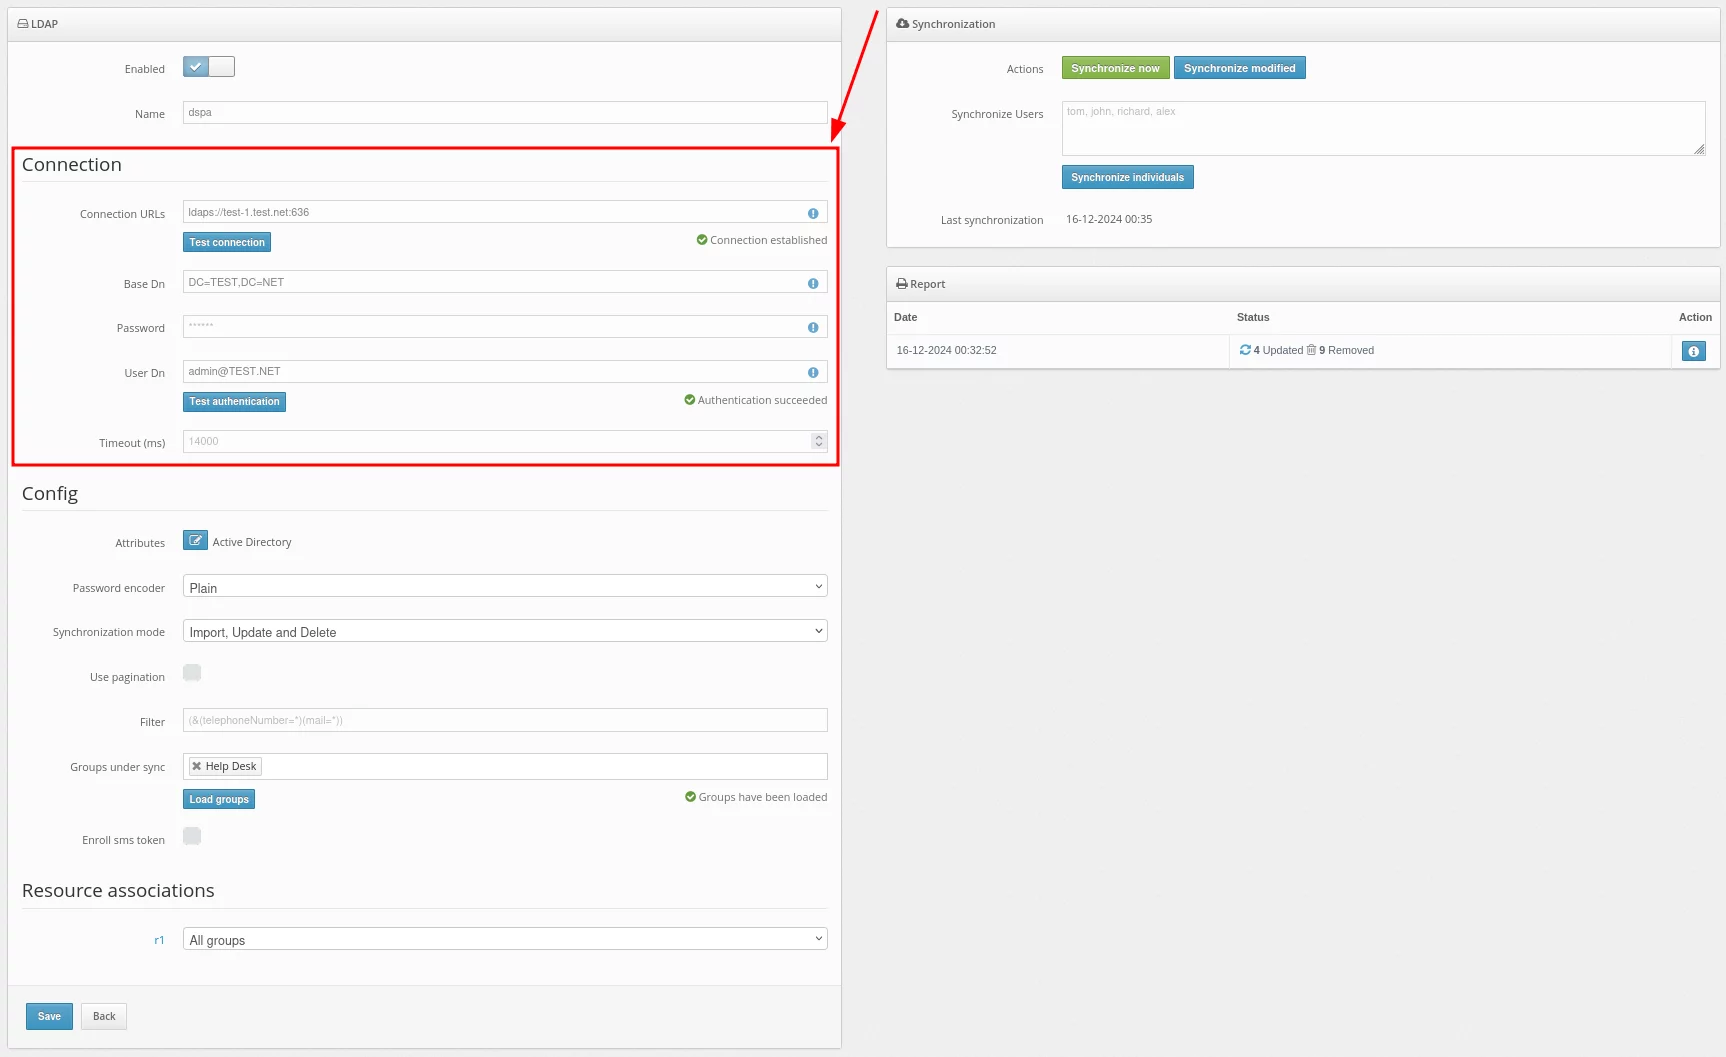
Basic settings:
| Field |
Value |
Note |
| Connection URLs |
URL to connect to your LDAP server |
Example: ldaps://dc1.domain.local:636
For DSPA, you need to use the LDAP connection, and you also need to import the SSL certificate.
A standard way:
keytool -import -alias ___ -file '___.cer' -keystore 'C:\Program Files\Java\jre___\lib\security\cacerts' -storepass changeit
|
| Base DN |
Full DN of the directory in which your users are stored |
Example:
DC=domain,DC=local
|
| Password |
The password of the specified user |
|
| User DN |
DN or userPrincipalName
of the administrator or user who has access to user information |
Example:
CN=Administrator, CN=Users, DC=demo, DC=domain, DC=local
administrator@domain.local
For DSPA, the user must have rights to change passwords
|
| Timeout (ms) |
Connection timeout |
|
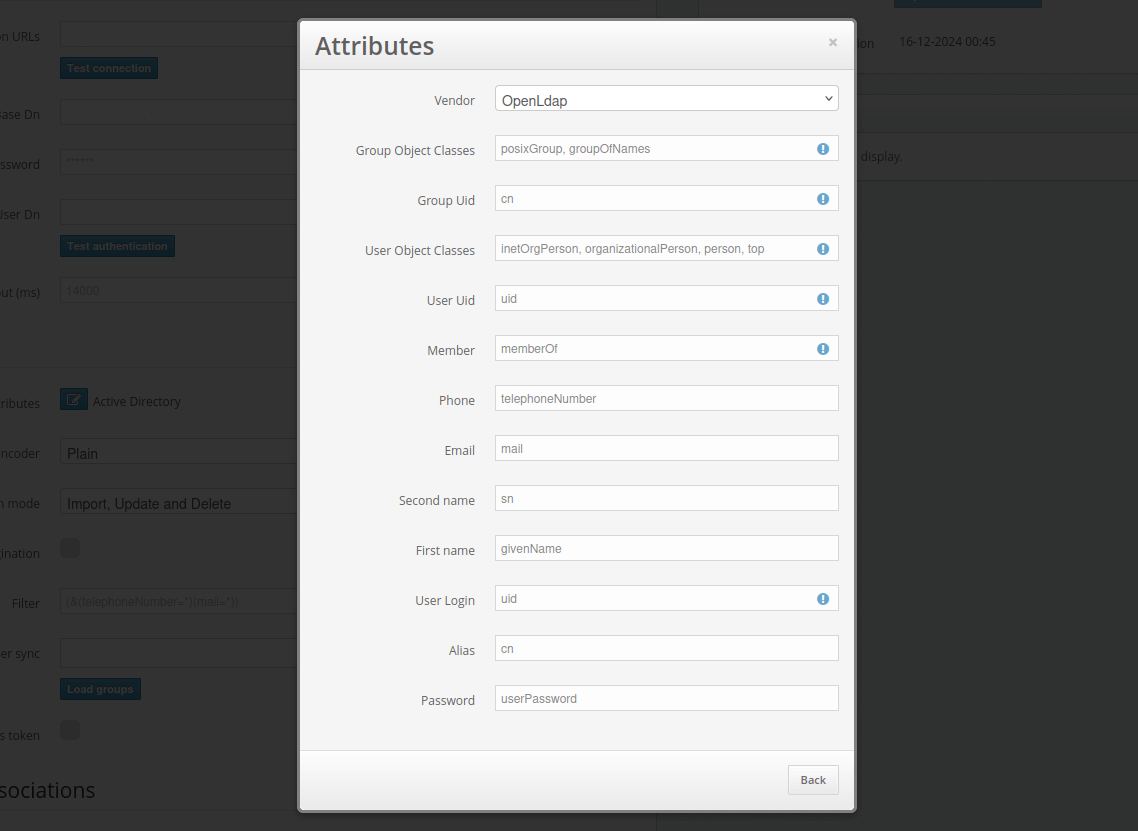
- After filling in details about your user directory, add synchronization attributes.
Click on the Attributes button.
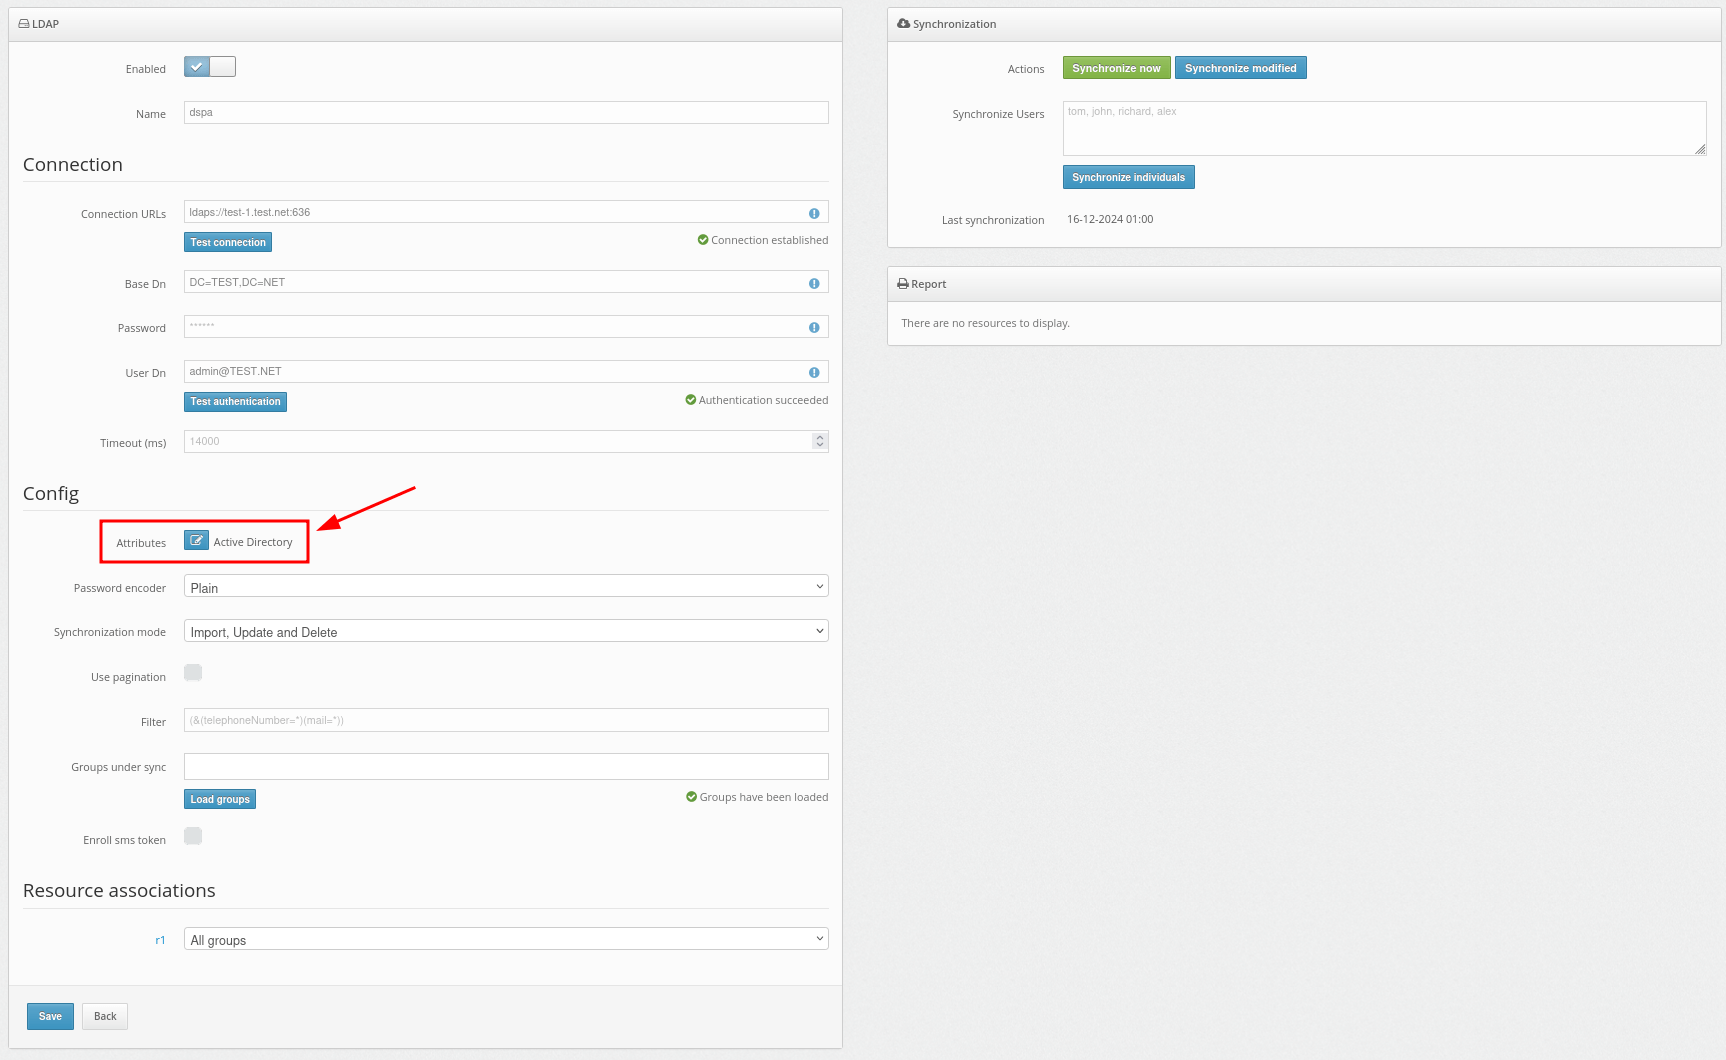
Then add your attributes as shown in the example.
Additionally, the OpenLDAP configuration is available from the provided vendors. You can select it in the Vendor field.
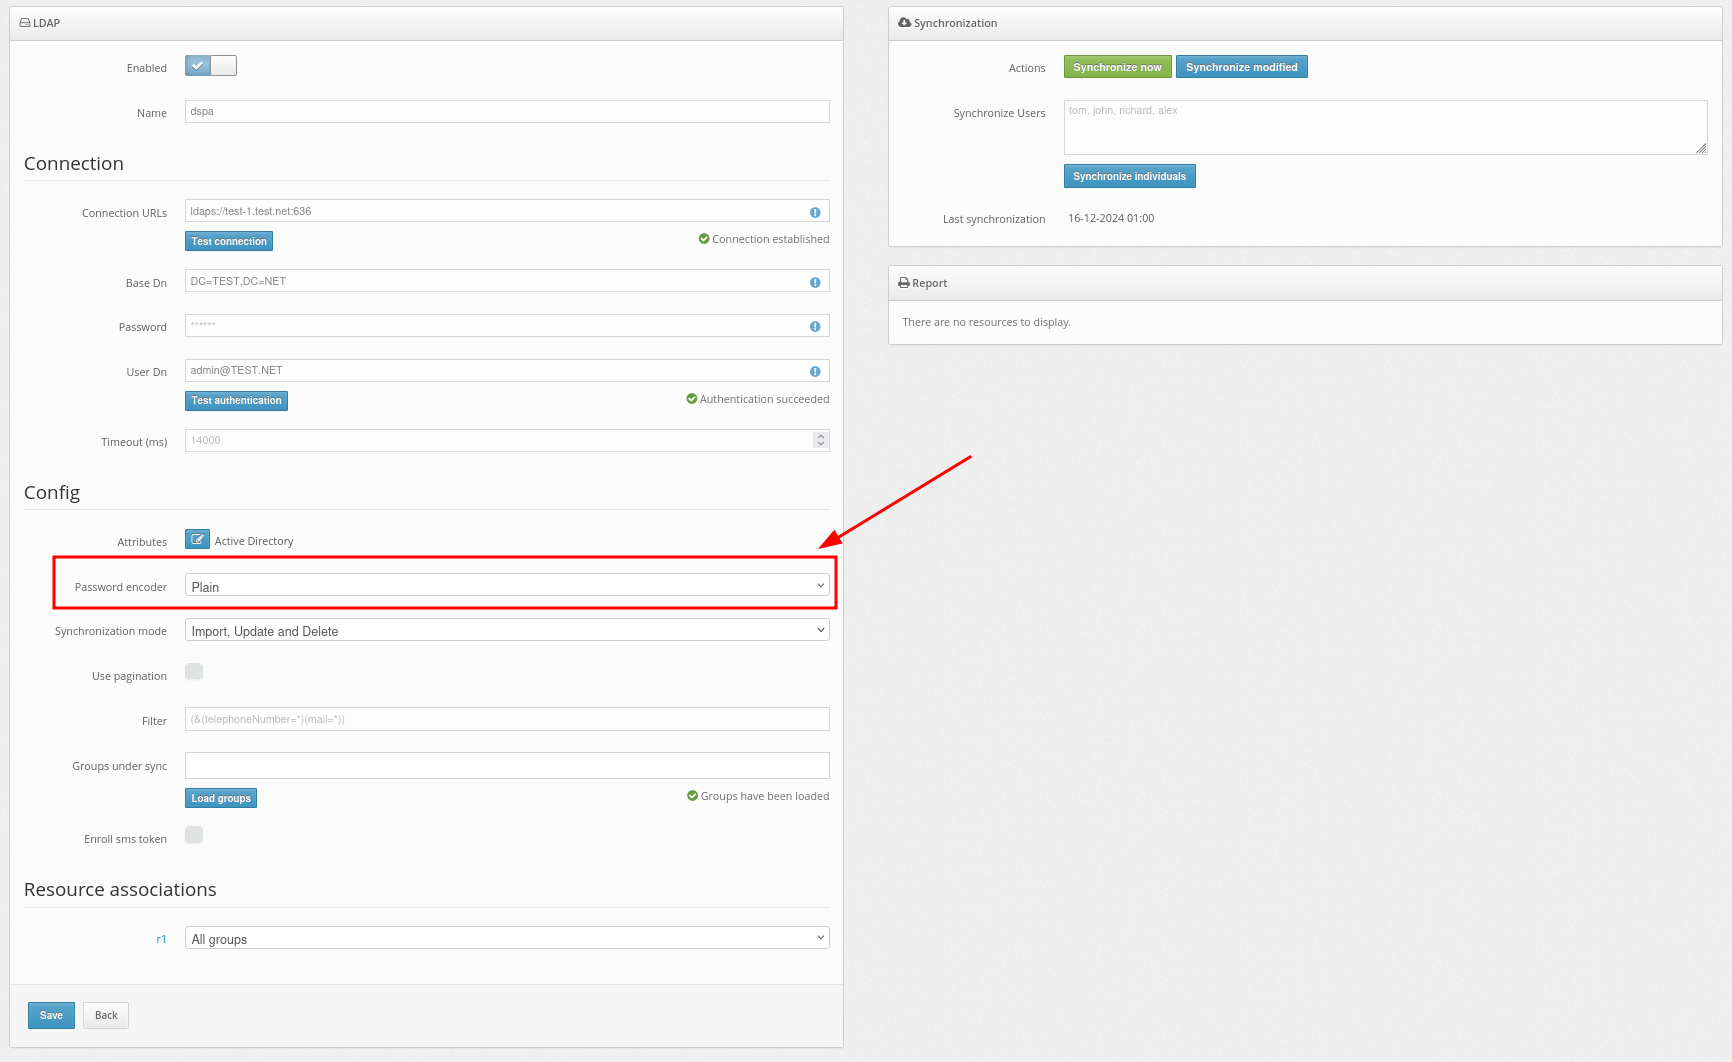
- Now configure the Password Encoder setting.
Select an algorithm that matches your configuration. Available algorithms: AD-specific (UTF-16LE), Plain, BCRYPT, SHA256, SSHA256, SHA512, SSHA512, MD4, MD5, SMD5, SHA, and SSHA.
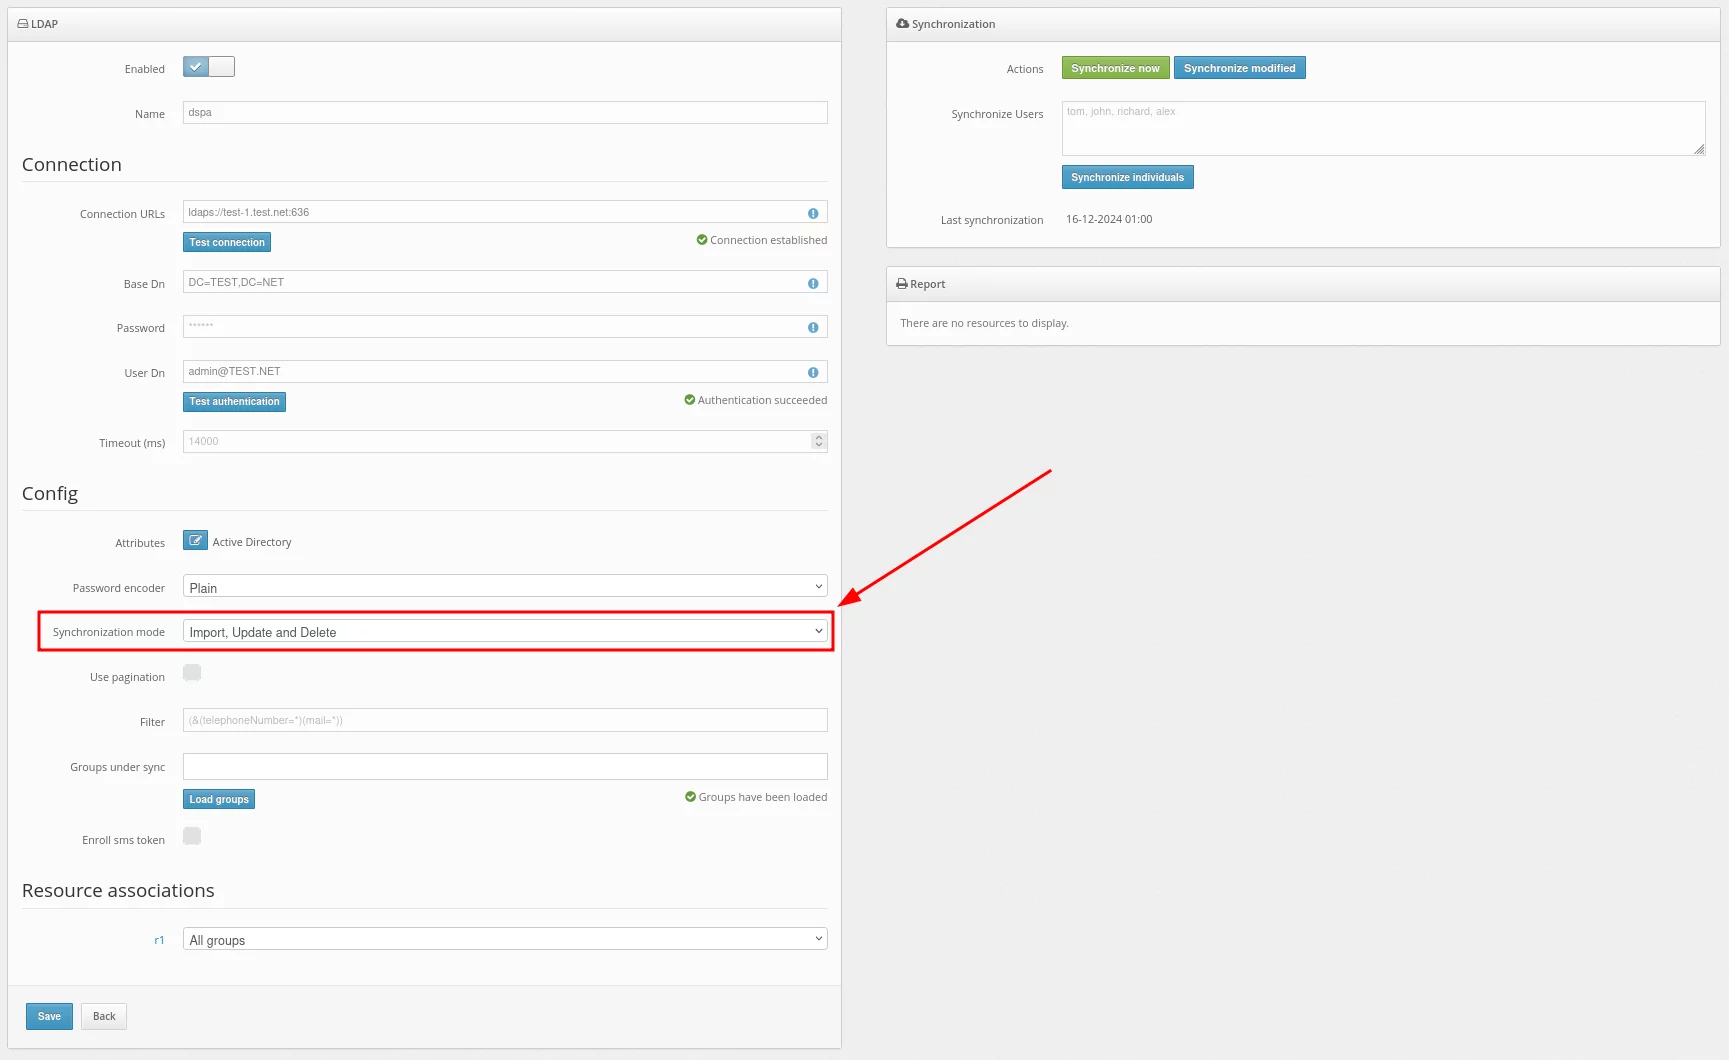
- After successfully adding the user provider, you need to import the users into the Protectimus system and synchronize them with your user directory.
In the Synchronization mode field, you should choose how you would like to import your users.
Importing users can be set up in three ways:
- Import – will never update user data.
- Import and Update – will always update user data when possible.
- Import, Update and Delete – will always update user data when possible. Protectimus users, as well as the software tokens assigned to them, will be removed upon the user’s removal from external user storage.
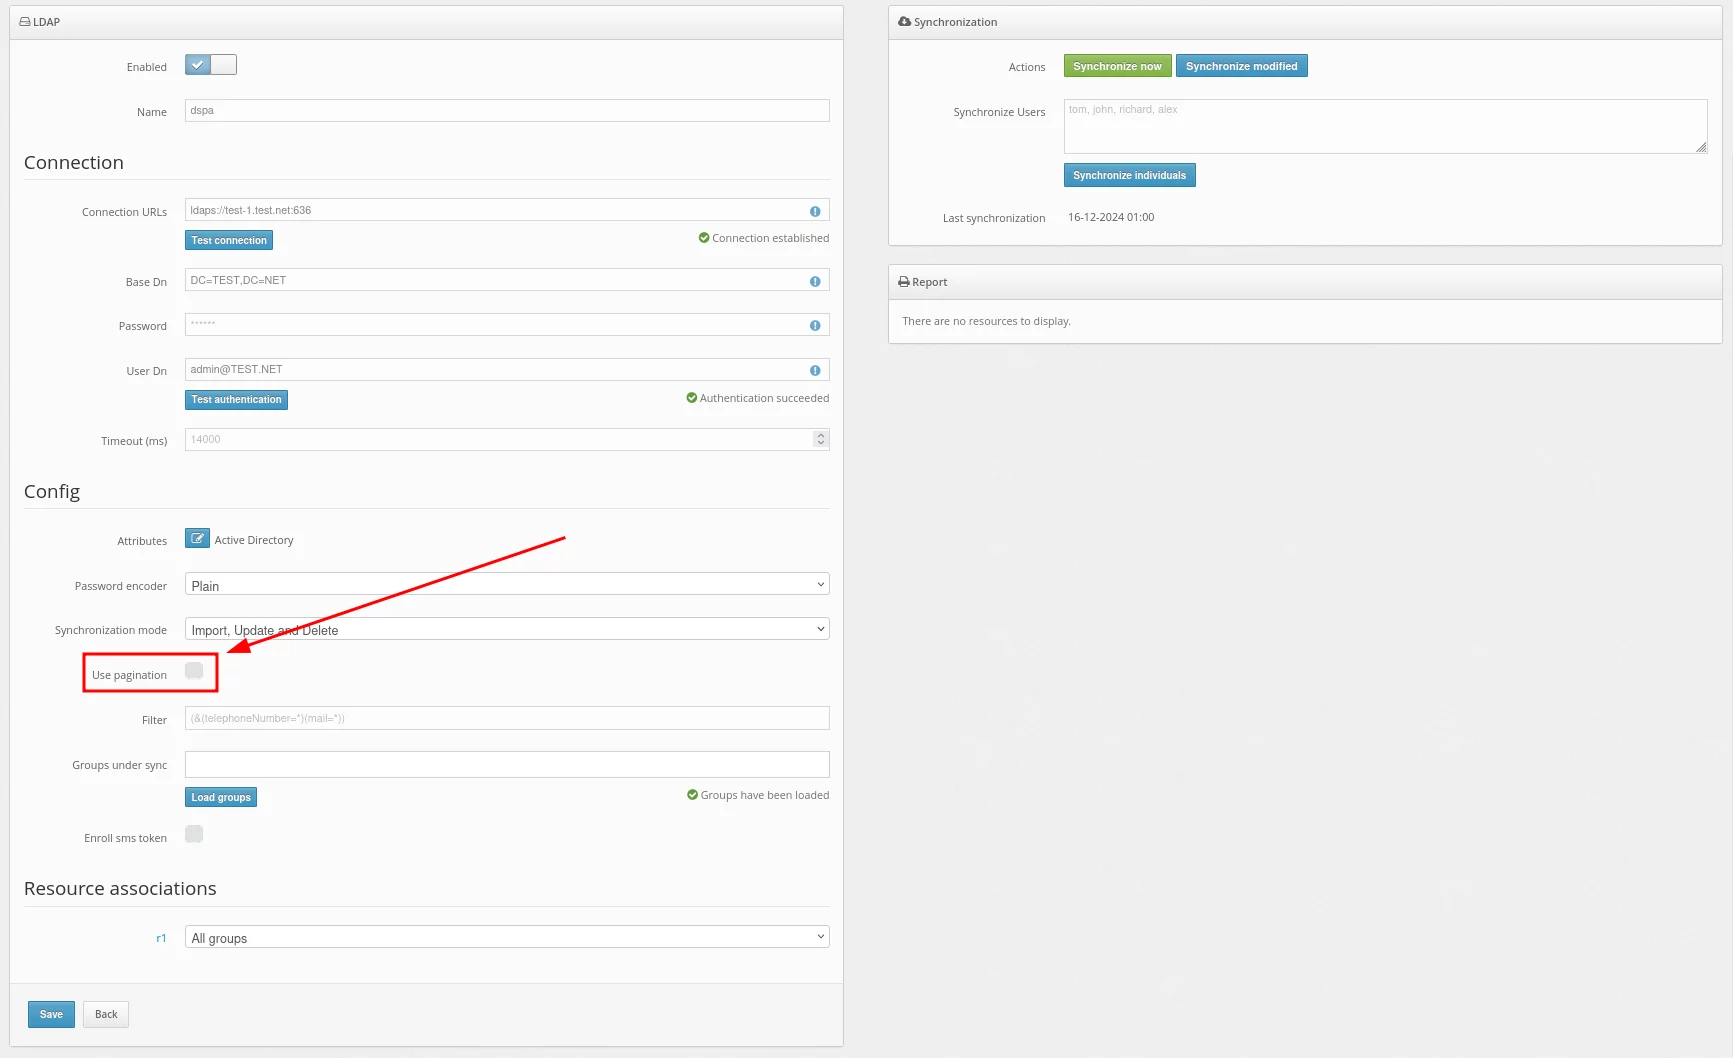
- Now configure the Use pagination setting.
When Use pagination is activated, it means that if the number of records exceeds 200 or 500, multiple queries will be used for retrieval. This is due to LDAP typically returning a limited number of entries by default.
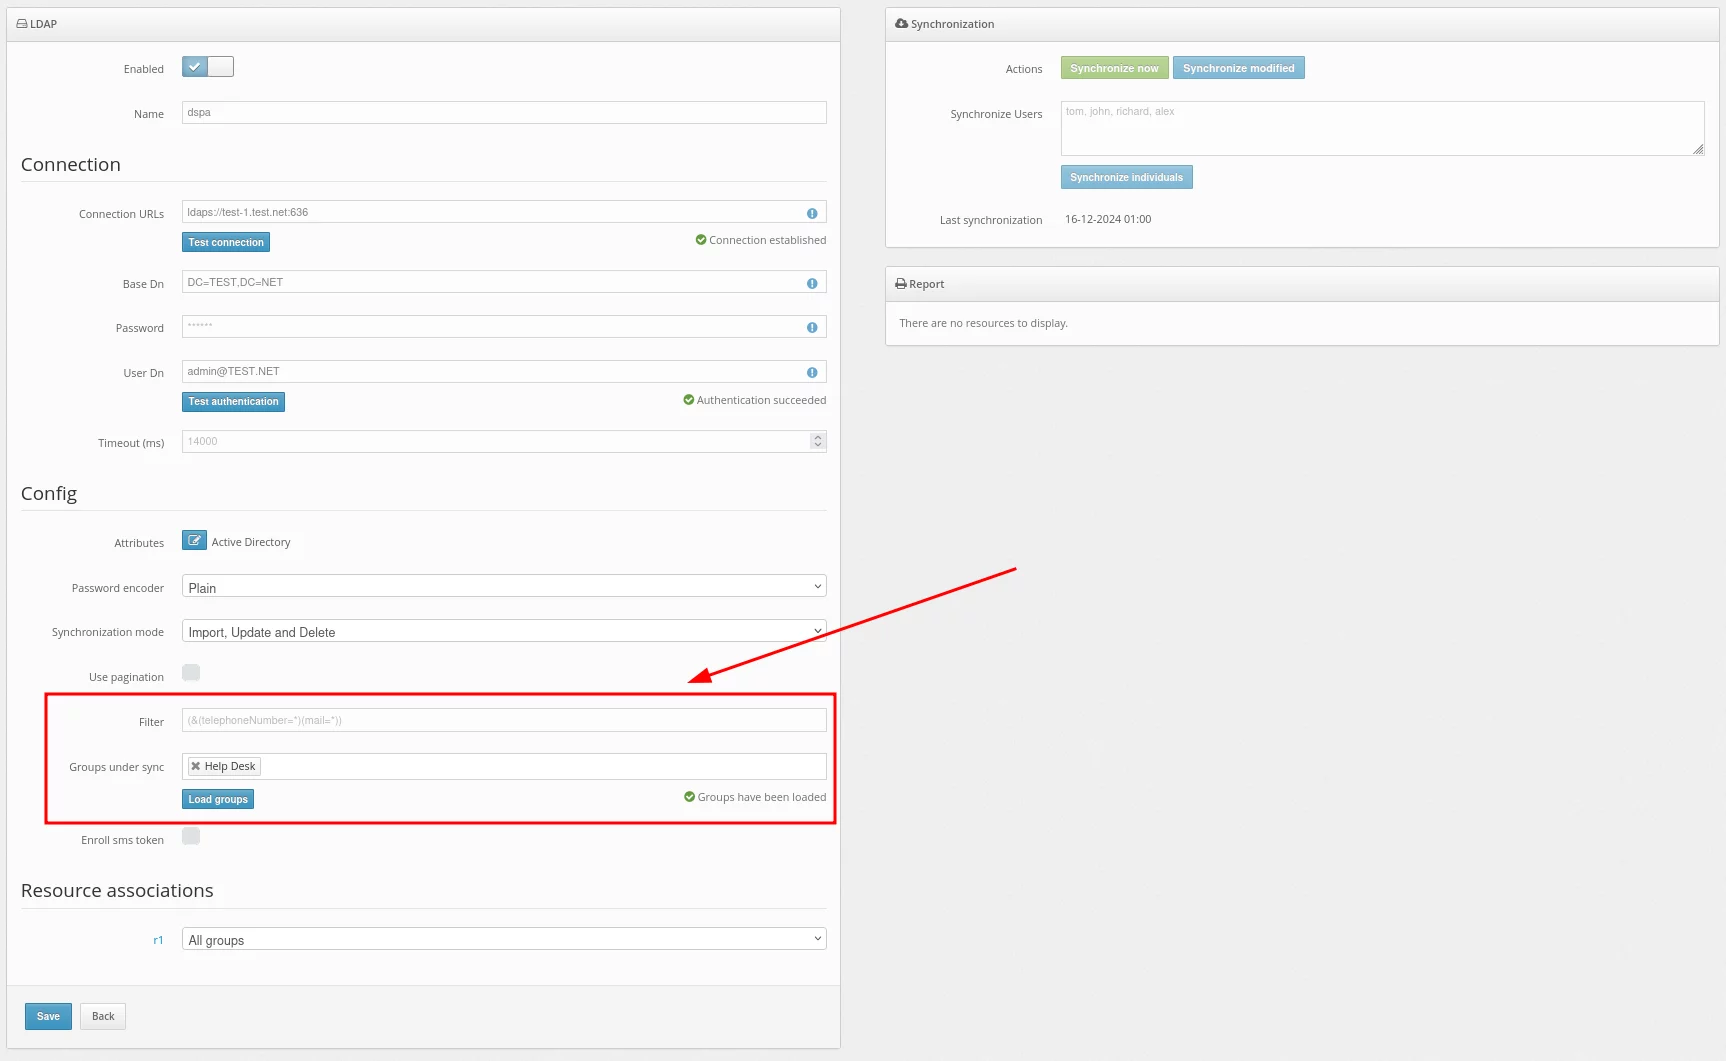
- Set up a filter to be applied during synchronization.
Use this filter to select only the users you want to synchronize.
For example, to import only those users who have the telephoneNumber and mail attributes specified, set up such a filter:
(&(telephoneNumber=*)(mail=*))
To import users from a specific group, choose the required group. In our example, it is the Users group.
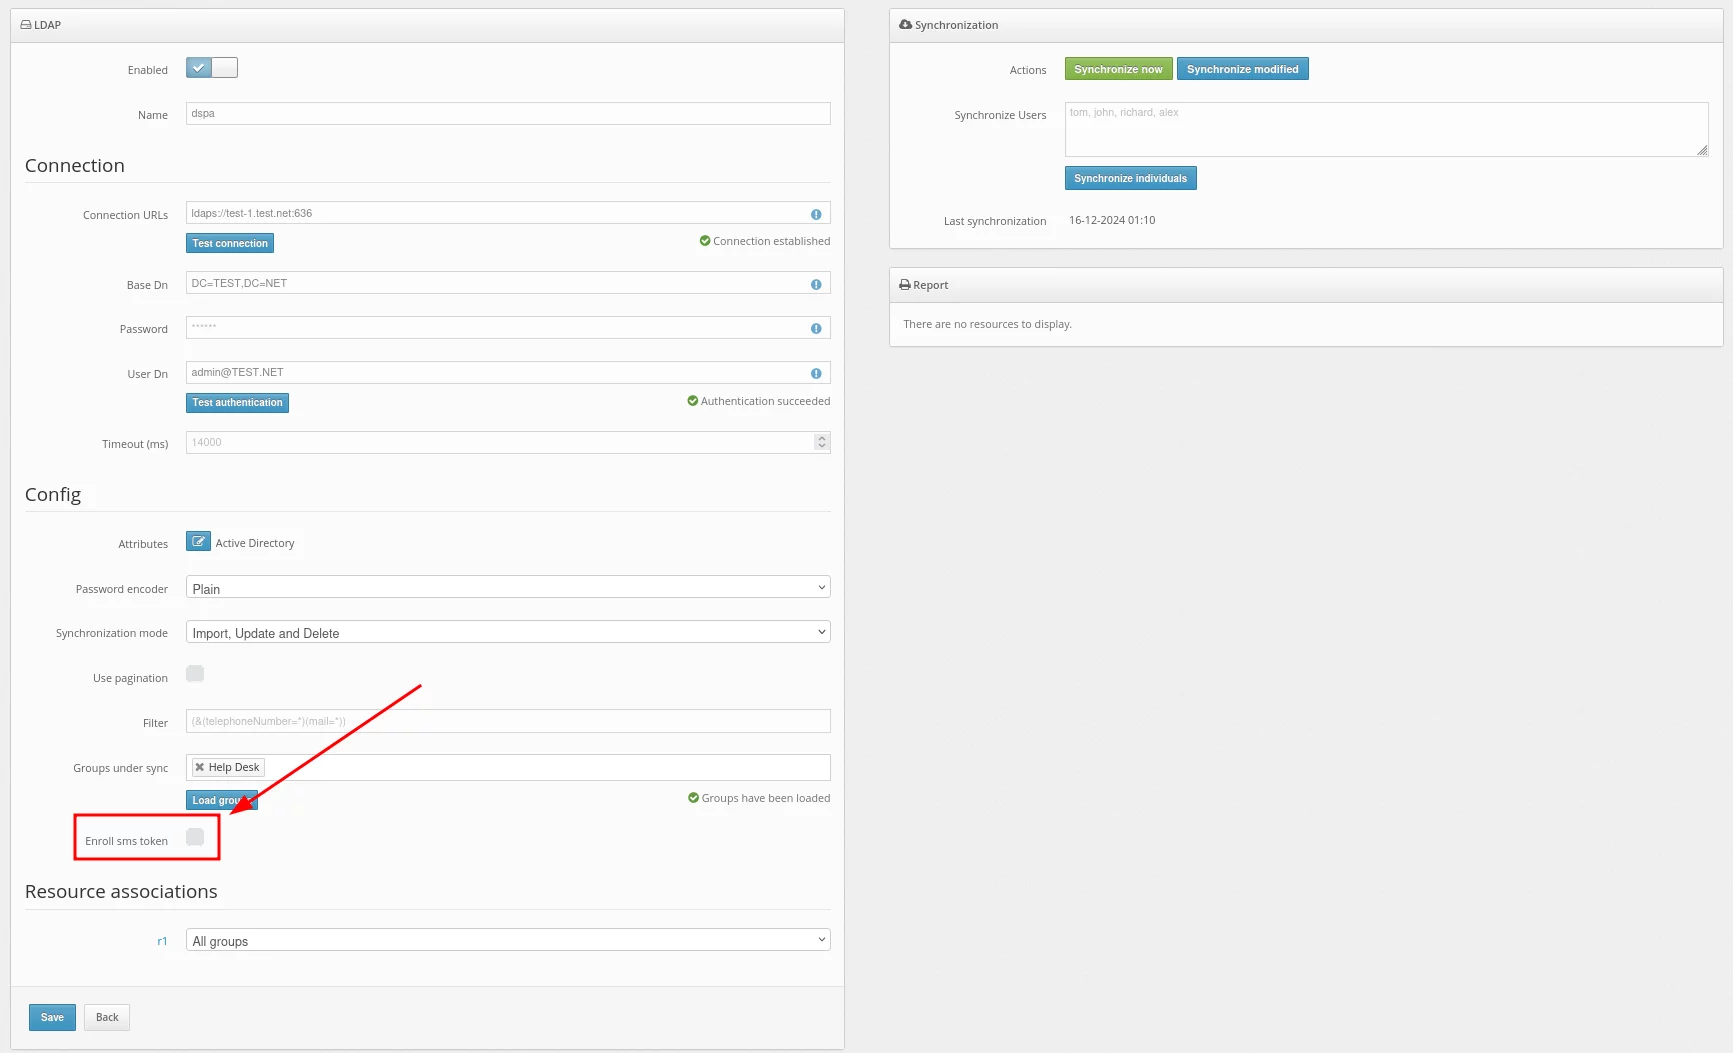
- Leave thr Enroll SMS token empty.
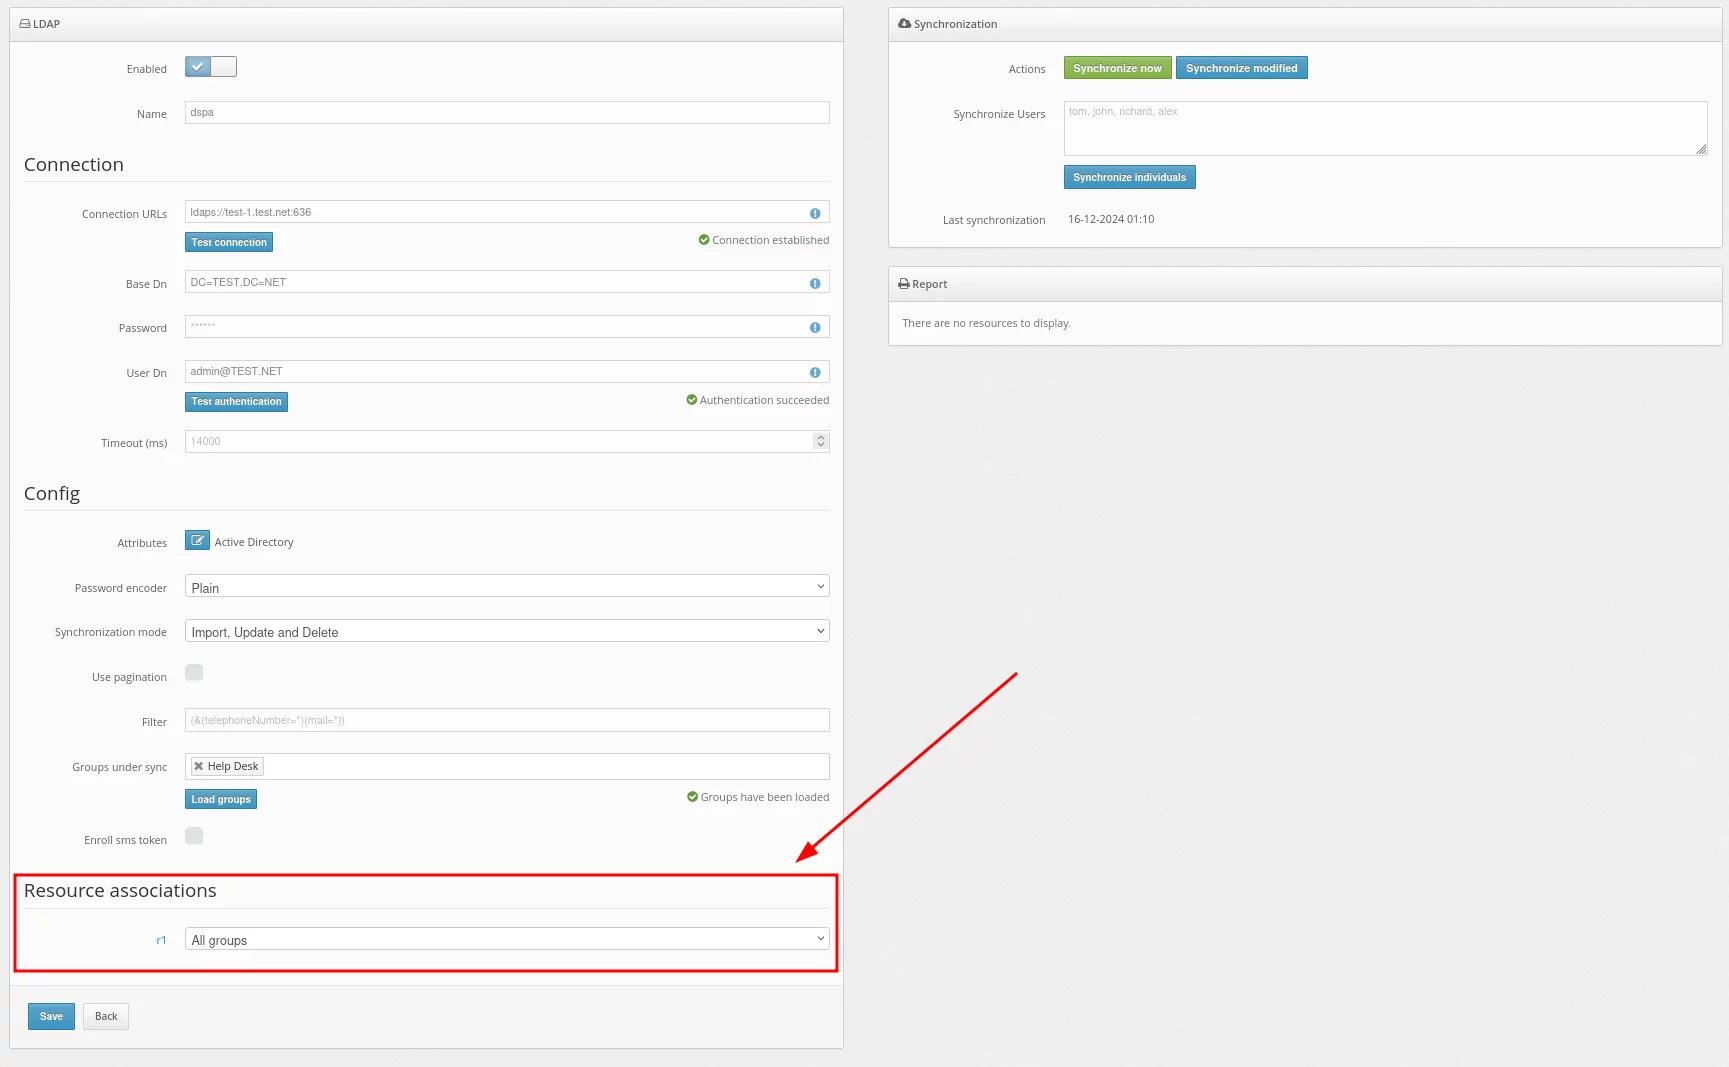
- In the Resource associations section, you can choose the resource to which the users will be assigned during synchronization.
- The next step is to enable user synchronization. This can be accomplished in three ways:
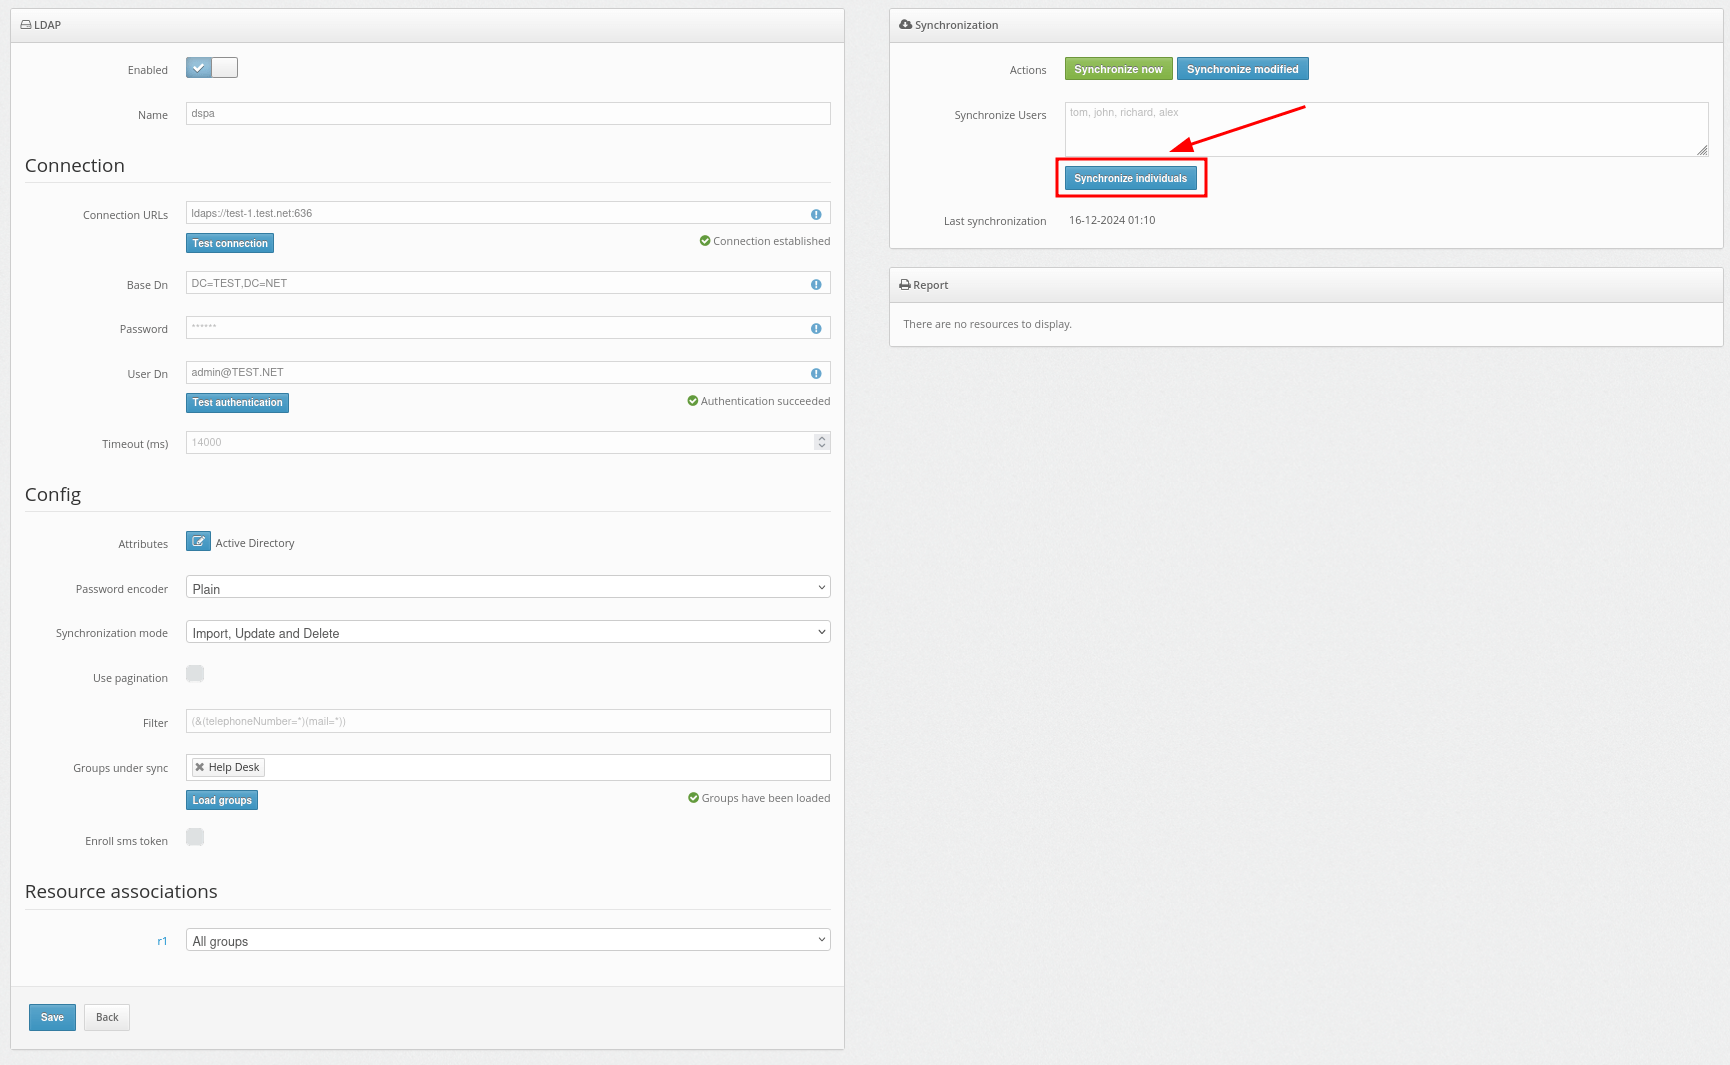
- Use the Synchronize now button to synchronize all users at once.
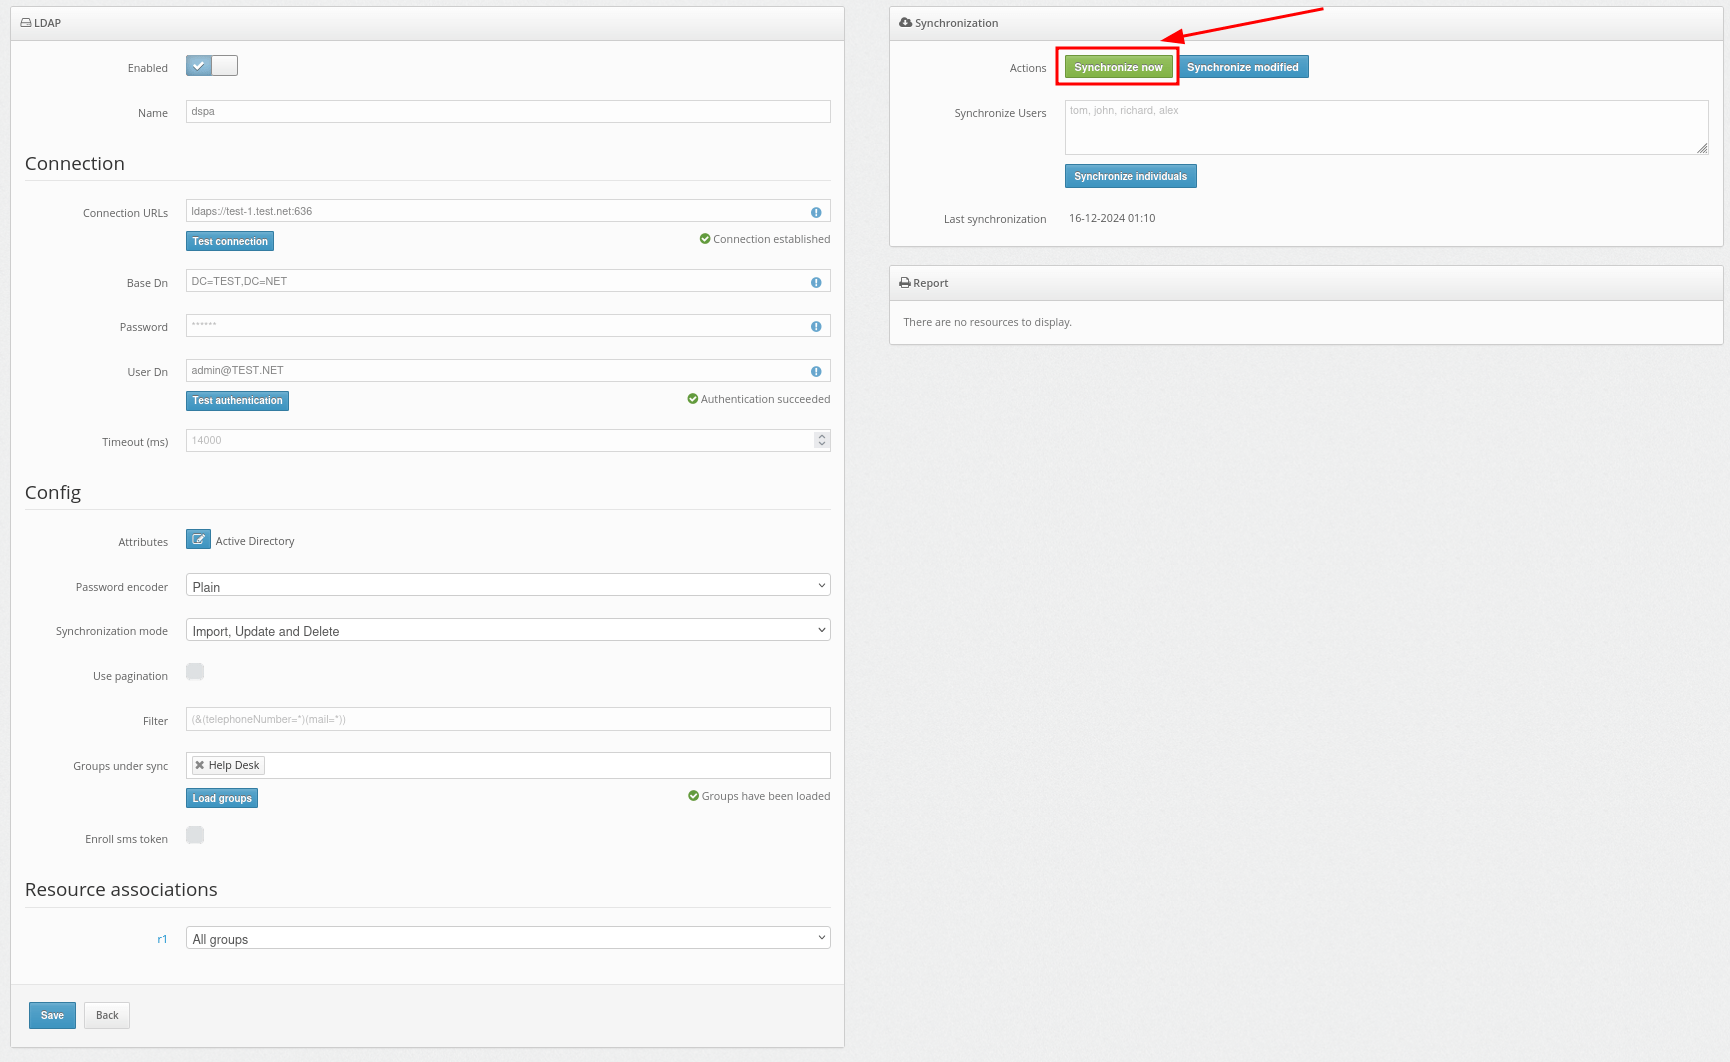
You can also select the Synchronize modified button to synchronize only the users who have been modified since the last synchronization.
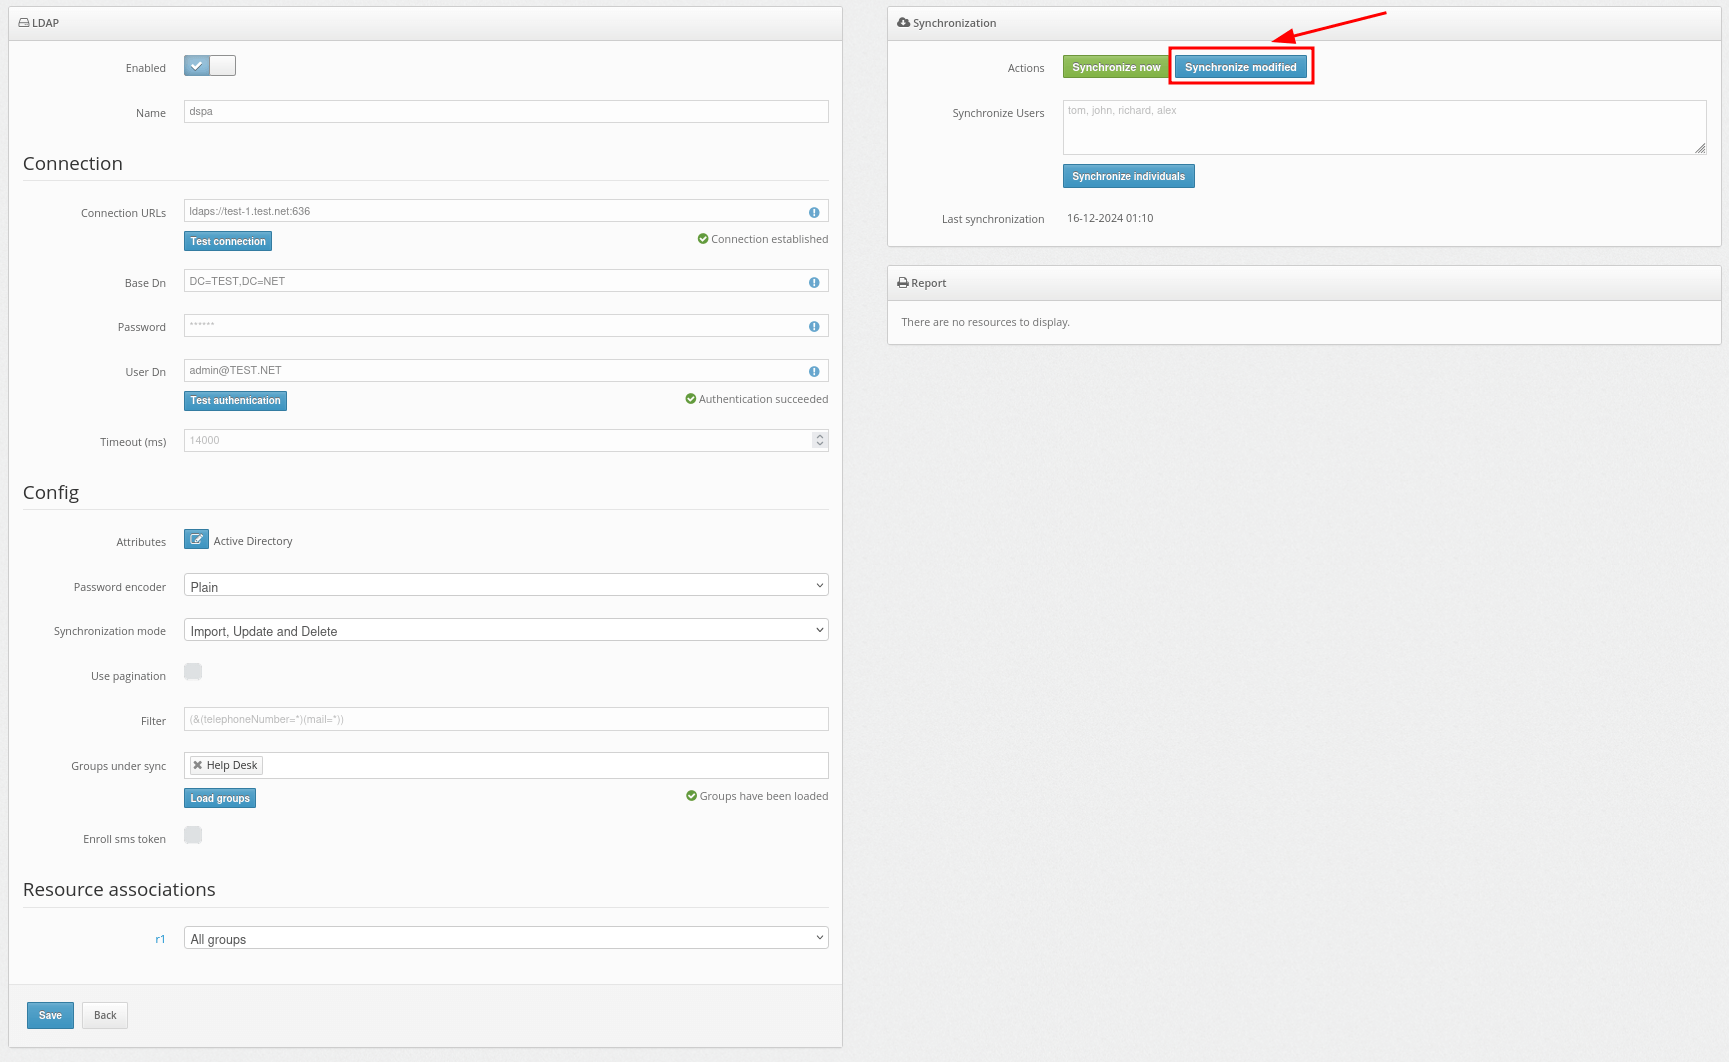
- Use the Synchronize individuals feature to synchronize only the selected users from your user directory.
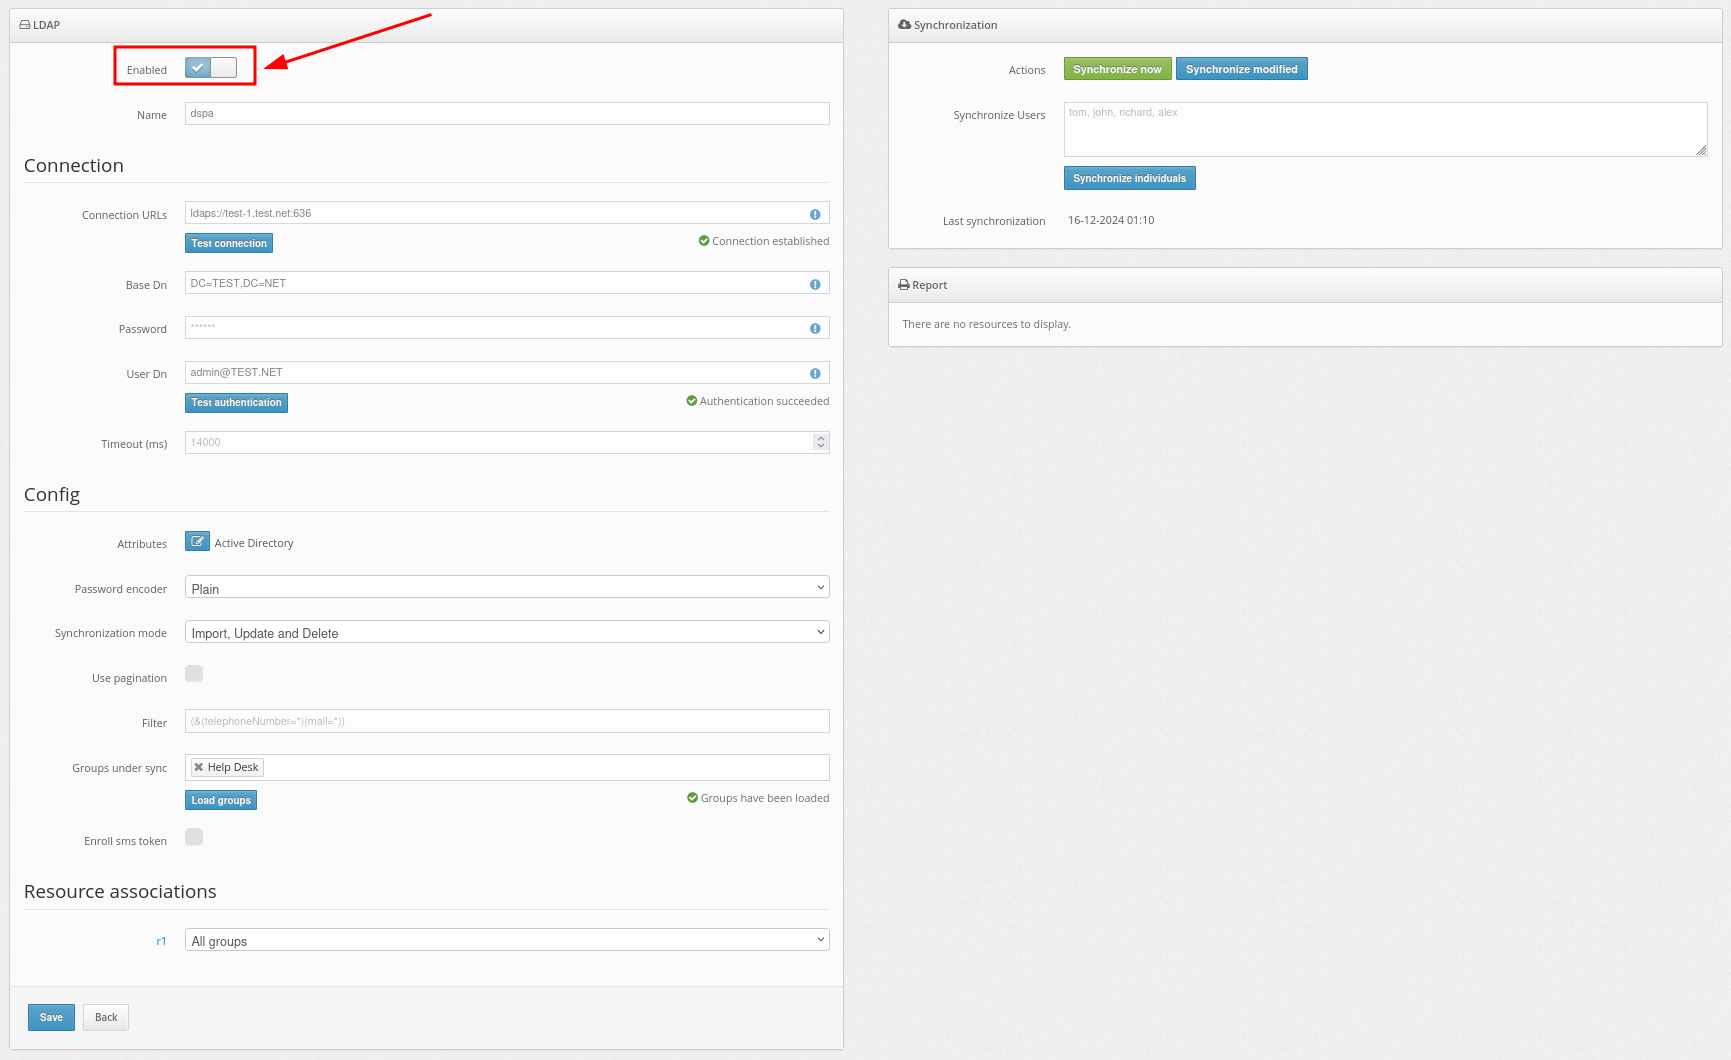
- Or enable automatic user synchronization by activating the Enabled option at the top of the page.
4. Add Passwords
PLEASE NOTE! You can activate the Users’ Self-Service Portal so that your users could add their passwords to the system themselves. Read how to set up a Users’ Self-Service Portal in the Users’ Self-Service Portal Setup Instructions.
If you prefer to set a password for a user manually:
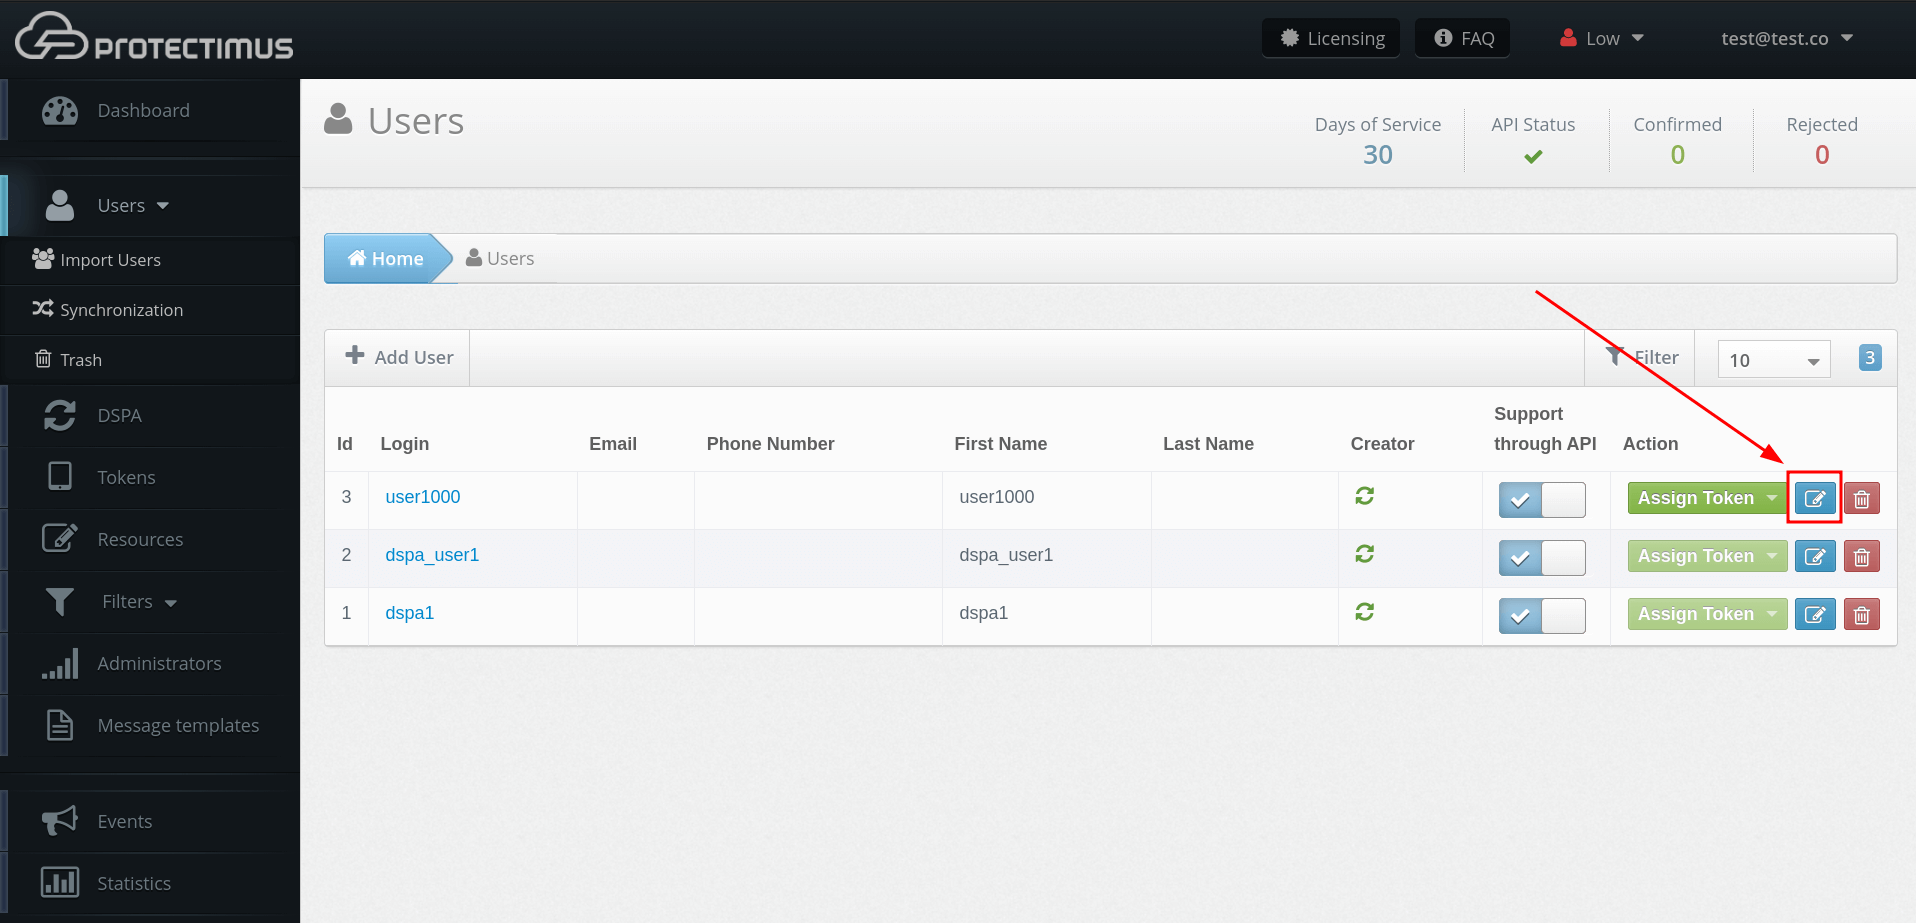
- Go to the user editing page: click Users in the menu on the left > click on the user’s Edit button on the right side
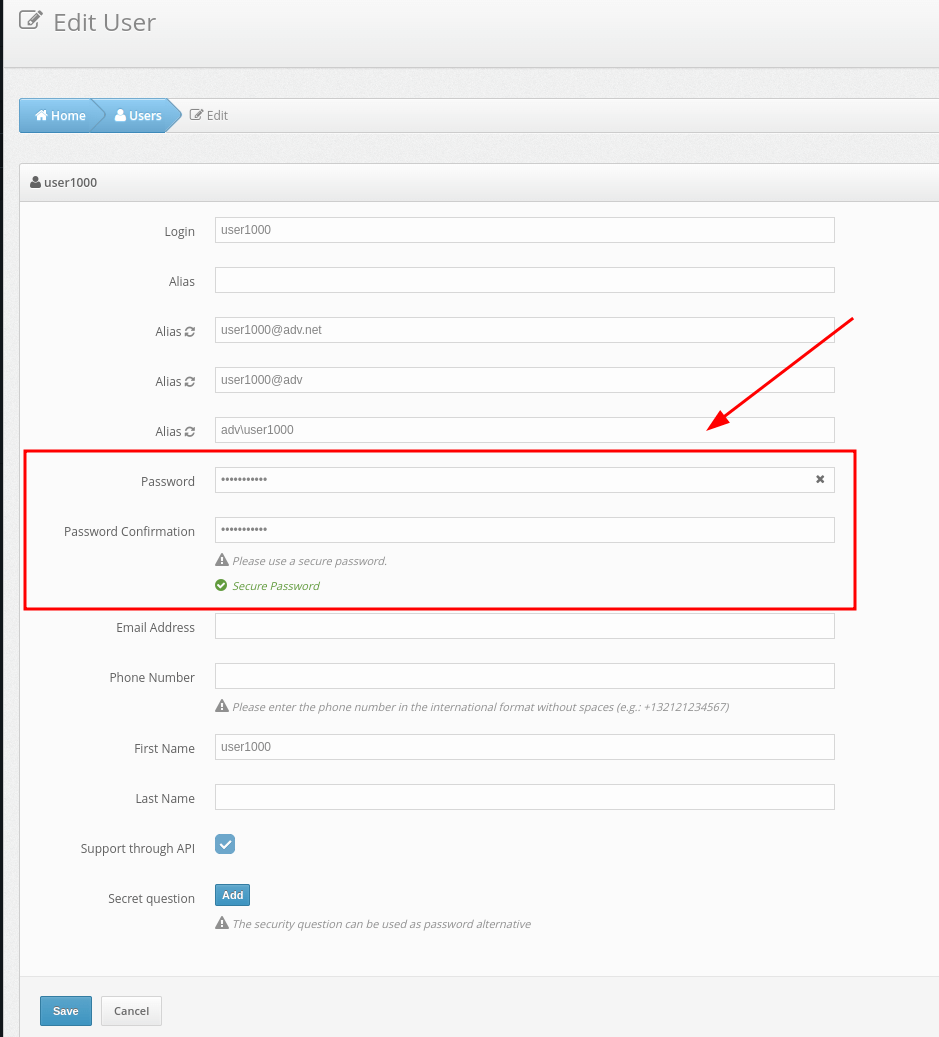
- Enter the user password in the corresponding field and click Save.
5. Add Tokens
So far, the Protectimus DSPA component is only compatible with the in-app 2FA tokens Protectimus Smart OTP, available on iOS and Android, therefore we recommend activating the User Self-Service Portal so that your end users could issue tokens on their own. Read our Self-Service Portal Setup Guide for detailed instructions.
If you prefer to add tokens to uers manually:
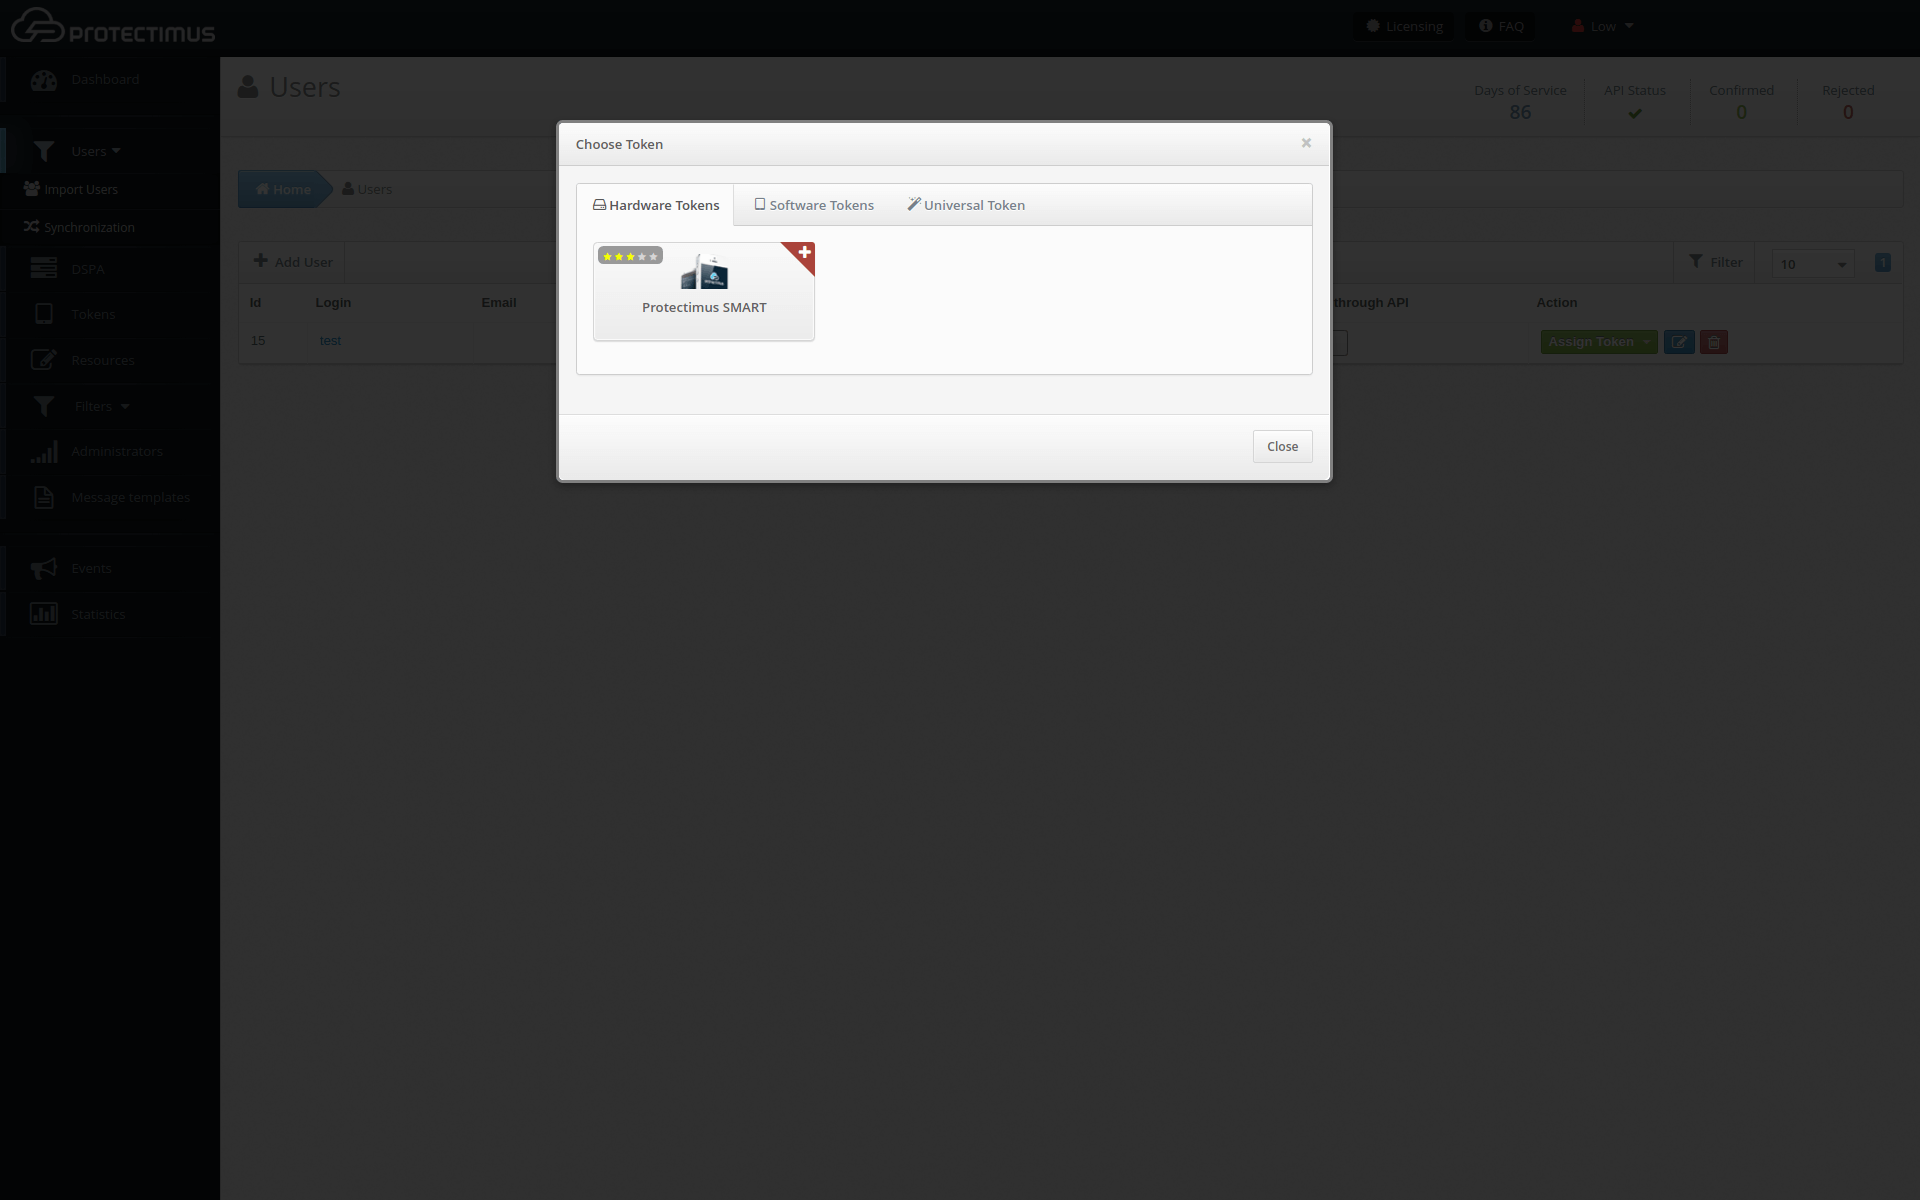
- Select a synced user and click Assign Token, then click New.
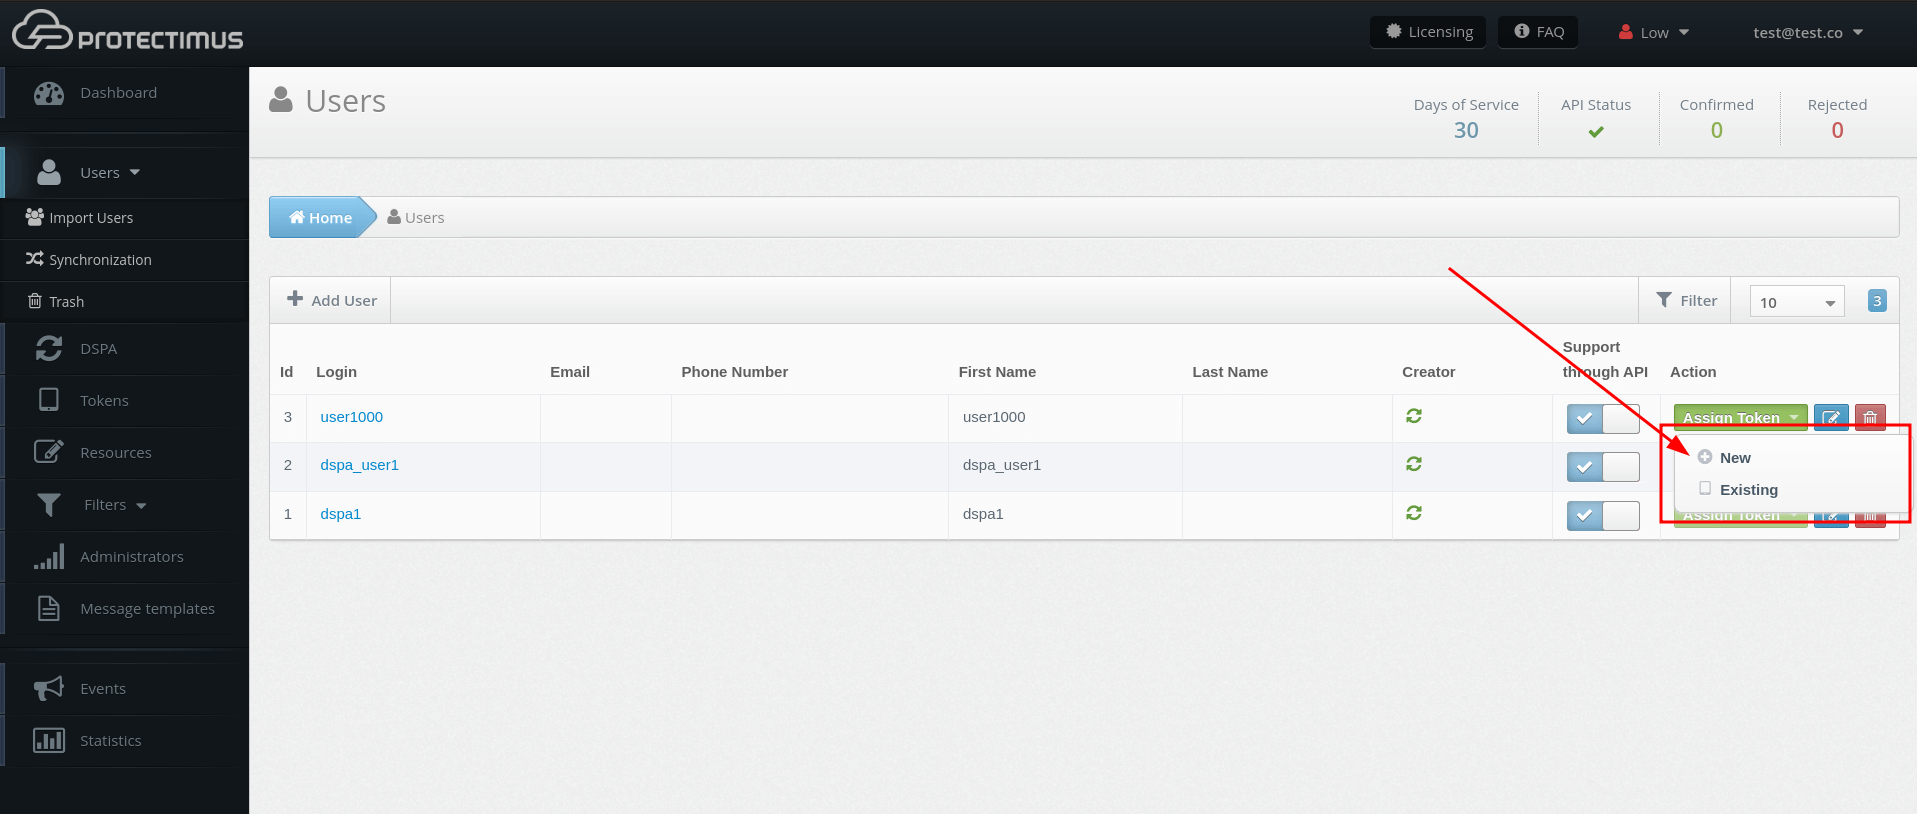
- Select the Protectimus SMART token and configure it. Protectimus Smart OTP App is available for free on Google Play and App Store.
6. Protectimus DSPA Activation and Deactivation
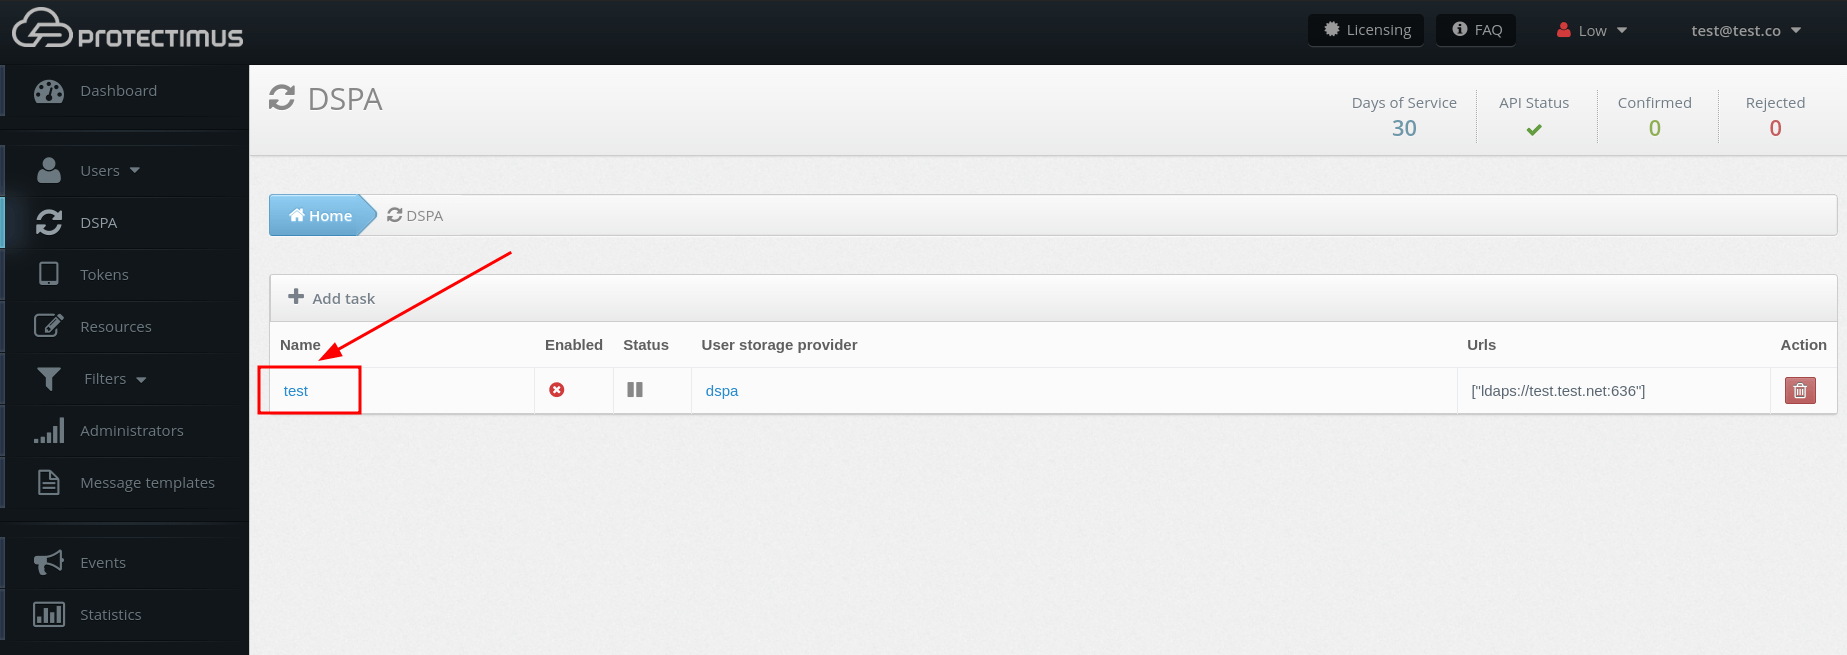
- To activate the Protectimus DSPA component, go to the DSPA tab and click on the name of DSPA:
Then activate the Enabled parameter.
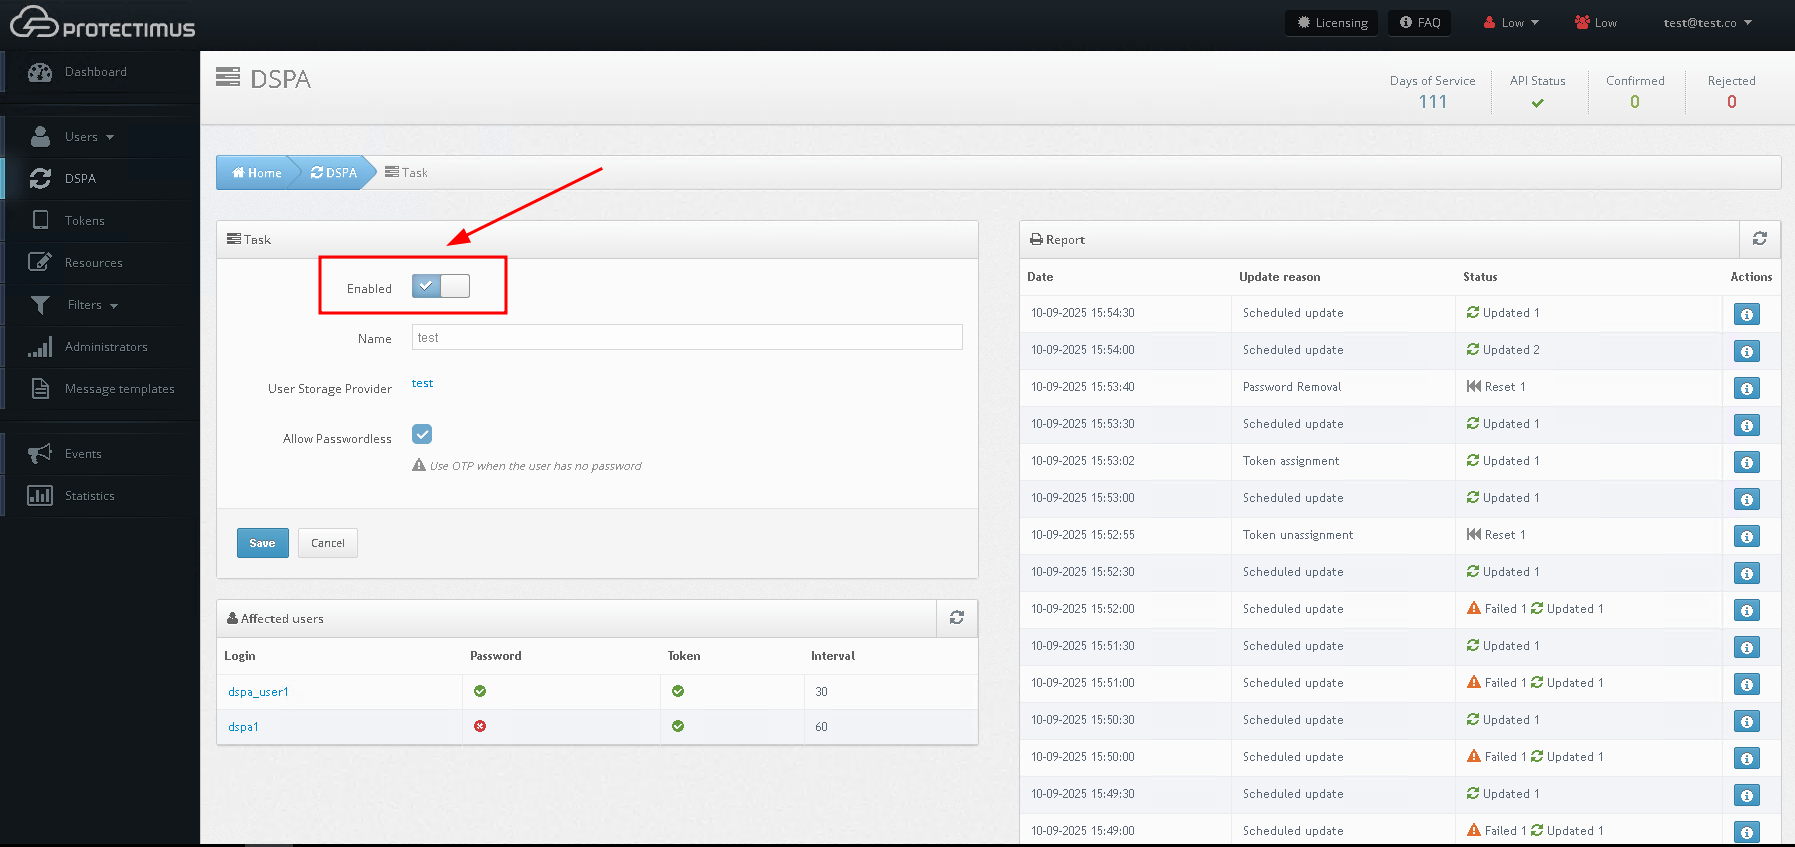
Accordingly, to deactivate the Protectimus DSPA component, it is necessary to uncheck the Enabled parameter.
When DSPA is disabled, all passwords will be reset automatically (i.e., the dynamic part will be removed).
-
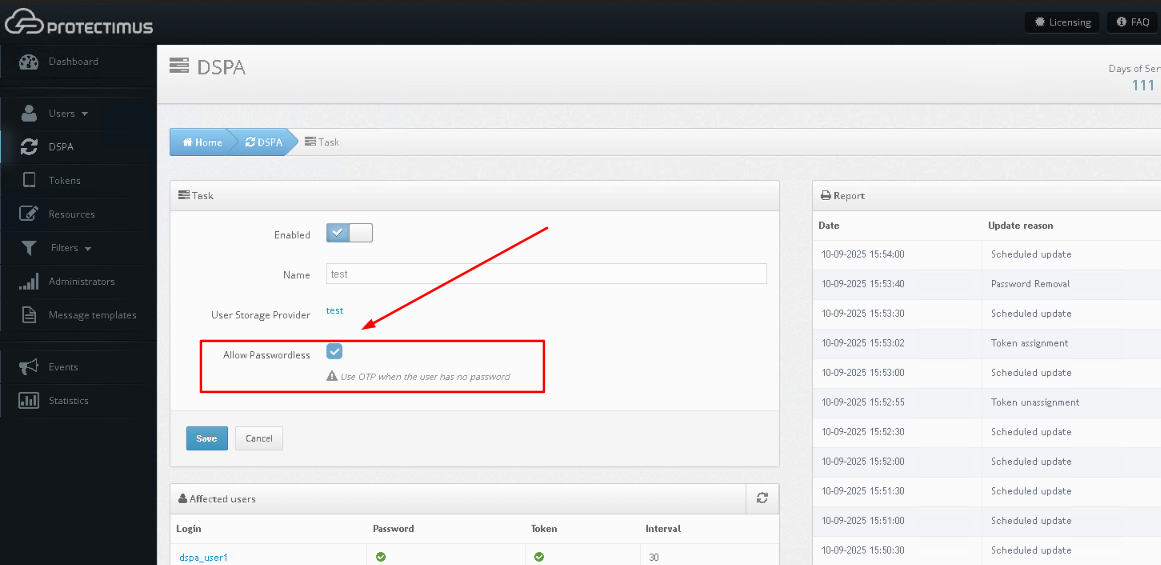
Please note: You can enable passwordless authentication for your users, which means they will log in using ONLY one-time passwords (OTPs).
By default, Protectimus DSPA combines the user’s static password with a six-digit time-based one-time password (TOTP). For example, P@ssw0rd!459812, where: P@ssw0rd! is the fixed part, and 459812 is a TOTP one-time password that changes at regular intervals.
With passwordless authentication enabled, your users will only need to enter the TOTP part.
When the Allow Passwordless checkbox is selected:
- Users without a password in the Protectimus platform will authenticate using only an OTP.
- Users with a password will continue to authenticate with password + OTP.
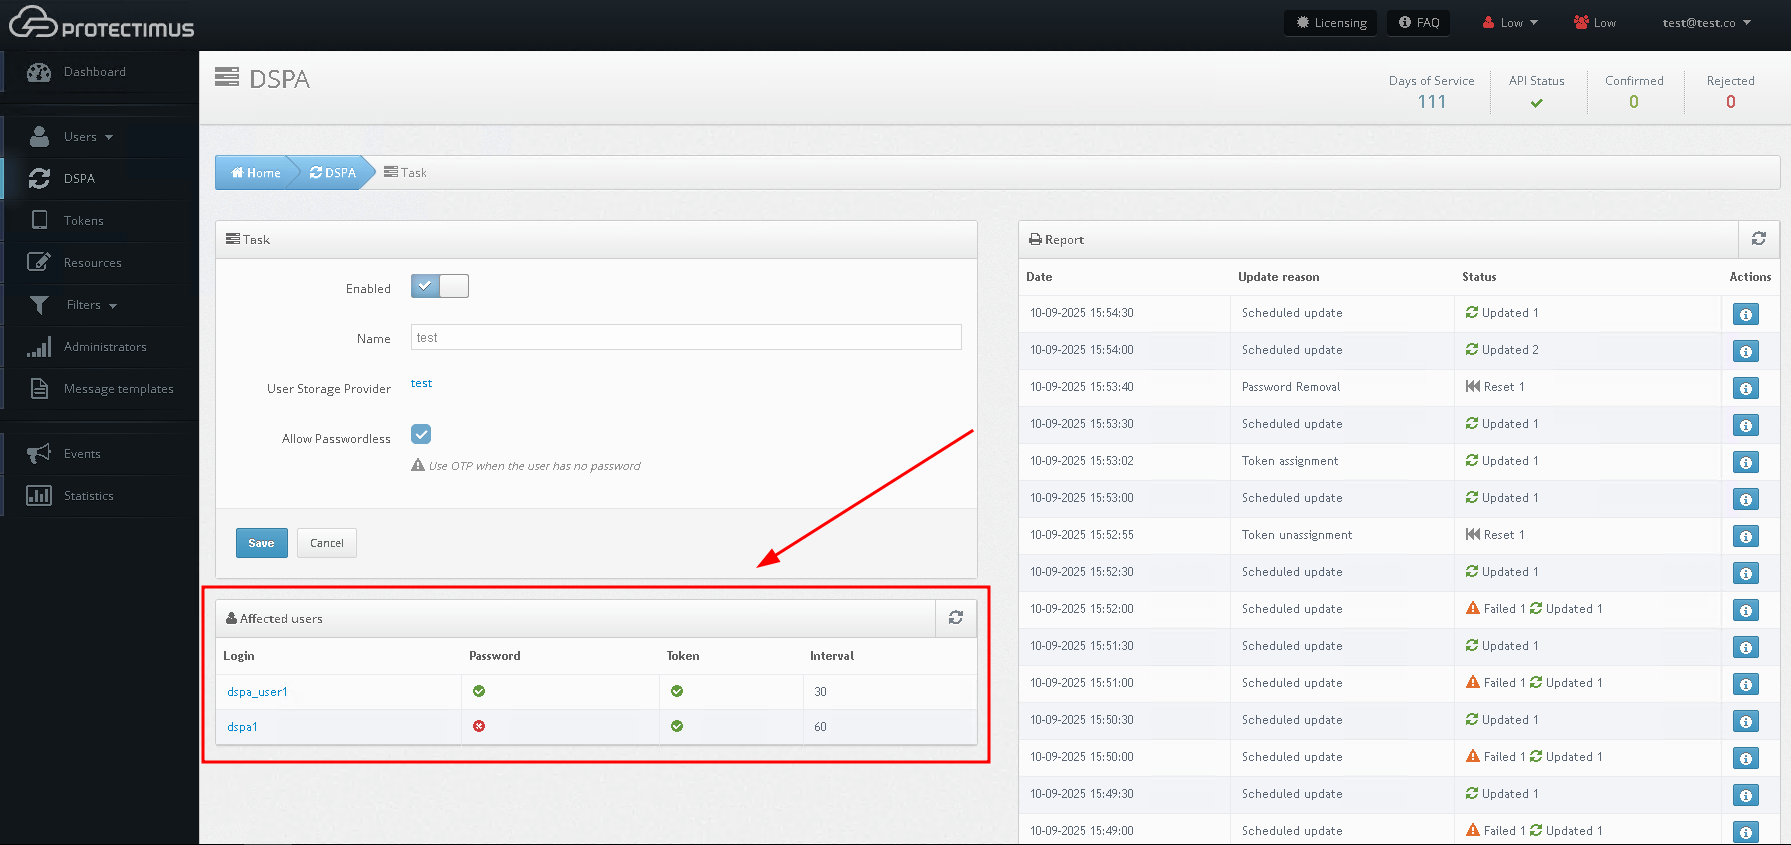
- For the Protectimus DSPA component to work, you need:
- A configured user provider;
- A synchronized user;
- A password set for the user;
- A token assigned to the user.
You can check whether these conditions are fulfilled on the Affected users section on the DSPA tab.
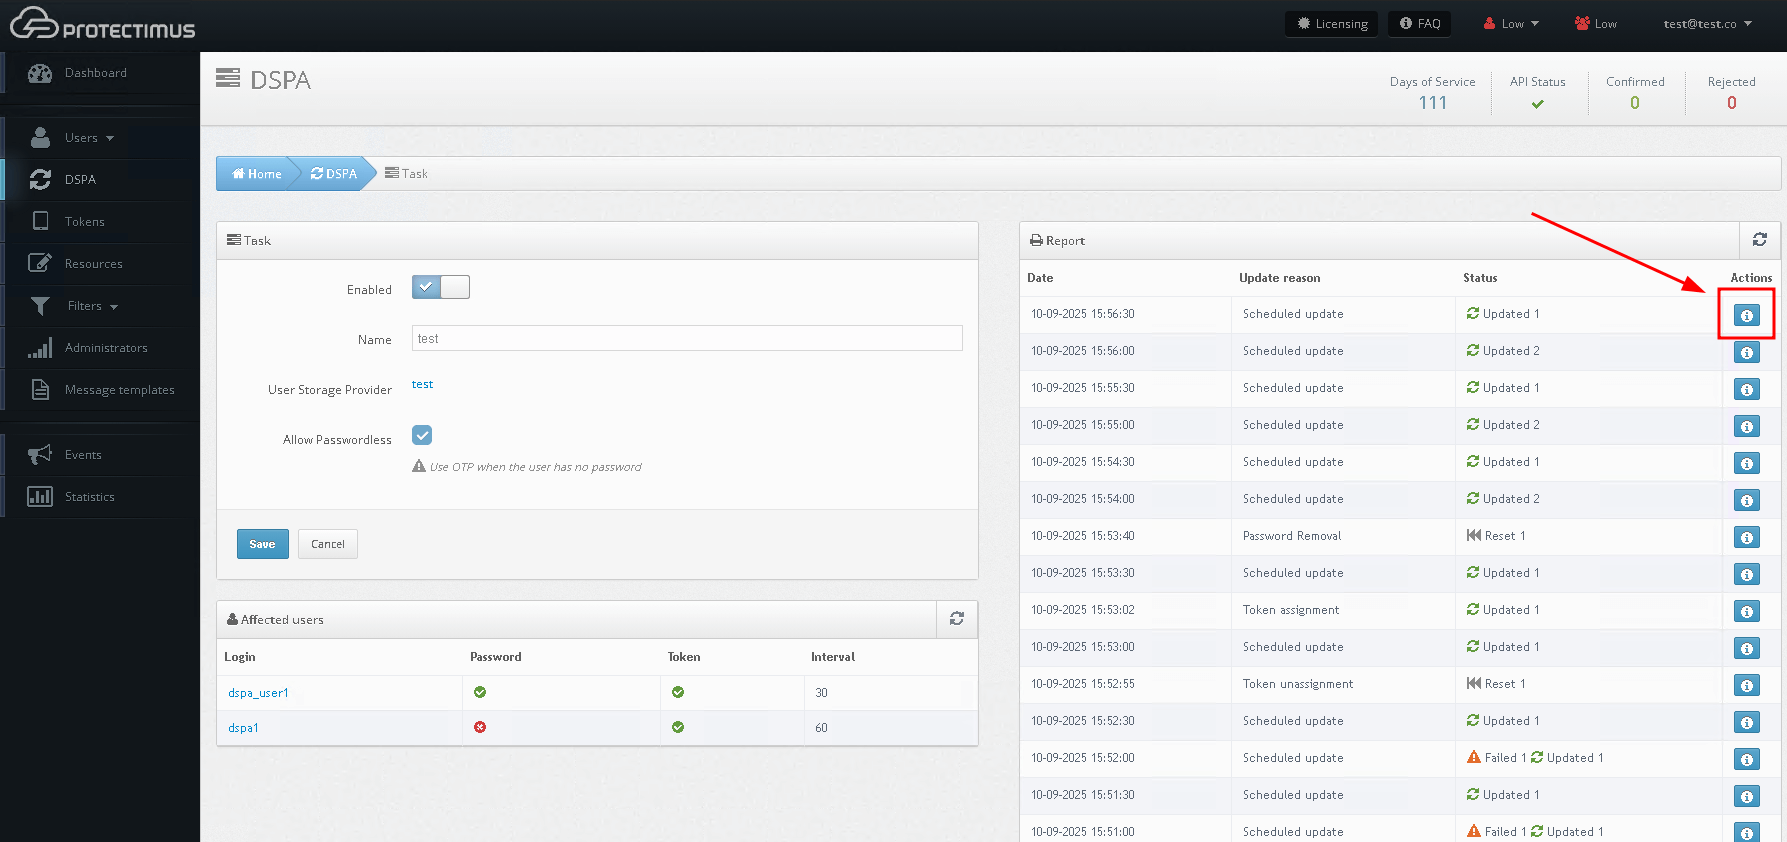
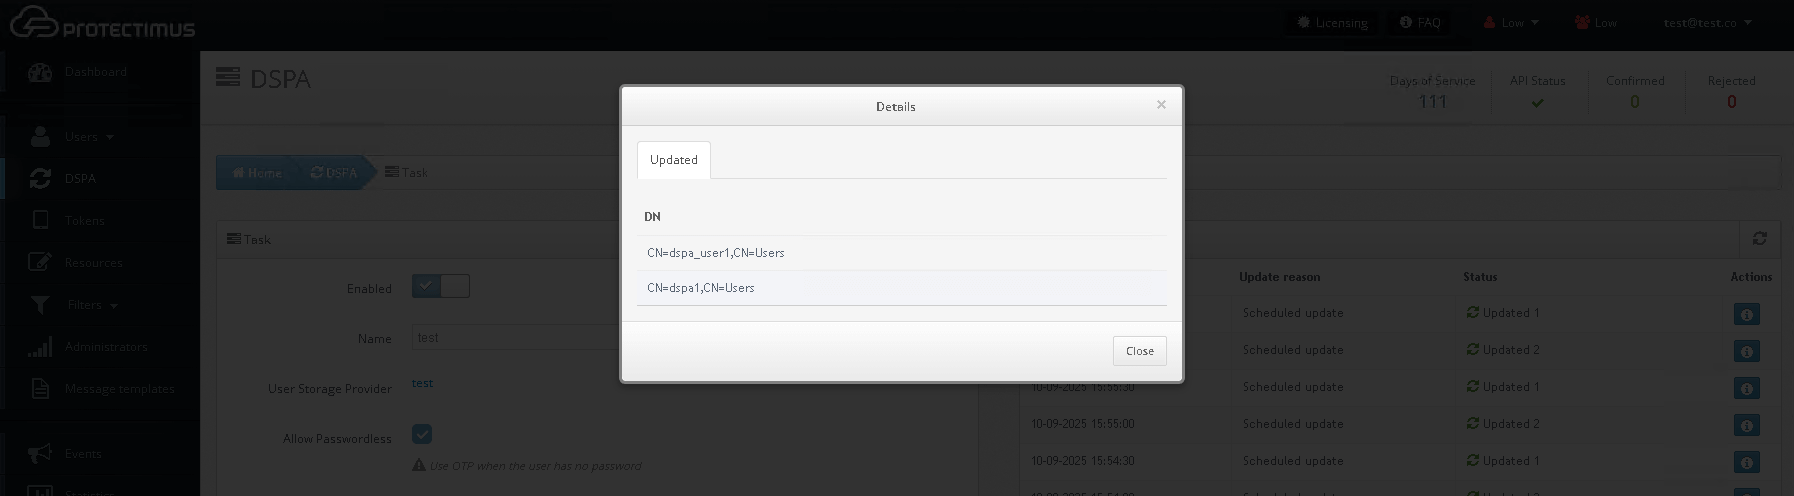
- You can see the results of the passwords update in the Report section.

- The result of updates can be viewed by clicking on the icon in the table of reports.
7. How to Set Up an LDAPS SSL Certificate
To establish LDAPS (LDAP over SSL/TLS) and import the necessary SSL certificate into a Java keystore, you need to obtain the certificate from the LDAP server itself.
Here’s how to get the SSL certificate and import it.
7.1. Obtain the LDAP Server’s SSL Certificate
- From the LDAP Administrator: The most straightforward method is to request the certificate file (e.g., a .cer or .crt file) from your LDAP server administrator. This certificate will be issued by a Certificate Authority (CA) that your Java environment needs to trust.
- Using keytool to retrieve directly: If you have network access to the LDAP server and the keytool utility (part of the Java Development Kit/JRE), you can extract the certificate directly.
keytool -printcert -sslserver <hostname>:<ssl_port> -rfc > ldap_server_certificate.cer
Replace <hostname> with the LDAP server’s hostname and <ssl_port> with the LDAPS port (commonly 636 or 3269 for Active Directory Global Catalog).
7.2. Import the Certificate into the Java Keystore:
- Locate your cacerts file: The default Java truststore is typically named cacerts and is located in the jre/lib/security directory of your Java installation (JDK or JRE).
- Import using keytool: Use the keytool command to import the obtained certificate into your cacerts file.
keytool -importcert -alias <unique_alias> -file ldap_server_certificate.cer -keystore <path_to_cacerts> -storepass <keystore_password>
- Replace <unique_alias> with a descriptive, unique name for the certificate (e.g., ldap_server_cert).
- Replace ldap_server_certificate.cer with the actual path to your certificate file.
- Replace <path_to_cacerts> with the full path to your cacerts file.
- Replace <keystore_password> with the password for the cacerts file (the default is often changeit).
After importing the certificate, your Java application will be able to establish a secure LDAPS connection to the LDAP server, as it will now trust the server’s SSL certificate. Remember to restart any applications that use this JRE to ensure the new certificate is loaded.
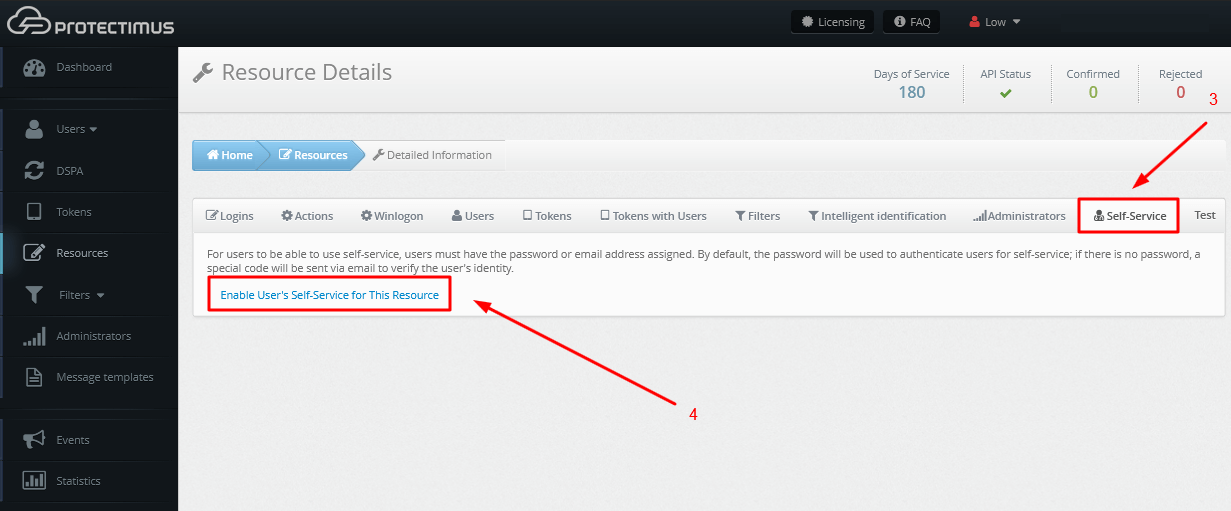
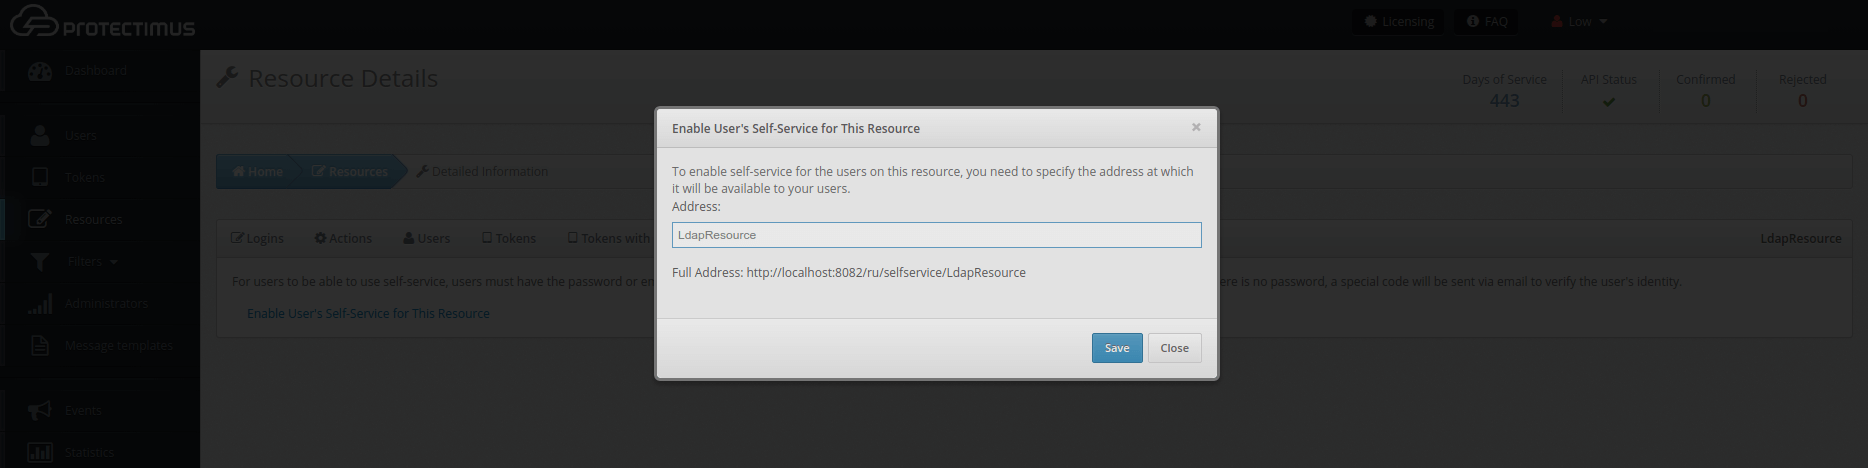
8. How to Activate the Users’ Self-Service Portal
If you want users to enroll tokens and set passwords on their own, use the Users’ Self-Service Portal.
From the
Resource information page, navigate to the
Self-Service tab. You can enable self-service for a resource after entering the address at which the self-service page will be located. You can find more detailed instructions on setting up a self-service portal in the article
Configuring the Self-Service Portal.

9. Users Interaction with the Self-Service Portal
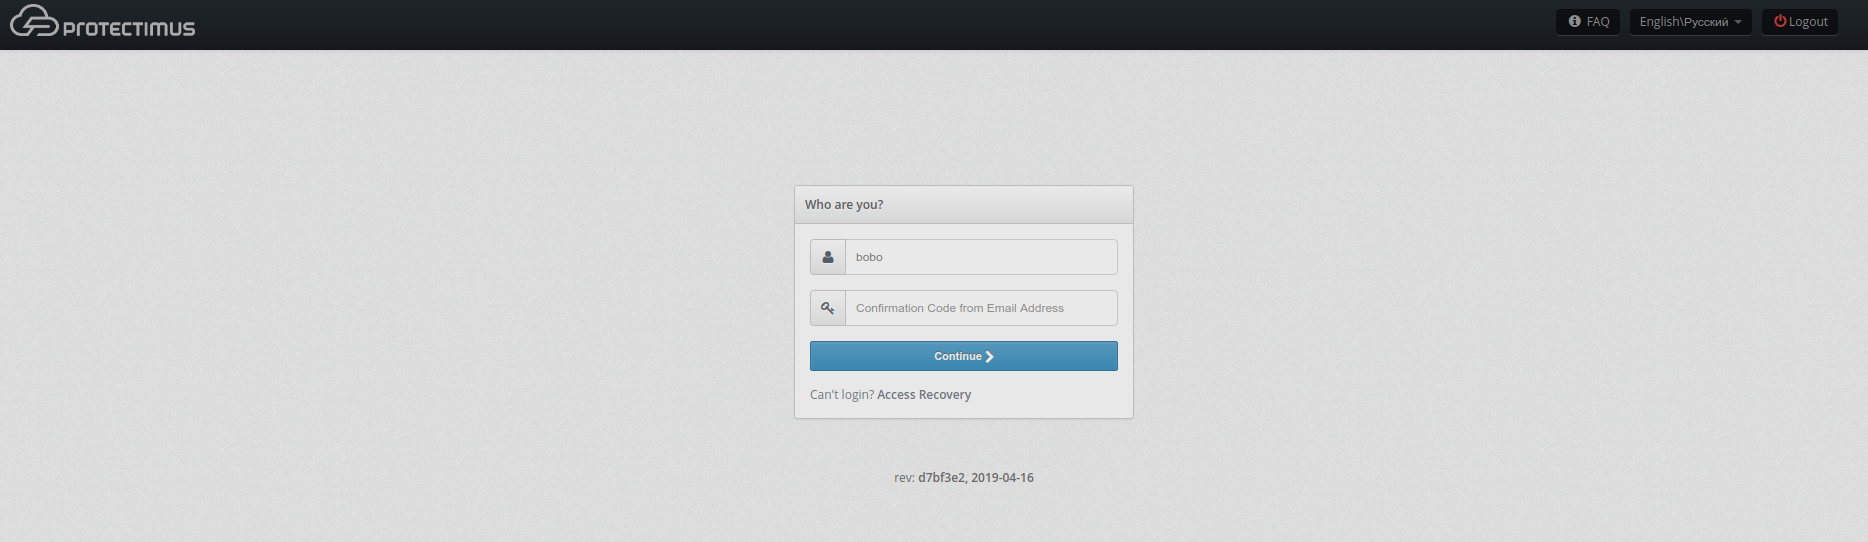
9.1. Authorization on the Users’ Self-Service Portal
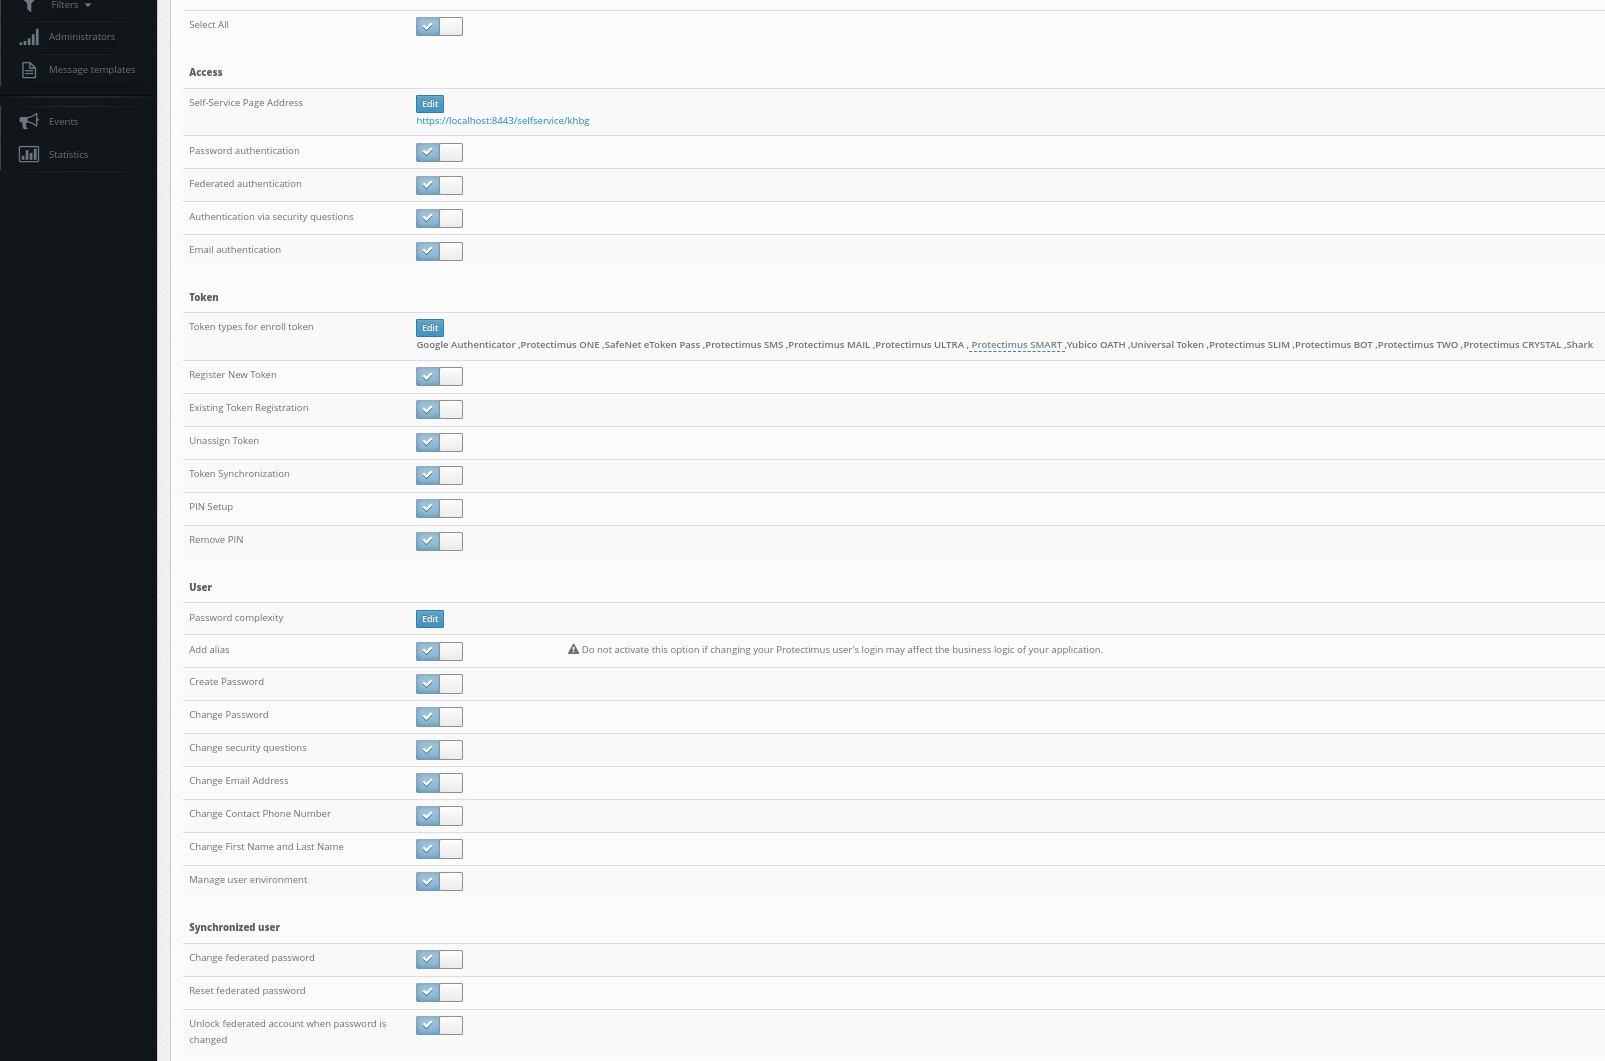
You can choose the authentication method your users will use to log into their self-service accounts. All available authentication methods are detailed
in this guide. Depending on the selected settings, the required authentication method will be applied.
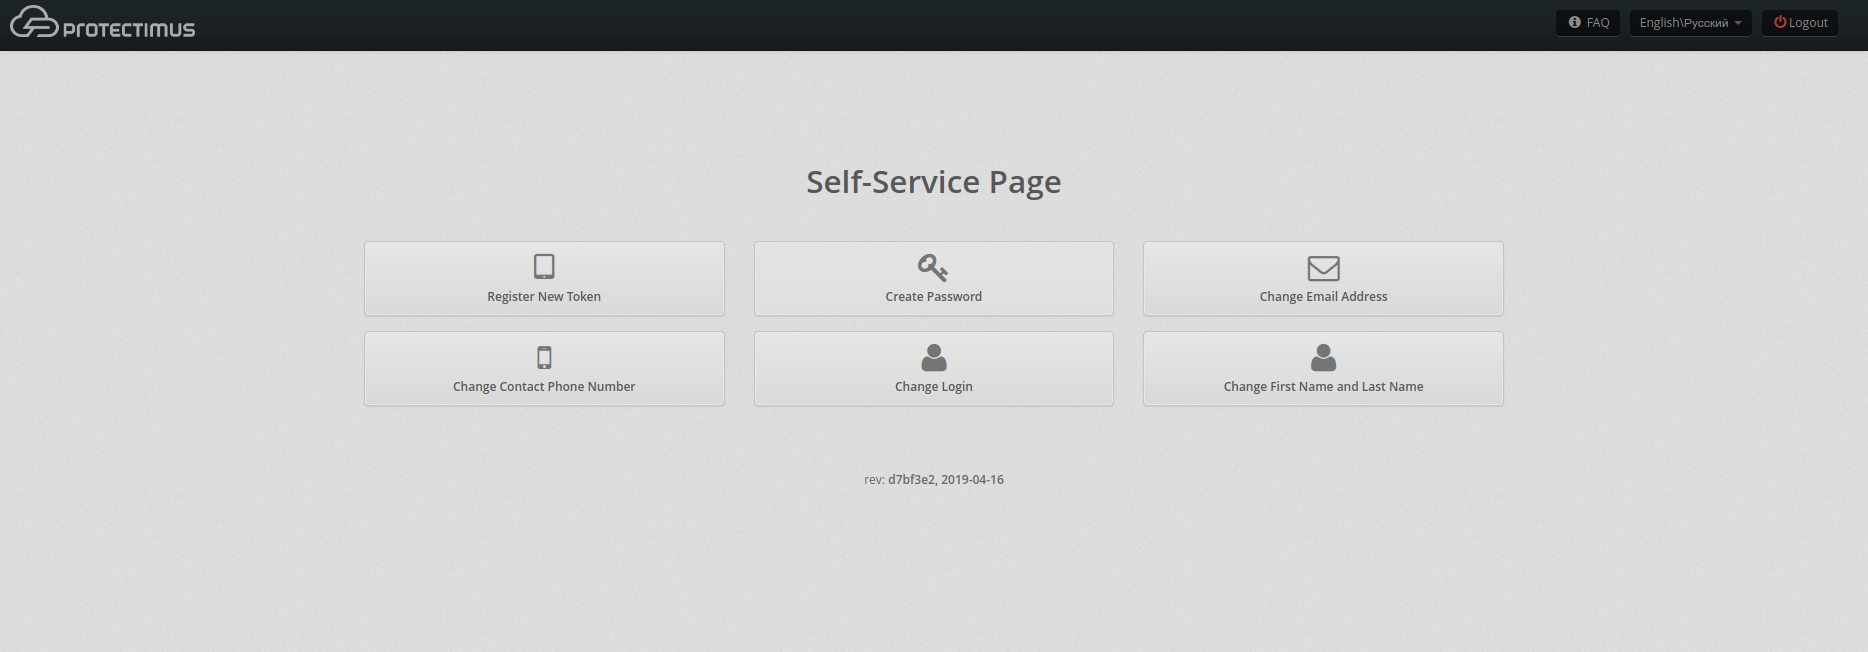
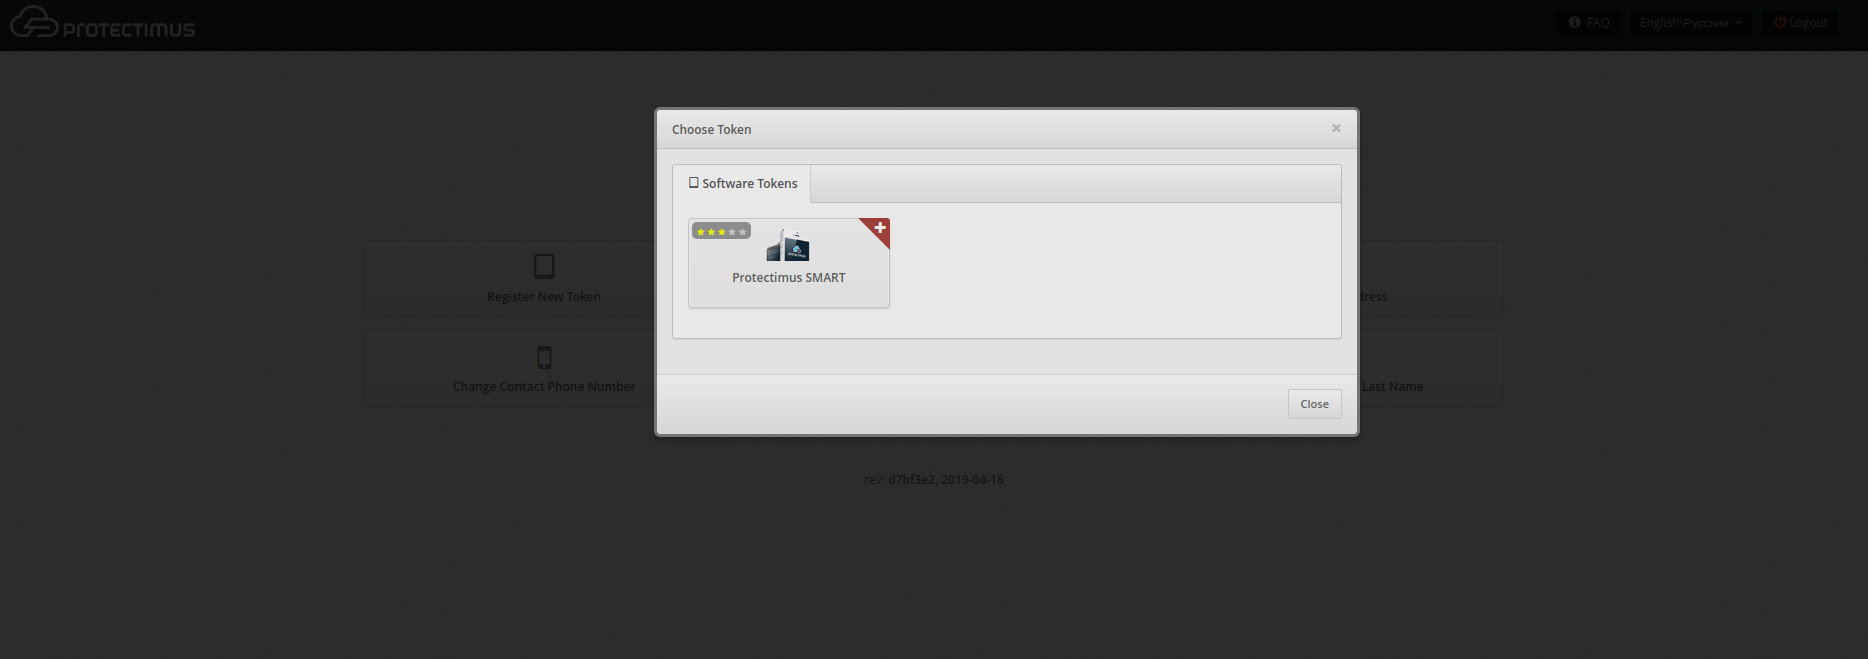
9.2. Enrolling the token Protectimus SMART OTP
- The user needs to choose the tab Register New Token -> Software Tokens -> Protectimus SMART.
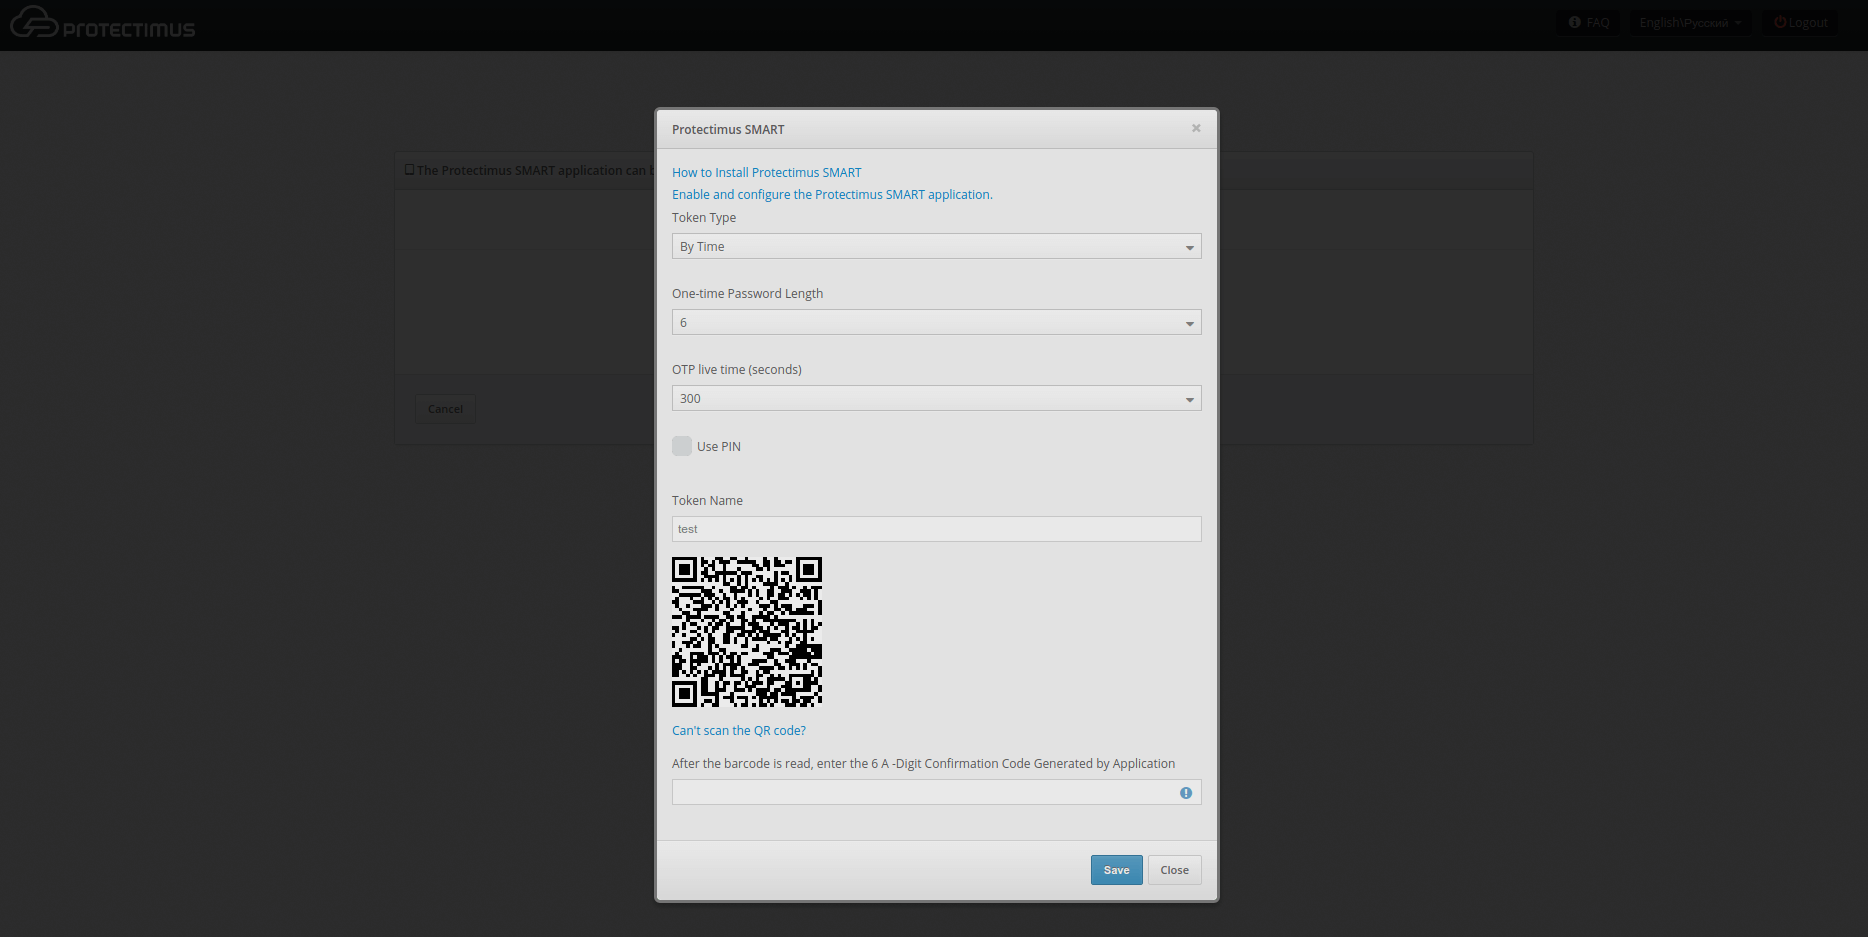
- After that the user needs to enter the name of the token, set the length of the one-time password, select the lifetime of the one-time password and click on the “Show QR code” button.
To create a token, the user should scan the QR code using the Protectimus SMART OTP application, having previously installed it on their smartphone. The Protectimus Smart OTP app is available for free on Google Play and the App Store.
And to finish the token enrollment, the user must enter the OTP code generated using the Protectimus SMART OTP application.
9.3. Creating a password
- The user should navigate to the Create Password tab in Self-Service.
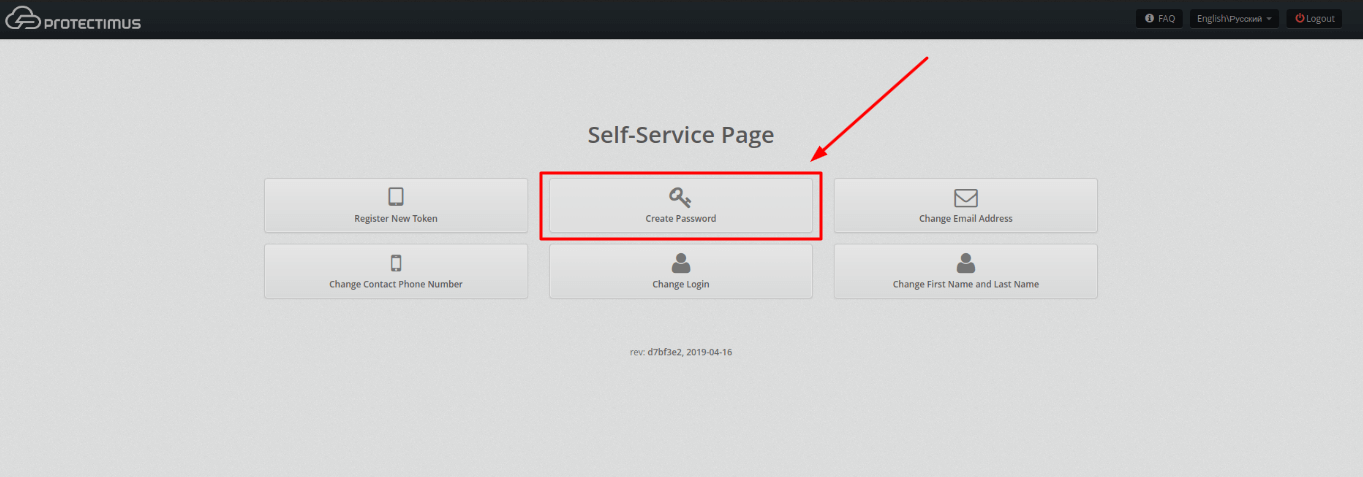
- The user should enter the password identical to their password in user directory.
