This guide shows how to enable two-factor authentication (2FA / MFA) for Palo Alto Networks VPN using the Protectimus Cloud 2FA Service or On-Premise 2FA Platform.
Protectimus integrates with Palo Alto GlobalProtect VPN via RADIUS authentication protocol to add two-factor authentication (2FA) to VPN logins.
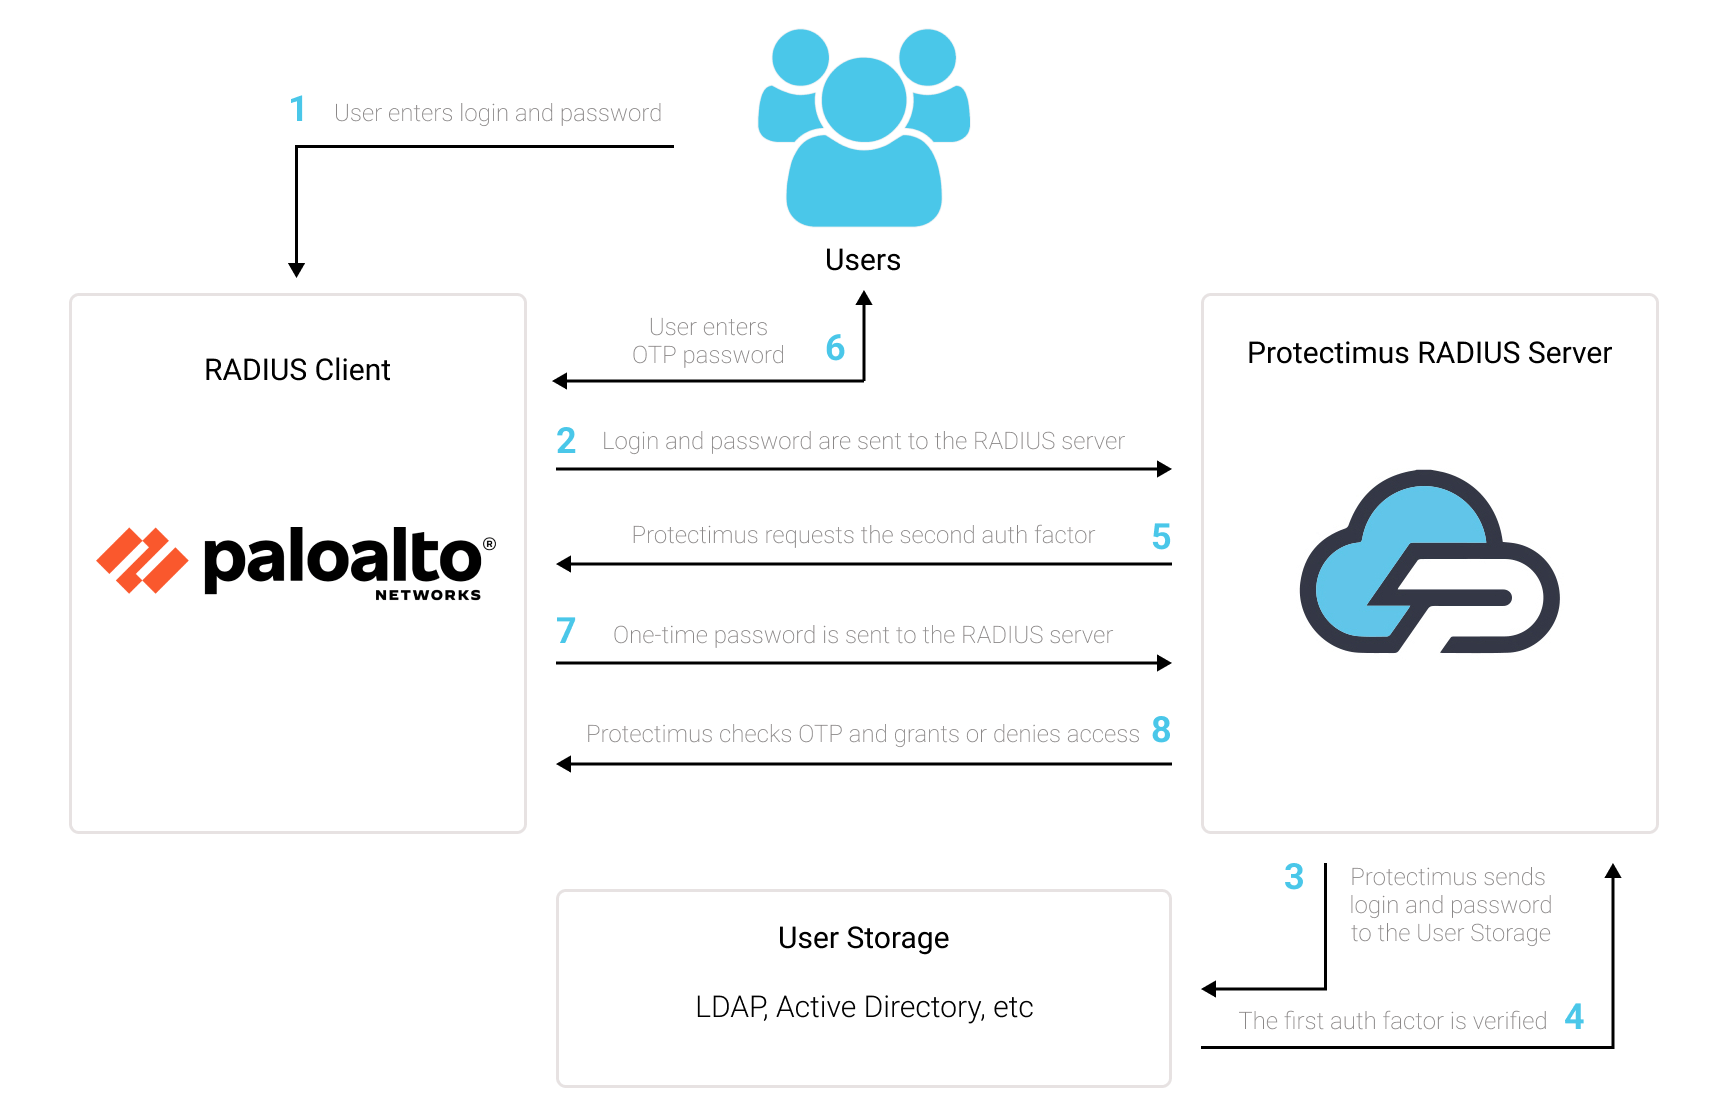
In this scenario, the Protectimus two-factor authentication solution for Palo Alto GlobalProtect VPN 2FA performs as a RADIUS server, and the Palo Alto Networks VPN takes the role of a RADIUS client. You will find the scheme of work of the Protectimus solution for Palo Alto Networks VPN two-factor authentication below.
Two-factor authentication (2FA), also known as multi-factor authentication (MFA), is a must-have security measure for Palo Alto GlobalProtect VPN. 2FA will protect Palo Alto GlobalProtect VPN logins from such threats as phishing, brute force, data spoofing, social engineering, keyloggers, man-in-the-middle attacks, etc.
And this is how two-factor authentication for Palo Alto GlobalProtect VPN works:
This way, to get access to the Palo Alto GlobalProtect VPN account protected with two-factor authentication, the fraudster has to get access to two authentication factors that differ in their nature. That is quite a challenging task. Moreover, a time-based one-time password remains active only for 30 seconds, which makes hacking way more complecated and almost impossible.
You can set up Palo Alto Networks VPN two-factor authentication (2FA) with Protectimus using the RADIUS protocol:
- Get registered with Protectimus SAAS Service or install the On-Premise 2FA Platform and configure basic settings.
- Install and configure Protectimus RADIUS Server.
- Configure Palo Alto Networks VPN authentication policies.
Choose your deployment option and complete the basic setup:
Protectimus Cloud Service
Protectimus On-Premise Platform
Detailed instructions for installing and configuring the Protectimus RADIUS Server for Palo Alto Global Protect VPN 2FA using RADIUS are available in our Protectimus RADIUS Server Installation Guide for Palo Alto Networks VPN 2FA.
PLEASE NOTE!
PAN-OS 7.x users must set the protocol in the CLI with this command:
set authentication radius-auth-type pap
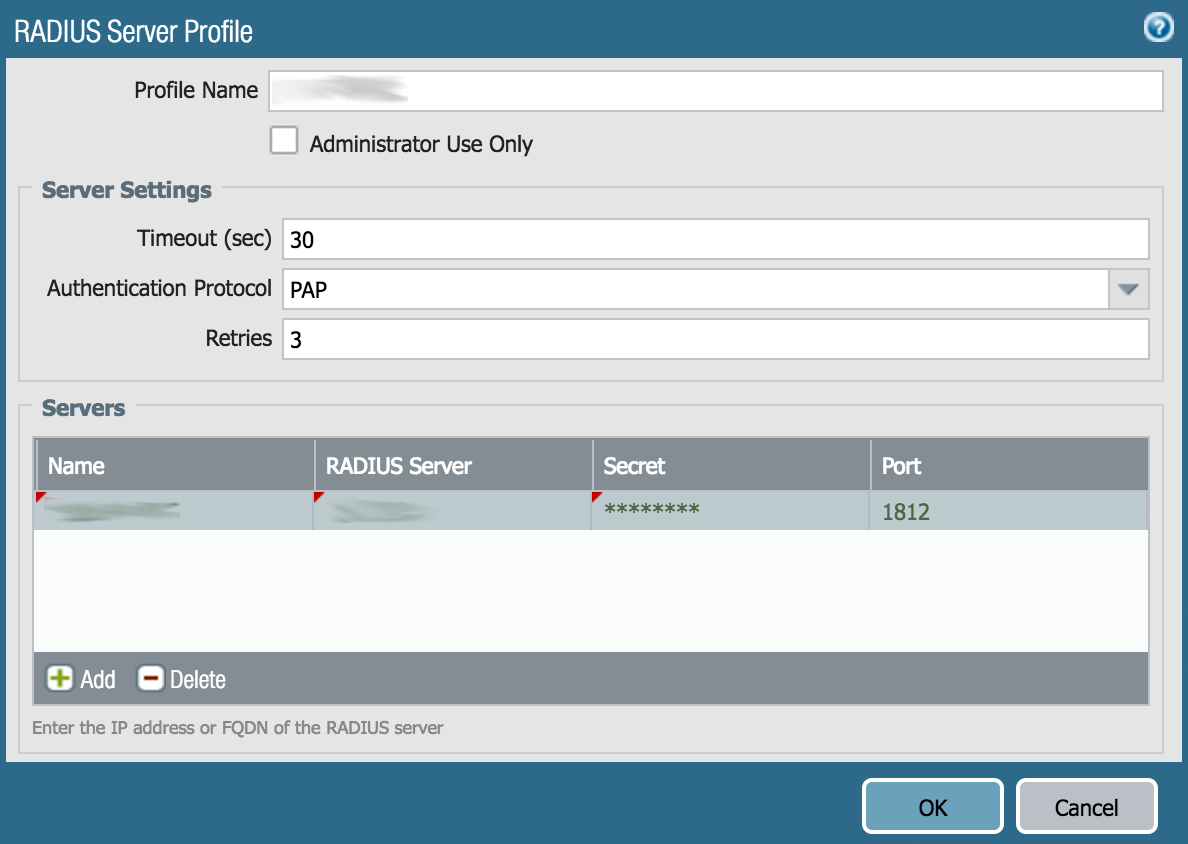
| Server | Type any name for your RADIUS server – enter Protectimus RADIUS or any other name you wish. |
| RADIUS Server | IP of server where the Protectimus RADIUS Server component is installed. |
| Secret | Indicate the shared secret you created in the Protectimus radius.yml file (radius.secret property) when configuring Protectimus RADIUS Server |
| Port | Indicate 1812 (or whichever port you configured in the Protectimus radius.yml file when configuring Protectimus RADIUS Server). |
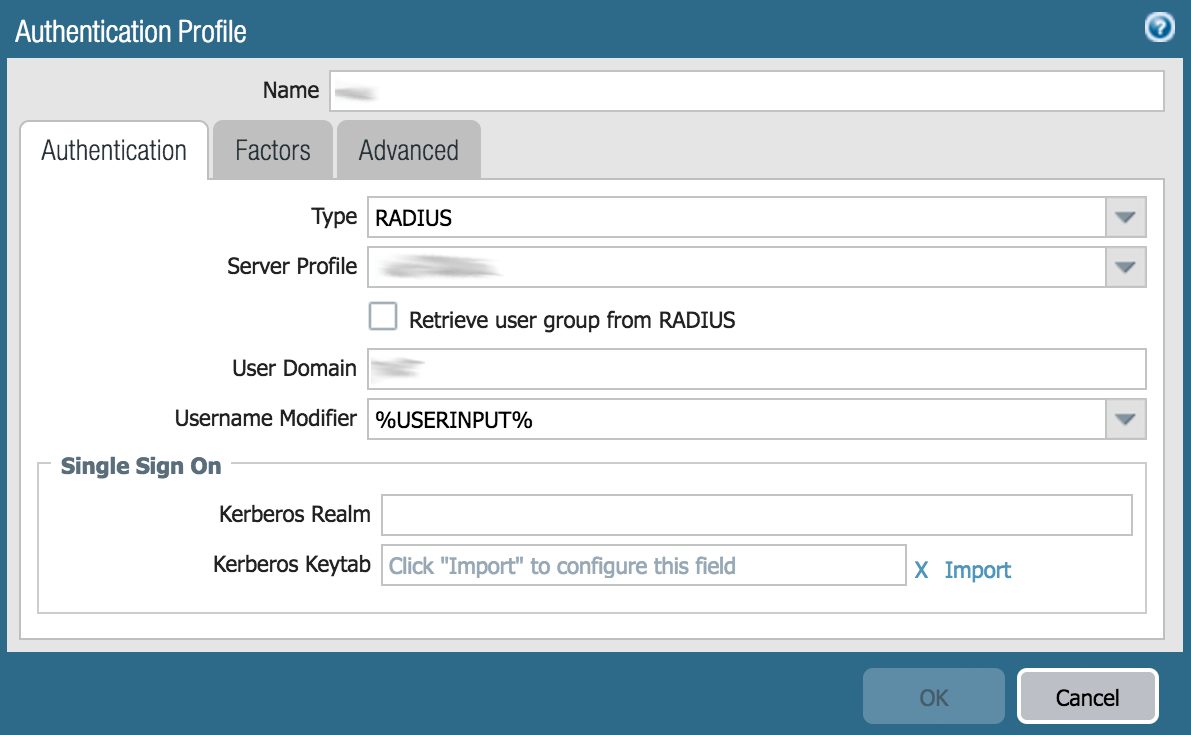
| Name | Type PROTECTIMUS ot choose any name you wish. |
| Type | Select RADIUS from the drop-down list |
| Server Profile | Select Protectimus RADIUS from the drop-down list (or whatever name used to create the RADIUS Server Profile in Step 2.3.) |
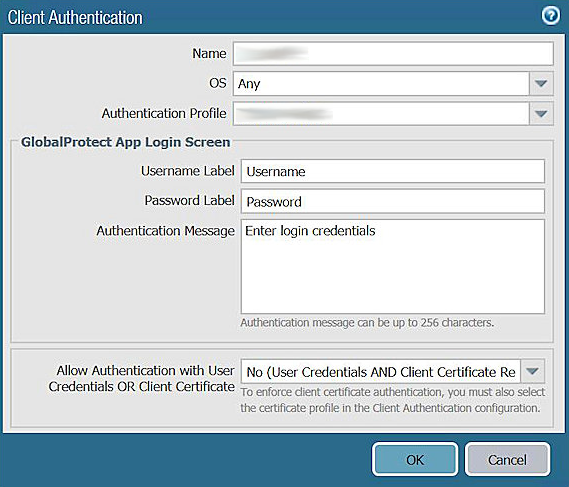
You can configure multiple client authentication configurations for the Palo Alto GlobalProtect portal and gateways. For each client authentication configuration, you can specify the Authentication Profile to apply to endpoints of a specific OS.
This step describes how to add the Authentication Profile to the Palo Alto GlobalProtect VPN portal or gateway configuration. For additional details on setting up these components, see the PaloAlto Networks documentation on GlobalProtect Portals and GlobalProtect Gateways.

| Name | Enter any descriptive name you wish. |
| OS | Any |
| Authentication Profile | Select the Authentication Profile you have created in Step 2.4. |
Integration of two-factor authentication (2FA/MFA) for your Palo Alto Networks VPN is now complete.
If you have other questions, contact Protectimus customer support service.