Protectimus two-factor authentication (2FA) system supports an SP (Service Provider) initiated Single Sign On (SSO).
This means that your end-users will have the ability to sign into their accounts directly from the protected resource login page. When the end-user tries to sign into a protected resource, an authorization request is sent to the Identity Provider (Protectimus). Once the Protectimus authenticates the user’s identity, the user is logged into their account in the protected resource.
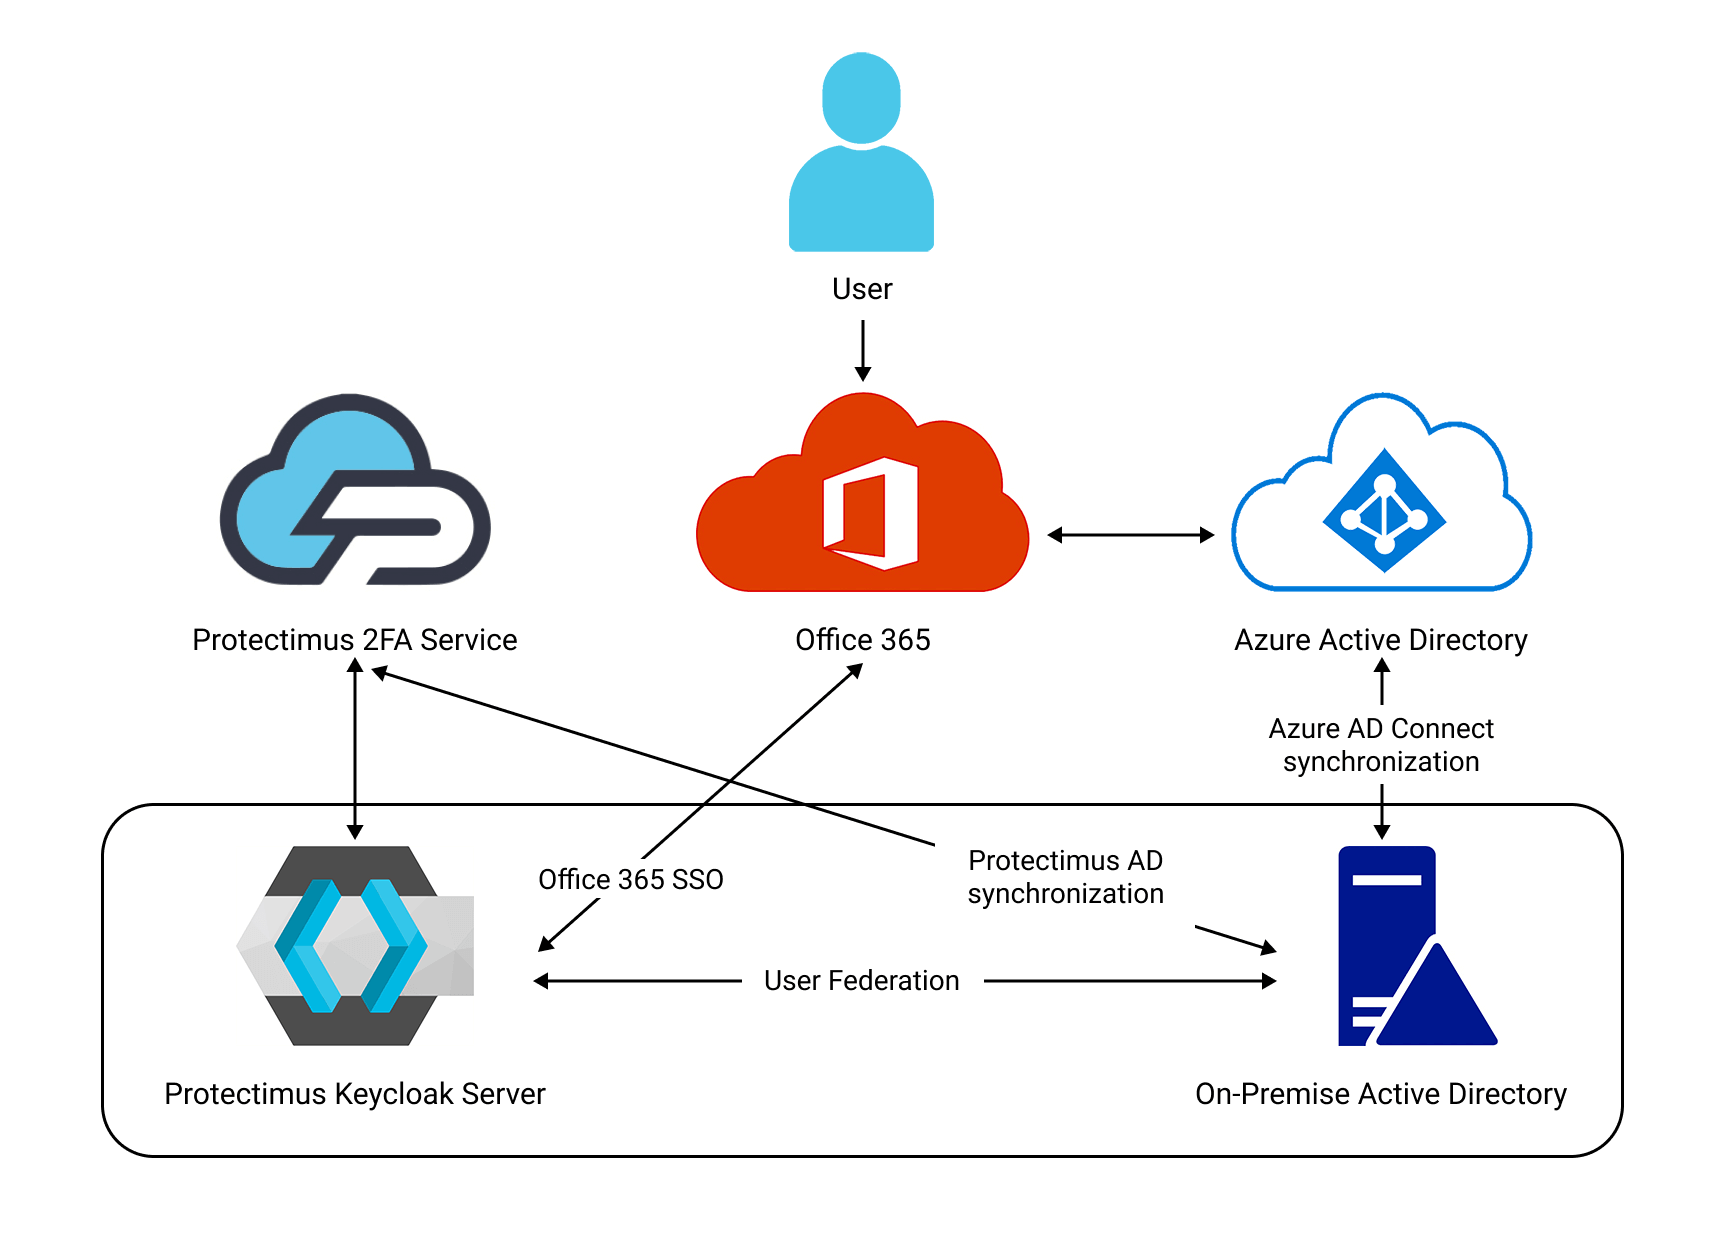
A scheme of interaction of Protectimus On-Premise Two-Factor Authentication Platform with Microsoft Office 365 through Keycloak is presented below.
Choose your deployment option and complete the basic setup:
Admin -> Show all -> Azure Active Directory -> Custom domain names -> “Add custom domain”
In DNS, you need to create a TXT record to confirm adding a domain to Azure AD.
https://www.microsoft.com/en-us/download/details.aspx?id=47594
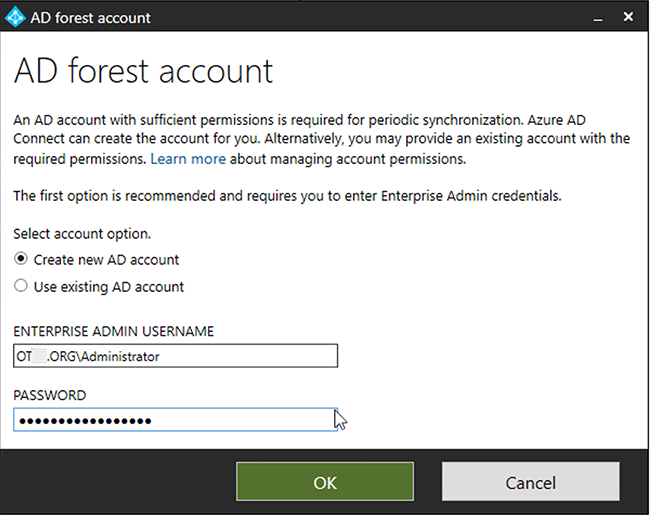
Continue -> Customize -> Install (No checked options) -> Password Hash Synchronization -> Next -> Connect to Azure AD:
username@[something].onmicrosoft.com pass:
Next -> Add Directory -> domain
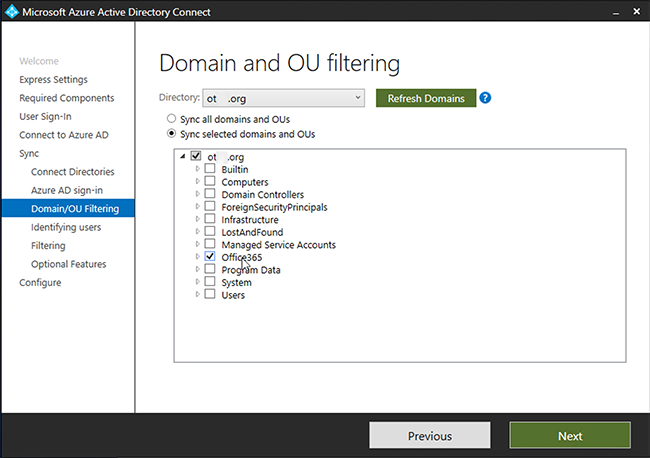
You can create a separate Organizational Unit (OU) for users whose accounts must be protected with two-factor authentication and set up synchronization only for this OU. Every User in this OU must have an email, it will be used as a UPN (User Principal Name).
(Check the image below) ↓
Next -> Next -> Sync Selected Domain
Next -> Next -> Next -> Exit.
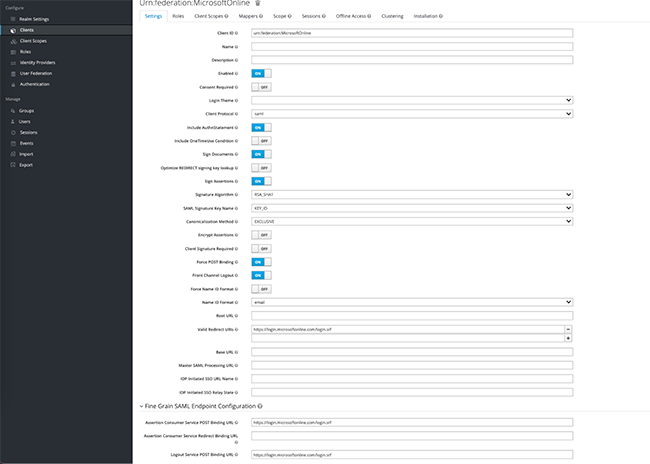
Add Realm, for example, name it Office365.
Add Mapper:

ATTENTION! It is important to name the file: “urn:federation:MicrosoftOnline”
First of all, you need to get a SAML certificate and check it using this URL:
https://kc.dev.protectimus.com/auth/realms/[realm name]/protocol/saml/descriptor
Or check the certificate using the corresponding feature in the interface – SAML keys.
If you’ll be asked about NuGet and PSGallery – install them too.
Execute the following script:
# get the public key certificate from keycloak
# https://kc.dev.protectimus.com/auth/realms/2608/protocol/saml/descriptor
# see X509Certificate
$cert="MIICoTCCAYkCBgF3Y+nVLjANBgkqhkiG9w0BAQsFADAUMRIwEAYDVQQDDAlvZmZpY2UzNjUwHhcNMjEwMjAyMTgwMTQ0WhcNMzEwMjAyMTgwMzI0WjAUMRIwEAYDVQQDDAlvZmZpY2UzNjUwggEiMA0GCSqGSIb3DQEBAQUAA4IBDwAwggEKAoIBAQC3eE+GuP2ubqH0C2sceb1iBsPr5LNIK0dtW67CQPL2tLM0YlRAFXu2sWRMKwPl8ZULvMzufA855j0Chd5KX1izVi8c6fclqge+OB9iMB05Ew/zGb8zmCXETgVU9+lsQFchd8M/I/i0QKKOatIbP50t9SKJI5daX78wb/IVk2pexB76cqXaQrrddh9ksXo3OFyFpAk1xlCC9Nu77QLCPWK4fBnSEbnzxDP3ZMhPXMQsn3MbD1SHGmHmJ93wMeXFGGIU77aDI/uAYZj1tb7dj/aICqG8RpUVXEolf8BDH/nT2TonYSmMaSqd99wCNJaKJWpyPd2qid7118DtOyPzZza/AgMBAAEwDQYJKoZIhvcNAQELBQADggEBAFglY4CdTJkGTL7/YUY1uBhSTSGvtbv6GiQ+2Uox3JVNVECB1Za63mUU1tTC/r4Jp02jRnTtBfSR7Sra+HDIKgAOkwcVTh2P++i1bk7PiY1Rb2ePrBtXWnb0GC8qCLAOK7b2/y9E1K5Wjg2Qg1dxnNZFys8CLpHkkYwMwChJA6E8DMg/bWUYfighBo4mAUpORAwqkmEB2mC39VbWZAUyBysQ5Cb9xK8RWnOgj7XhZfhpihK815z+uwirQjOFmGhWs2Mxk9PHkPkCFeWdcGGoRPvBuVYaG5/MrWu5hqQFtiu4ZDsySEnBdUqfudD6Iorc6QHVYf6VCunSIdE9L9sIovs="

$uri="https://kc.dev.protectimus.com/auth/realms/Office365/protocol/saml"
$issuer_uri="https://kc.dev.protectimus.com/auth/realms/Office365"
$dom="yourdomain.com"

$cred = Get-Credential
Connect-MsolService -Credential $cred

Set-MsolDomainAuthentication -DomainName $dom  -Authentication Federated -ActiveLogOnUri $uri -SigningCertificate $cert -PassiveLogOnUri $uri -IssuerUri $issuer_uri -LogOffUri $uri -PreferredAuthenticationProtocol SAMLP
You can check if the operation has been performed successfully:
Get-MsolDomainFederationSettings -DomainName domain.nameExecute the following script:
$dom="yourdomain.com"
Set-MsolDomainAuthentication -DomainName $dom -Authentication managed
Everything is ready, open office365.com and try to log in with an account from AD.
If you have other questions, contact our customer support service.