With Protectimus multi-factor authentication (MFA) solution, you can set up Ubuntu two-factor authentication (2FA) in a few steps and securely protect your Ubuntu users’ accounts from unauthorized access.
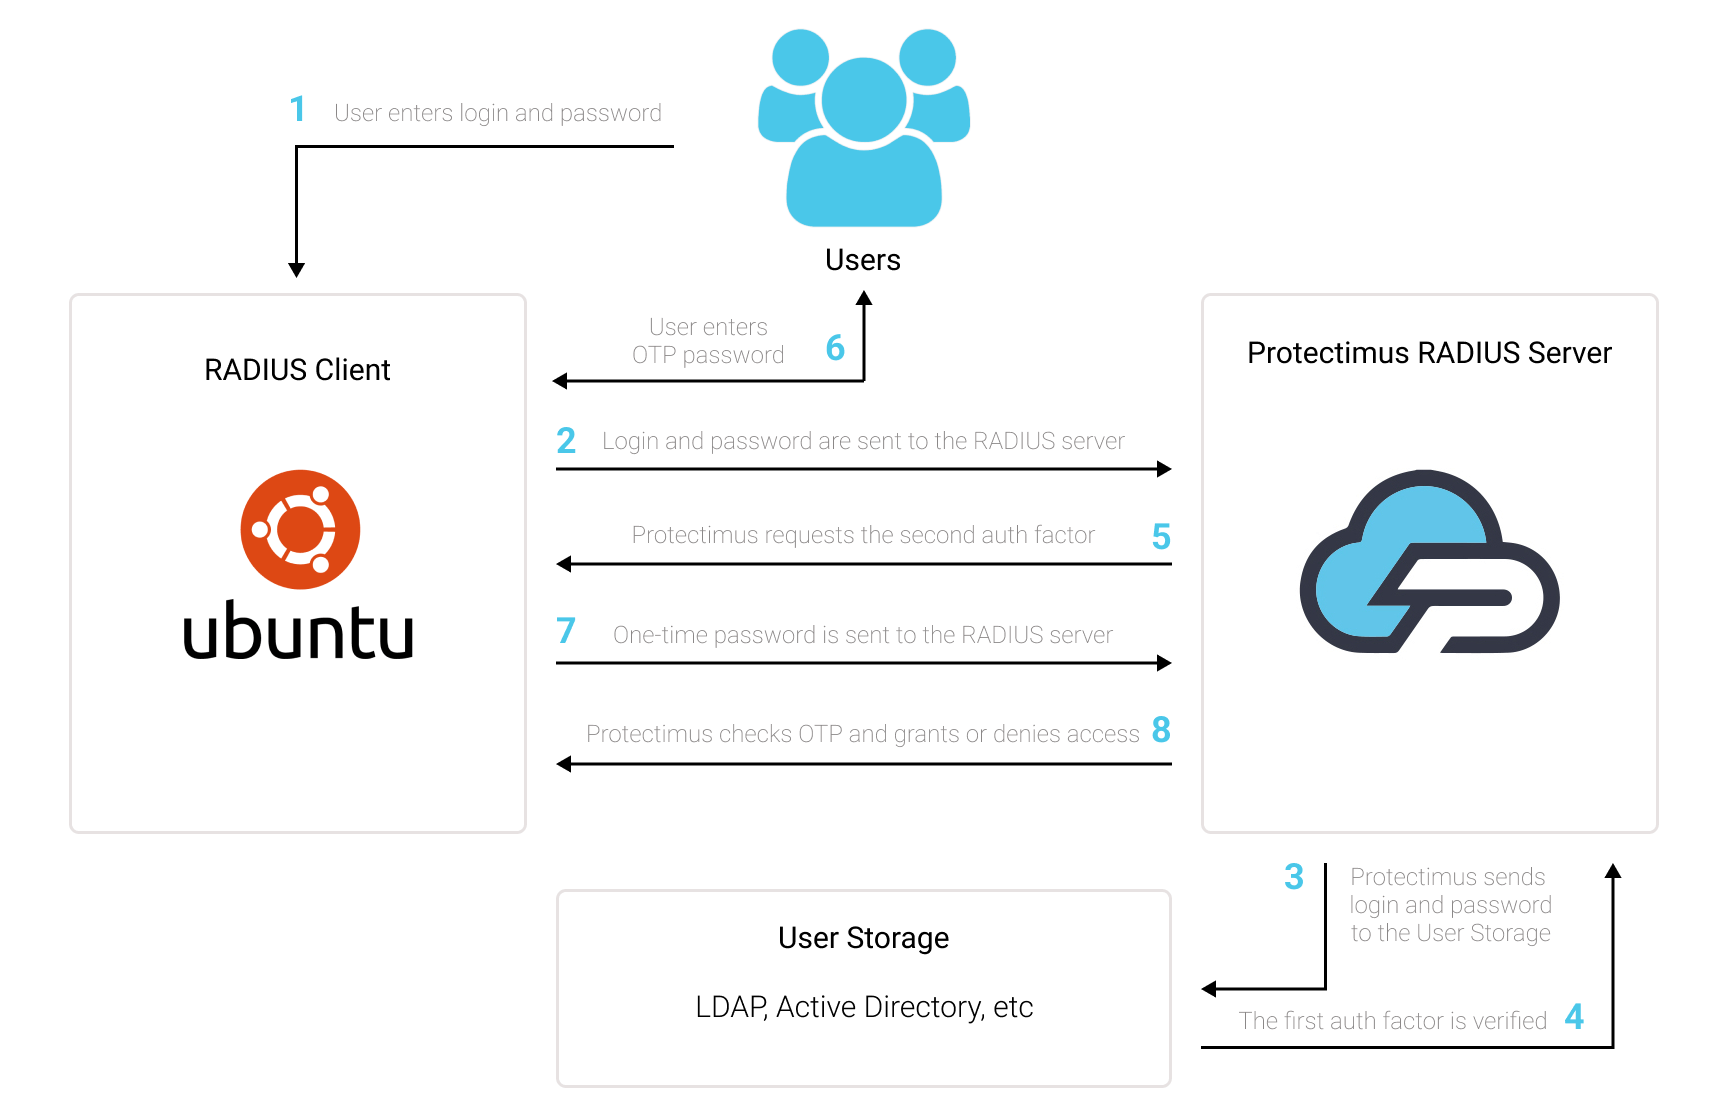
After you enable Ubuntu two-factor authentication, your users will enter two different authentication passwords at the same time to get access to their Ubuntu accounts:
This way, the Ubuntu account becomes protected with two different authentication factors. Even if the hacker steals the one-time password using phishing, brute force, social engineering, data spoofing, or any other way, they can’t get access to the Ubuntu account without the one-time password from a user’s 2FA token.
This guide shows how you can set up Ubuntu two-factor authentication (2FA) using Protectimus RADIUS 2FA component for the integration with Protectimus Cloud 2FA service or Protectimus On-Premise MFA Platform.
You can set up Ubuntu two-factor authentication (2FA) with Protectimus using the RADIUS protocol:
- Get registered with Protectimus SAAS 2FA Service or On-Premise 2FA Platform and configure basic settings.
- Install and configure Protectimus RADIUS Server.
- Configure Ubuntu Settings.
Choose your deployment option and complete the basic setup:
Protectimus Cloud Service
Protectimus On-Premise Platform
Detailed instructions for installing and configuring the Protectimus RADIUS Server are available in the Protectimus RADIUS Server Installation and Configuration Guide.
apt install libpam-radius-auth
vim /etc/pam_radius_server.conf
# server[:port]	shared_secret  	timeout (s)
127.0.0.1      	secret         	1
IMPORTANT! Use your platform IP instead of 127.0.0.1
vim /etc/sshd/sshd_config
ChallengeResponseAuthentication yesvim /etc/pam.d/ssh
# Standard Un*x authentication.
@include common-auth

auth required pam_radius_auth.sovim /etc/pam.d/ssh
# Standard Un*x authentication.
#@include common-auth

auth	required	pam_radius_auth.so
/etc/pam.d/gdm-password
auth required pam_radius_auth.soIf you have other questions, contact our customer support service.