Implement Wi-Fi SMS Authentication (Ubiquiti UniFi Controller SMS Authentication) by setting up a Unifi Captive Guest Portal secured with Protectimus Unifi Guest Portal Server. This solution seamlessly integrates with the Ubiquiti UniFi Controller, enabling you to protect your Wi-Fi network through SMS authentication. You have the flexibility to choose any SMS provider that suits your preferences.
Here’s how the Wi-Fi SMS authentication process works after configuring the guest portal with the Ubiquiti UniFi Controller and connecting it to Protectimus:
For security and administrative purposes, the Protectimus server meticulously logs all user inputs in CSV format. The recorded data includes the user’s MAC address, the access point’s MAC address, the assigned IP, and the phone number provided during authentication. Depending on your requirements, you can configure the data storage period to meet your specific needs. Note that in most countries, data retention for a minimum of 6 months is typically required.
You have the option to install the On-Prem Protectimus Authentication Platform on your hardware on-premises or utilize the convenience of the Protectimus Cloud Service. Either way, you can ensure a robust and reliable Wi-Fi SMS authentication solution for your network.
docker-compose up -ddocker-compose logs -fhttps://localhost:8080If you are unable to use the Docker Image for any reason, please get in touch with our support team, and we will assist you with the installation.
The Protectimus Unifi Guest Portal Authentication Server settings can be configured by specifying them in the guest-portal.all.yml file, which must be located in the same directory as the executable.
Available properties that you should add to the guest-portal.all.yml file include:
server:
  port: 8888
  ssl:
	enabled: true
	key-store-type: PKCS12
	key-store: classpath:keystore/guest-portal.p12
	key-store-password: password
key-alias: guest-portal| PROPERTY NAME | PROTERTY STANDS FOR |
|
The port where the Protectimus Unifi Guest Portal Authentication Server will run. |
|
If you would like to import your own trusted SSL certificate, this property allows you to configure the SSL certificate settings, which include the keystore type, keystore path, keystore password, and key alias. |
unifi:
  cookie-expiration-time: 30000
  base-url: https://localhost:8443
  username: admin
  password: admin
  sites-verification-enabled: true
  sites:
	- default
  session:
	duration-minutes: 90
	download-speed: 2048
	upload-speed: 640
	quota: 4096
redirect-page: https://www.google.com| PROPERTY NAME | PROTERTY STANDS FOR |
|
Allows setting cookie expiration time. |
|
The UniFi Controller URL. |
|
The username of the Unifi Controller administrator. |
|
The password of the Unifi Controller administrator. |
|
Allows restricting access to the portal from the specified websites. |
|
UniFi Controller sites (fundamental organizational unit that allows you to manage and monitor your UniFi network devices and clients.) |
|
This property allows you to set session settings, including the maximum duration of the session, upload and download limits, and data quota amount. |
|
This is the URL that the client is attempting to open after successful authentication on the guest portal. In this instance, it is https://www.google.com. These types of URLs are commonly used to test internet connectivity or to redirect to a specific webpage after the authentication process. |
protectimus-api:
  login:
  api-key:
  url: https://api.protectimus.com/
resource-id: | PROPERTY NAME | PROTERTY STANDS FOR |
|
Your login in the PROTECTIMUS system. |
|
Your API key in the PROTECTIMUS system. |
|
If you are using the PROTECTIMUS cloud service, specify the following API URL: https://api.protectimus.com/ If you are using the Protectimus on-premise platform, the API URL will be something like: protectimus.api.url=http://127.0.0.1:8080/ |
|
ID of the resource that you created in the PROTECTIMUS system. |
report:
  csv:
	params:
  	- action
  	- id
  	- ip
  	- ap
  	- ssid
  	- time
  	- phoneNumber
	date-format: 'yyyy-MM-dd HH:mm:ss z'
zone-id: UTC| PROPERTY NAME | PROTERTY STANDS FOR |
|
Indicates that the report will be stored in CSV format. |
|
You can specify the parameters you wish to save about your guest logins. The available options include:
|
|
The date format as it should be displayed in the report (e.g., Unix). |
|
Time zone ID. |
server:
  port: 8888
  ssl:
	enabled: true
	key-store-type: PKCS12
	key-store: file:guest-portal.p12
	key-store-password: password
	key-alias: guest-portal

unifi:
  base-url: https://localhost:8443
  username: admin
  password: admin
  sites:
	- default

protectimus-api:
  login: test@protectimus.com
  api-key: secret
  url: https://api.protectimus.com/
  resource-id: 1

logging:
  level:
com.protectimus: INFOCreate a new User Group before setting up the Guest Network. Creating the user group enables you to define upload and download limits specifically for the guests, giving you greater control over the network usage.

Now you need to set up a special wireless network for your guests, called the Guest Network. This network will have some important rules to follow:
To create a Guest Network:
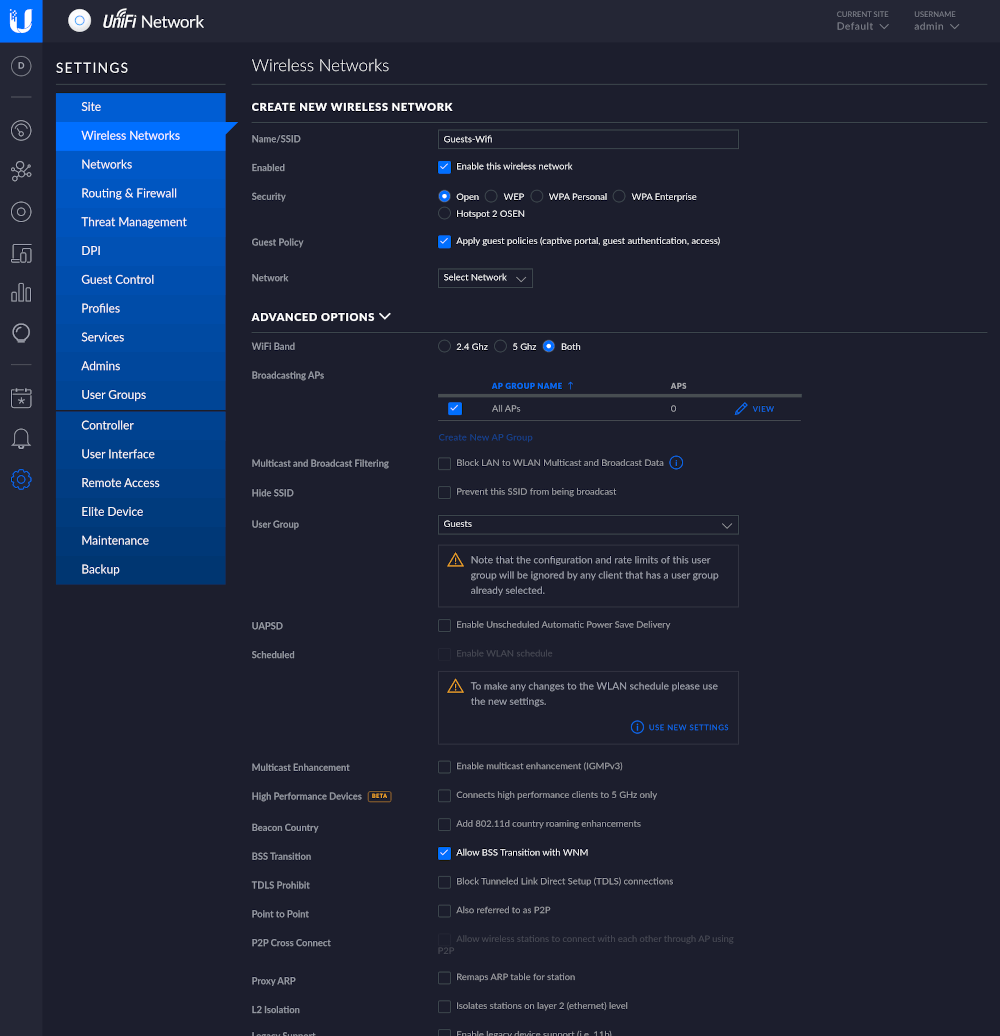
You’ve successfully set up the Guest Network. Now you need to Configure the Captive Portal.
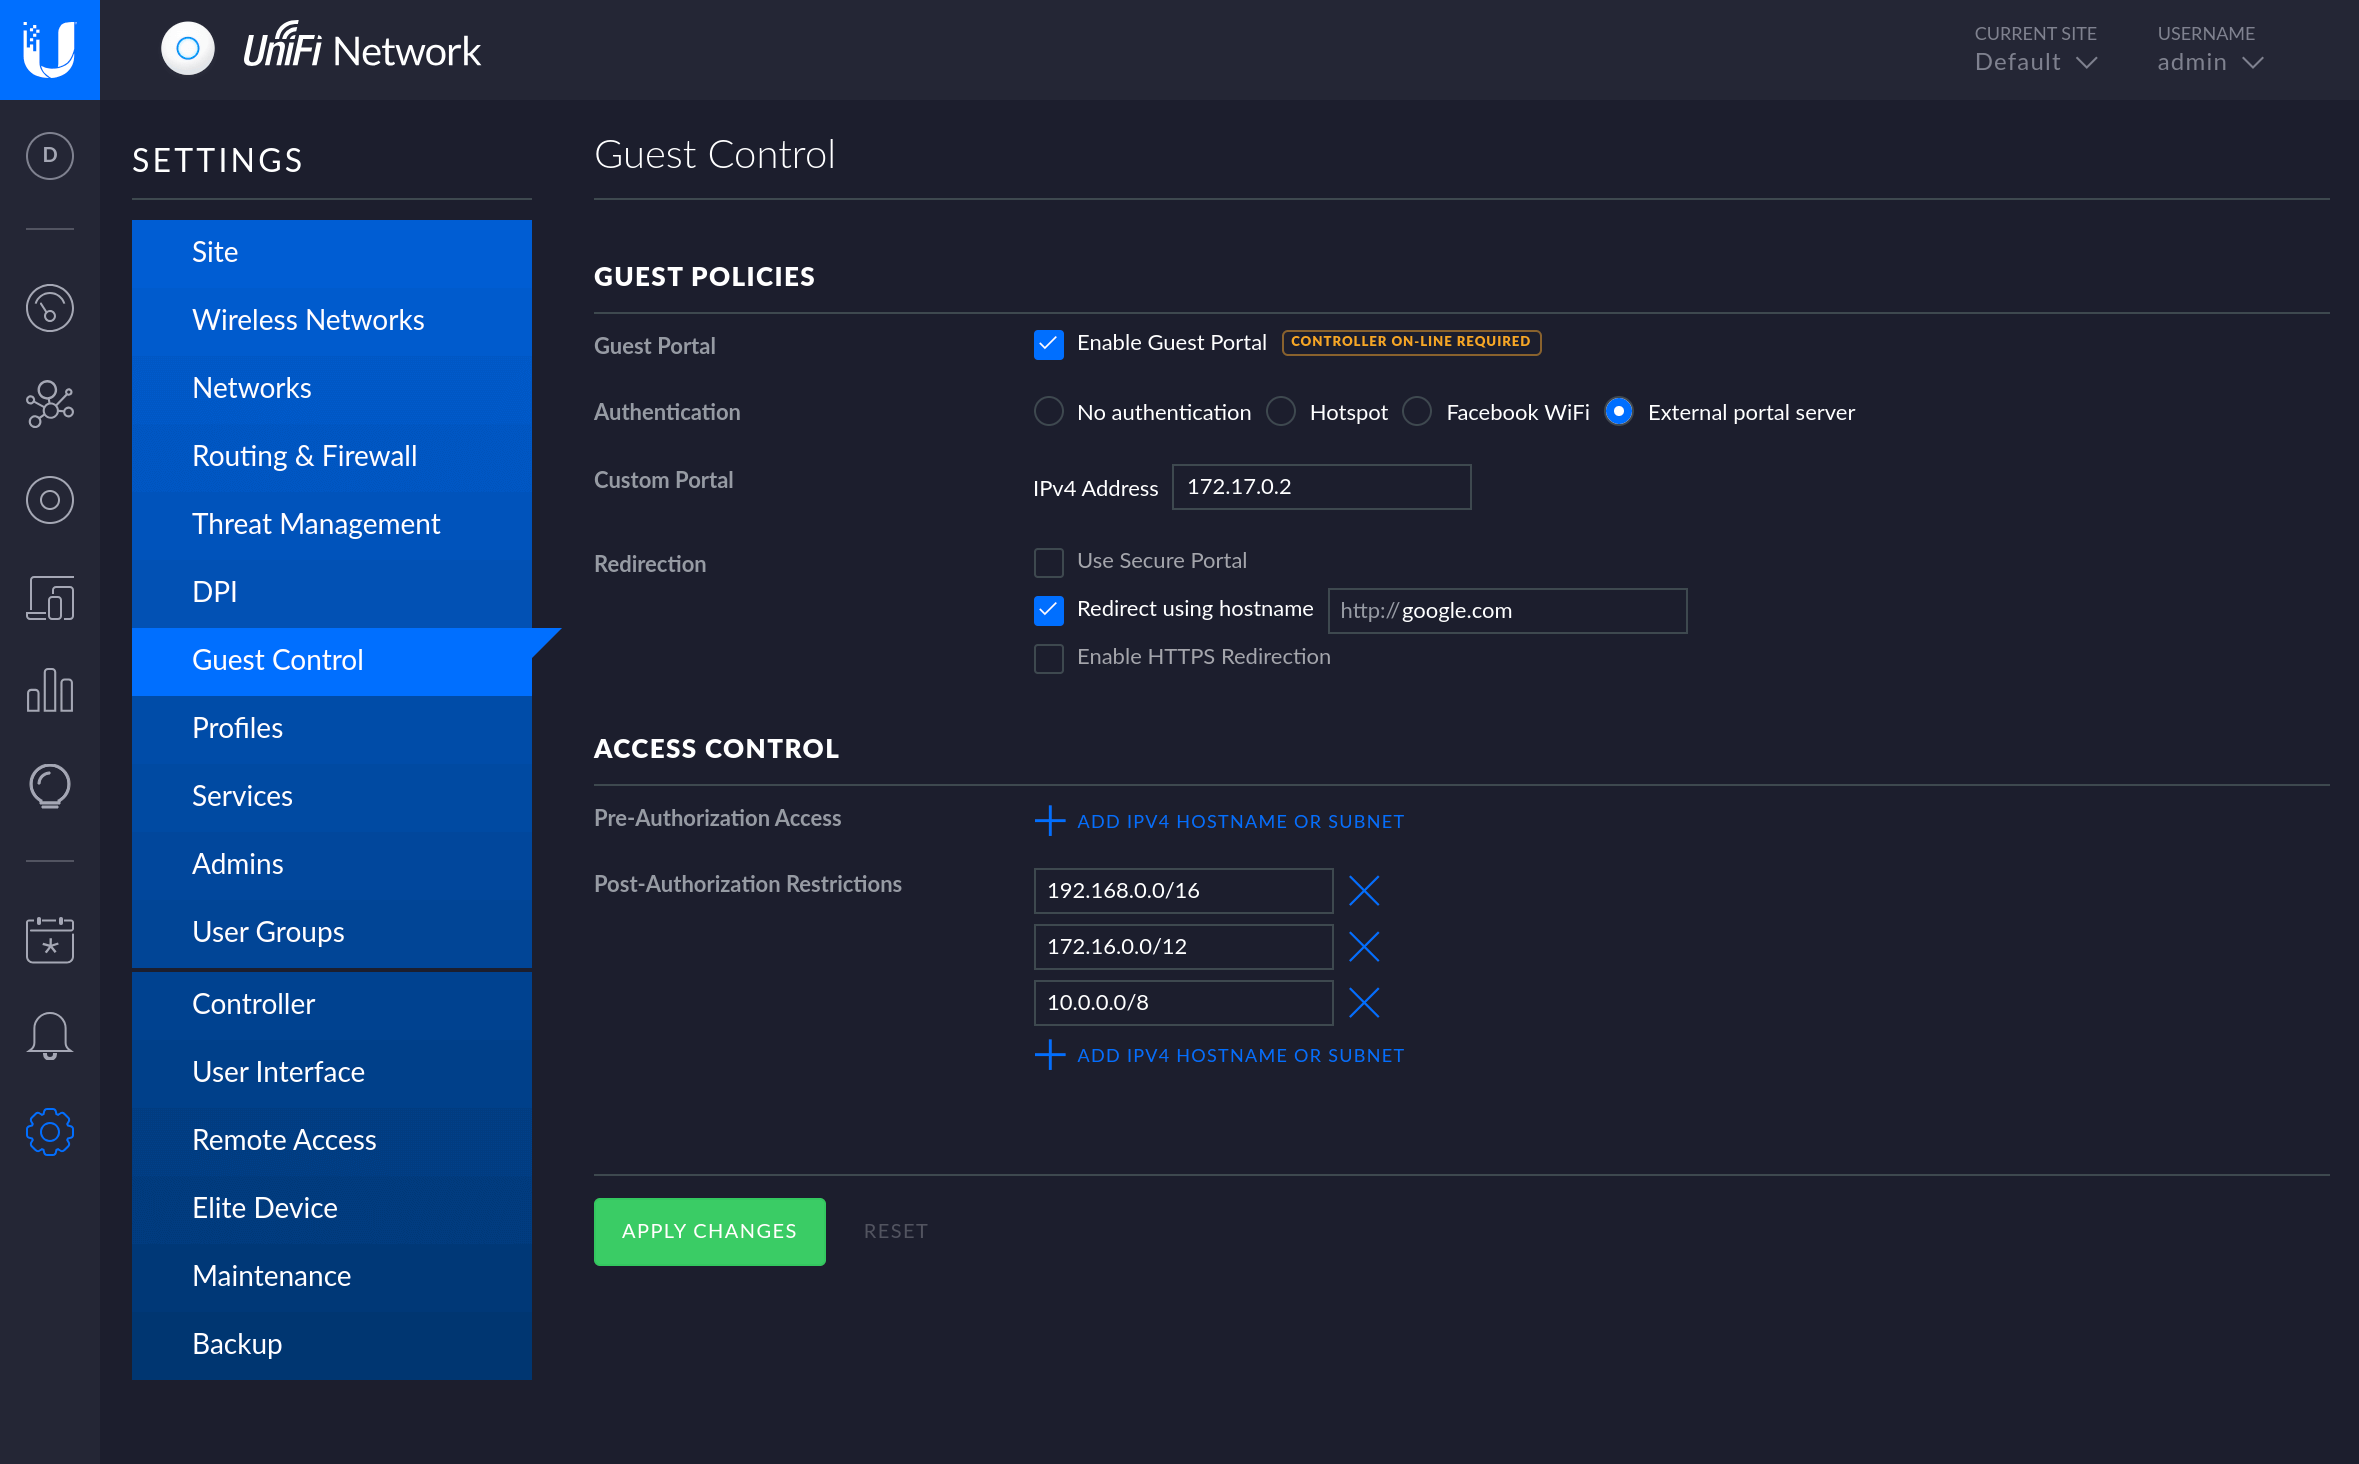
In the Unifi Controller, head to the Guest Control section where you can easily create the Guest Portal and configure the authentication method and access duration.
Set up the Guest Policies as shown in the image below.
If you have other questions, contact our customer support service.