Guides
Collapse SaaS Service

User Management in SaaS MFA Service: Complete Step-by-Step Guide

In Protectimus SaaS MFA Service, Users can only be added manually.

The number of Users you can add depends on your selected Service Plan. To add more Users, upgrade or customize your Service Plan accordingly.
1. How to Add Users


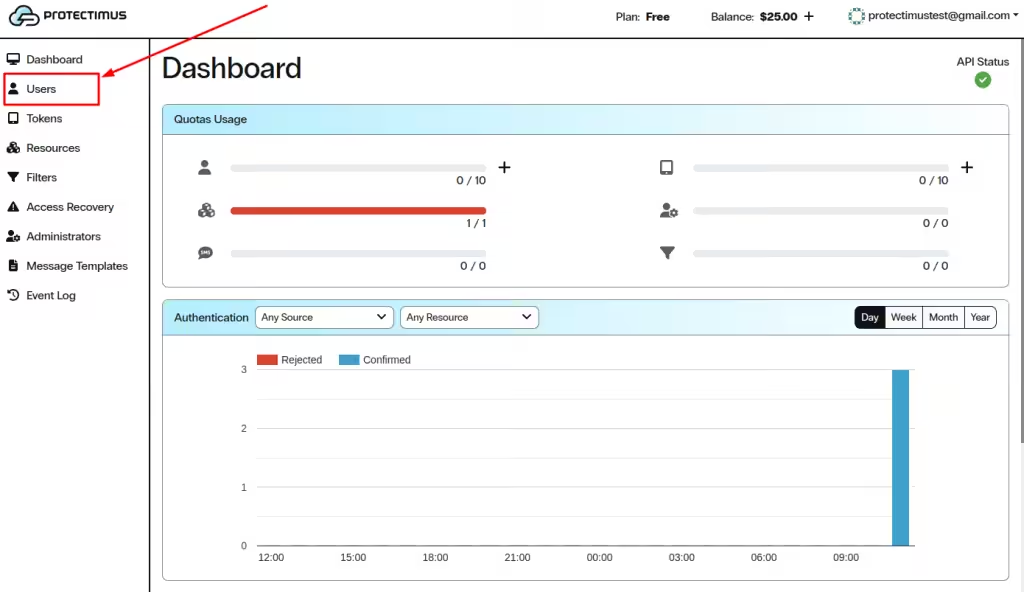
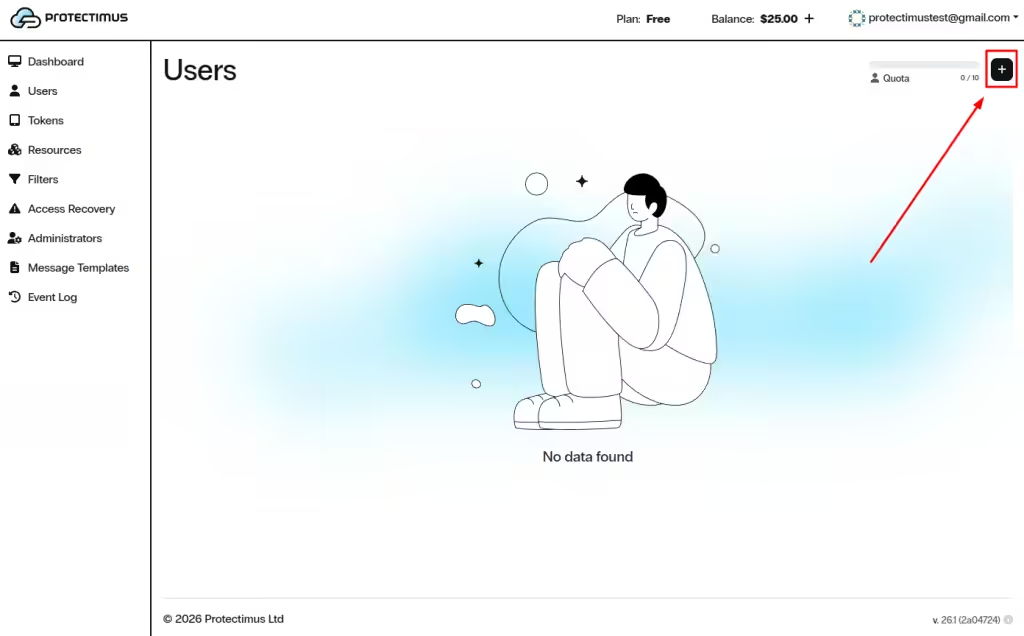
  1. Log in to your Protectimus SaaS Service account and go to the Users page.

Go to the Users page
  1. Click the + (Create User) button in the upper right-hand corner.

Click the + (Create User) button
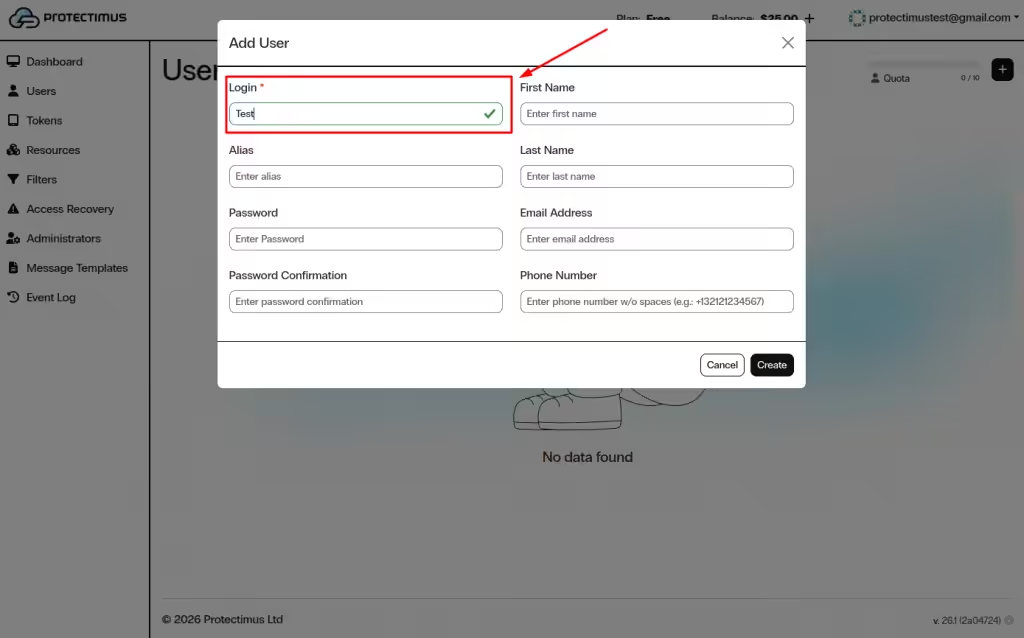
  1. Enter the User Login. Other parameters are optional.The Login may contain only Latin letters, numbers, and the following symbols: _ – @ ∽ ! # % + . $. Spaces and other symbols are not allowed.
    Click Create.

Specify the user Login
Note: If a User needs to authenticate in two systems using the same Token, create a User Alias with a different username. The alias will use the same Token.
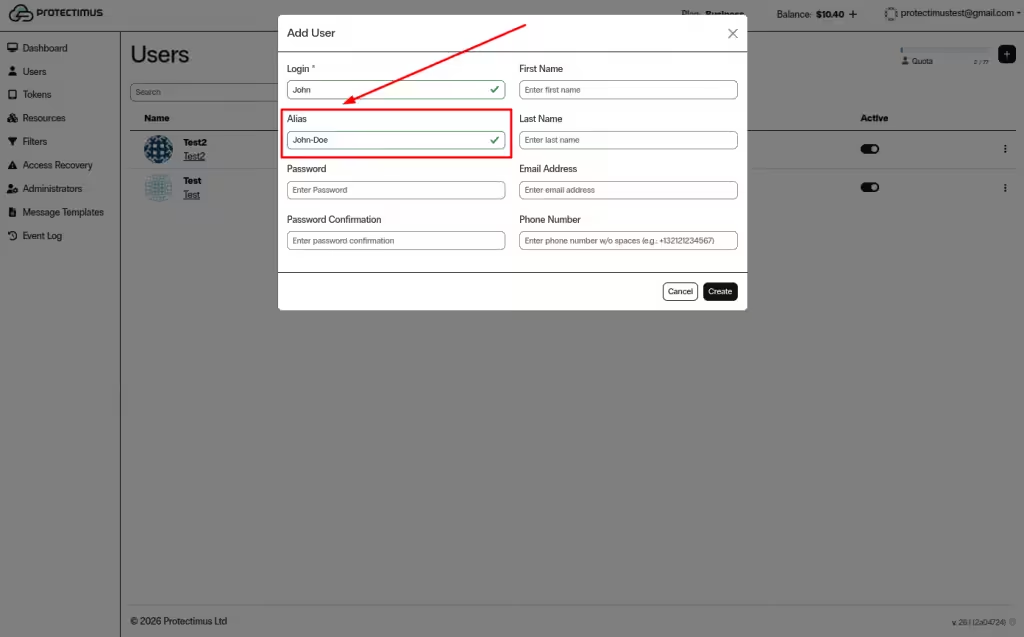
User alias

Note: If you plan to allow Users to register Tokens via the Self-Service Portal, each User must have either:

  • a password, or
  • a registered email address.

A verification code will be sent to the registered email address. If both a password and email address are set, the User will log in using the password.

After a Token is assigned, the User will also be required to enter a one-time password (OTP).
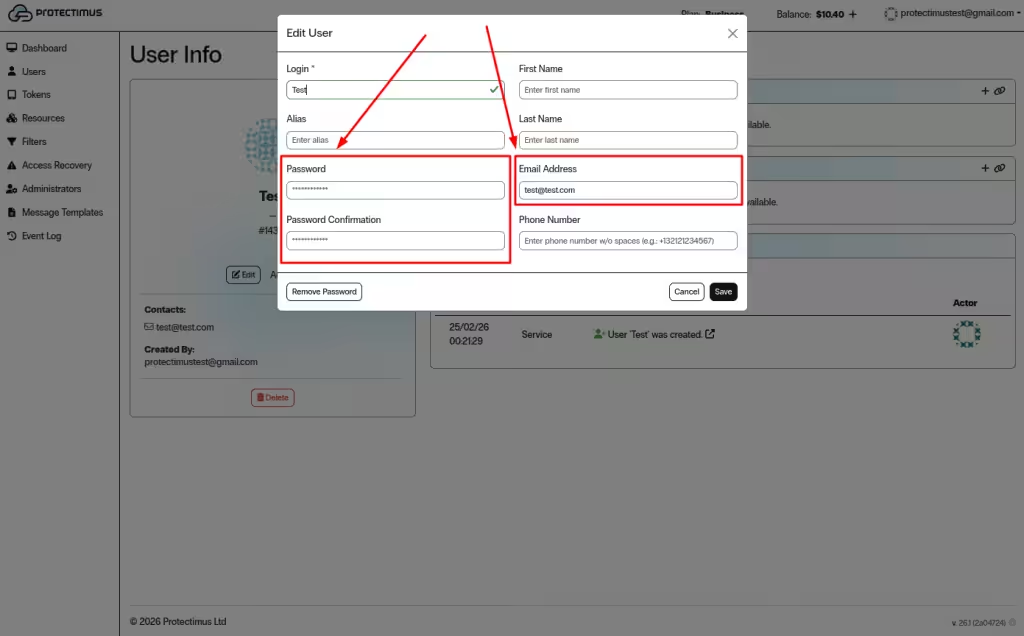

Add password or email address

2. Managing the User


After creating a User, open the User Dashboard to configure settings, assign Tokens and Resources, and monitor activity.

Note: For authentication to work properly:

  • A Token must be assigned to the User.
  • The User must be assigned to a Resource.

To open the dashboard, go to the Users page and click the User’s Login.
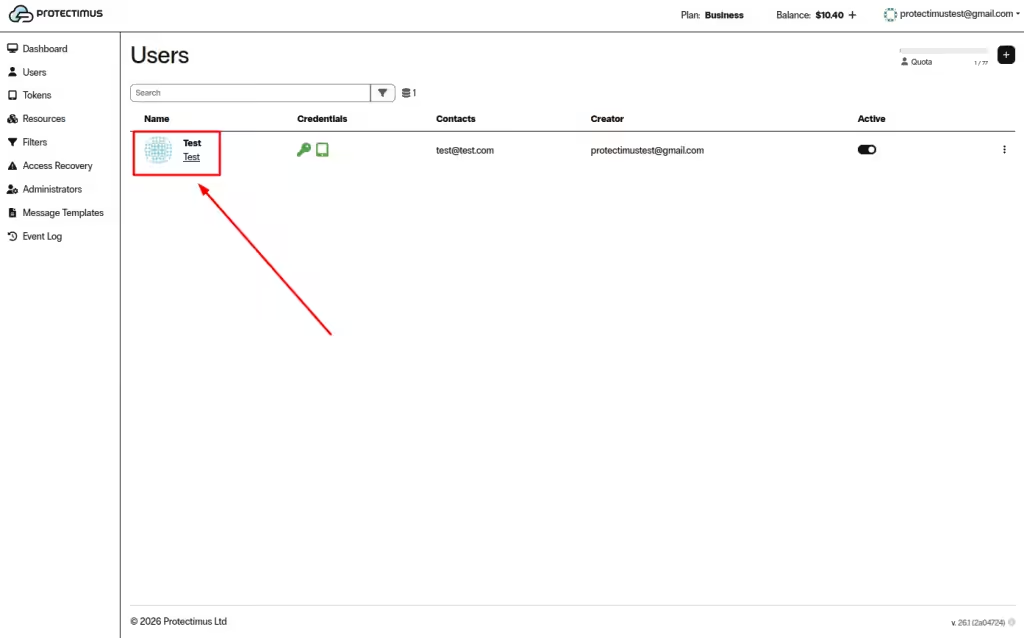

Open User Dashboard

The User Dashboard includes the following sections:
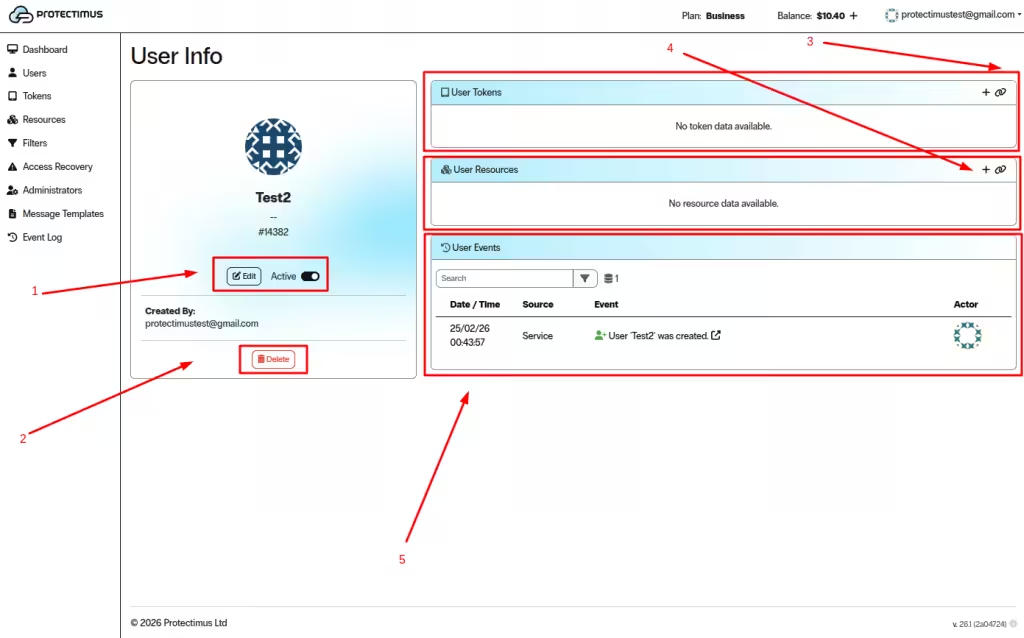

User Dashboard

1. Edit and Activate the User


  • Click Edit to modify User settings.
  • Use the Active toggle to enable or block the User.
  • Inactive Users cannot authenticate.

2. Delete the User


  • Click Delete to permanently remove the User.
  • This action cannot be undone.

3. Assign Tokens to the User


The User Tokens section allows you to manage authentication Tokens assigned to the User.

  • Click the + icon to add a new Token.
  • Click the link icon to assign an existing Token.
  • Assigned Tokens are displayed in this section.
  • Tokens enable authentication using one-time passwords (OTP).

4. Assign Resources to the User


The User Resources section defines which Resources the User can access.

  • Click the + icon to create and assign a new Resource.
  • Click the link icon to assign an existing Resource.
  • The User must be assigned to a Resource to authenticate.

5. Monitor User Activity


The User Events section displays all User-related activity.

  • View authentication attempts and configuration changes.
  • Use the Search field to filter events.
  • This helps monitor activity and troubleshoot authentication issues.

If you have any questions, please contact Protectimus customer support.

    This site is registered on wpml.org as a development site. Switch to a production site key to remove this banner.
    Table of Contents