How to Configure the Self-Service Portal in SaaS MFA Service
The Protectimus User Self-Service Portal enables users to manage their tokens and personal profile independently. The system administrator controls which actions are available for each Resource.
Important:
- The Self-Service Portal is configured individually for each Resource.
- Users must be assigned to a specific Resource to access its Self-Service Portal.
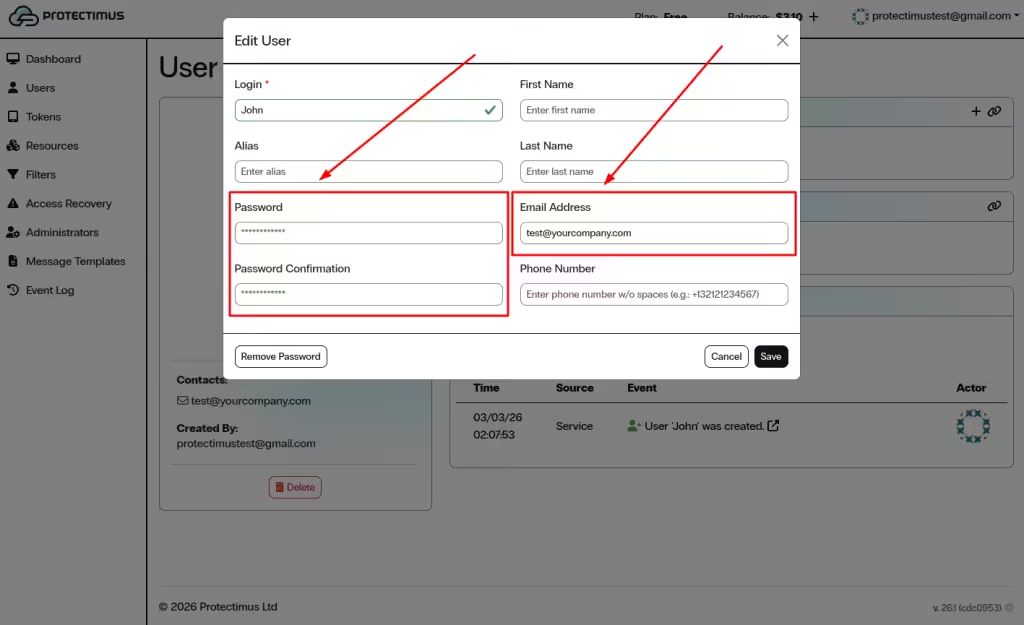
- Each user must have either a password or a registered email address:
- If both are set, the password is used for login.
- If only an email is specified, a verification code will be sent to that email address.
- If a token is assigned within the Resource, users must also enter a one-time password (OTP) when logging in.
1. Enable the Self-Service Portal for a Resource
- Log in to your Protectimus SaaS Service account.
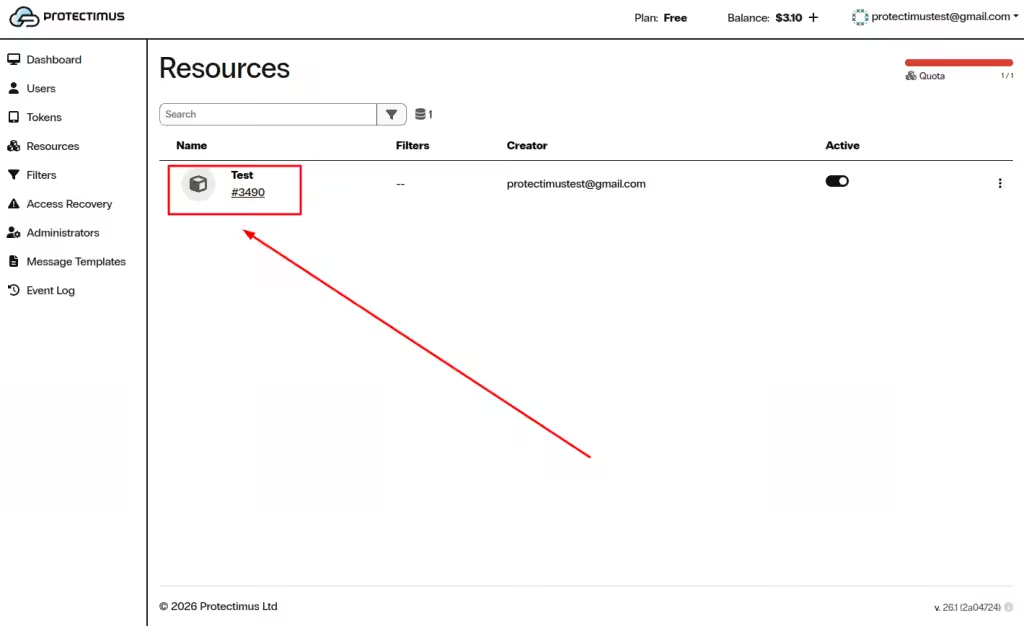
- Open the Resources page.
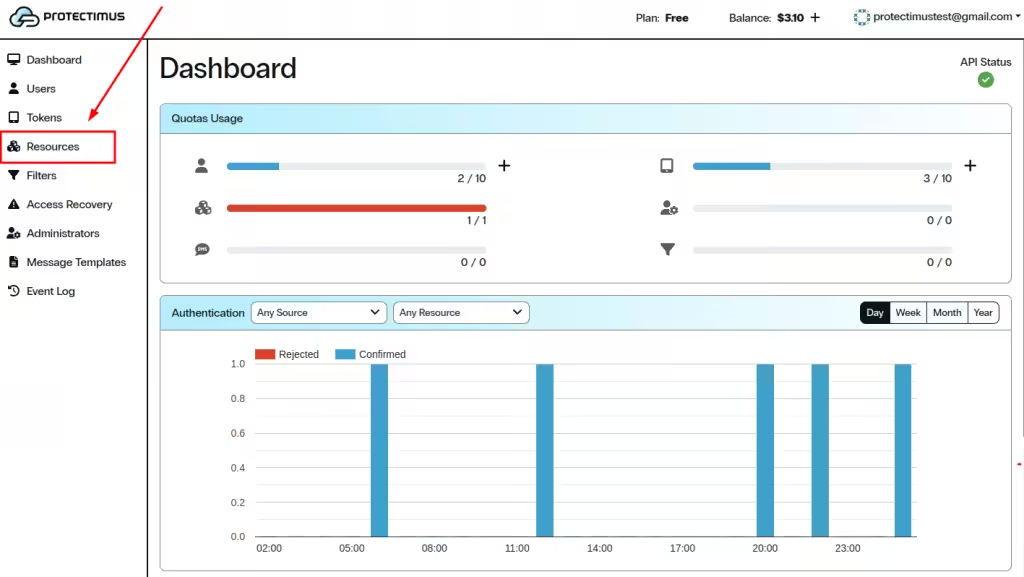
- Click the name of the required Resource.
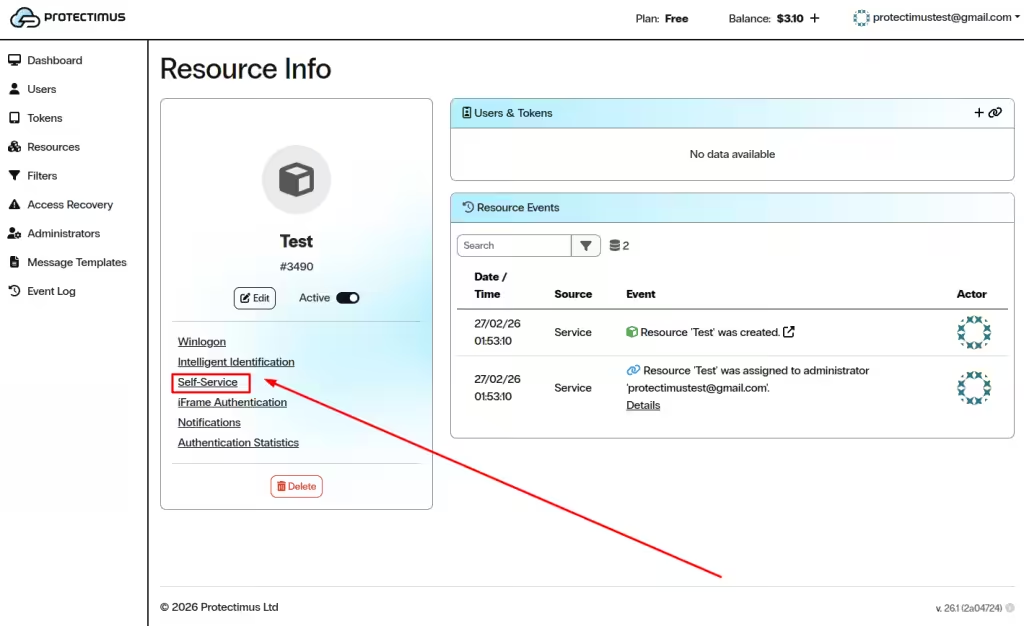
- Open the Self-Service tab.
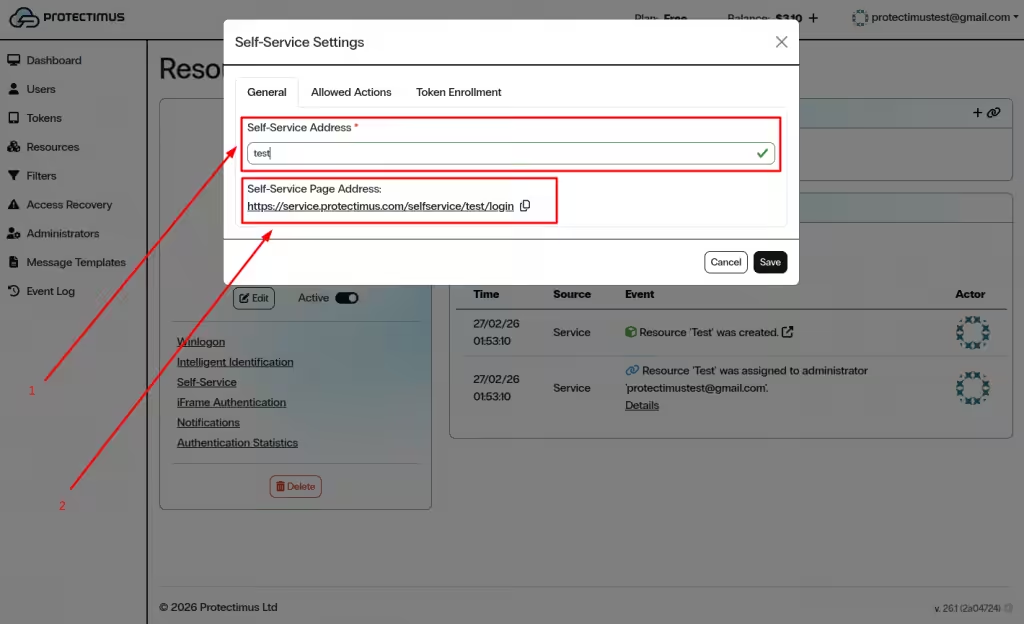
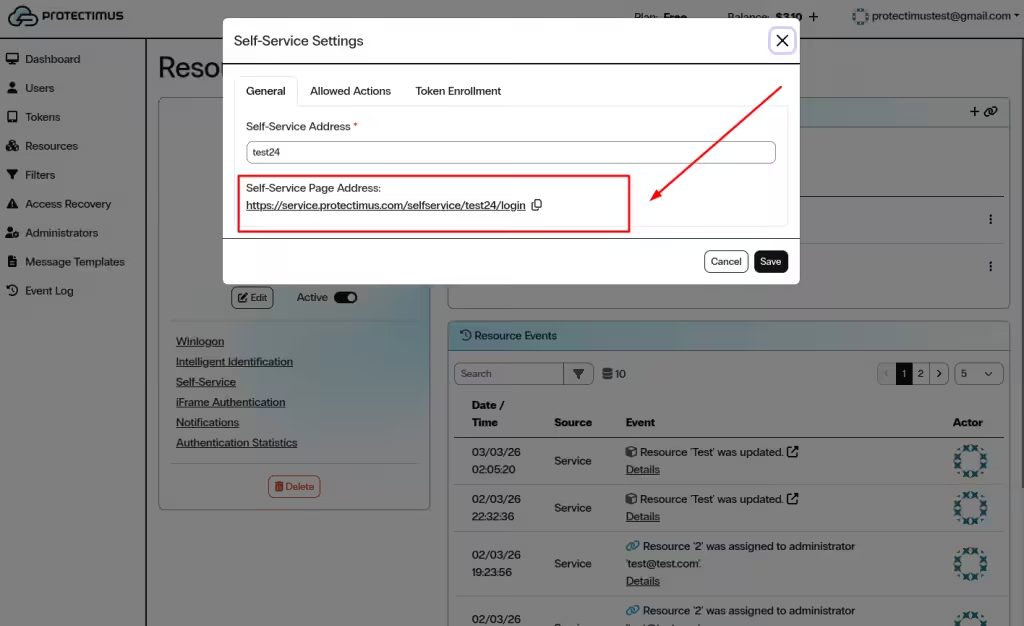
- In the General tab, enter a unique value in the Self-Service Address field.
- The system automatically generates the Self-Service Page Address (URL). This is the link your users will use to access the portal.
- Click Save to activate the portal for this Resource.
2. Configure Available Actions
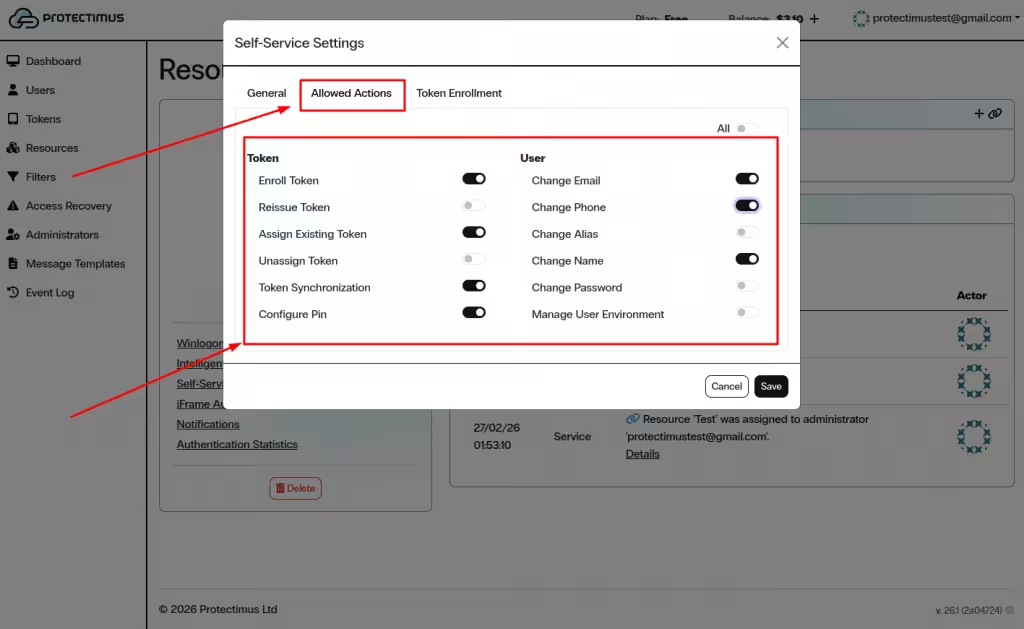
After saving the Self-Service address, open the Allowed Actions tab to define which operations users can perform.
Actions are grouped into two categories: Token and User. All options are disabled by default.
2.1. Token Management
- Enroll Token — Allows users to enroll and assign a new token.
- Reissue Token — Replaces an existing token with a new one.
- Assign Existing Token — Assigns a previously issued token.
- Unassign Token — Removes a token from the Resource.
- Token Synchronization — Synchronizes hardware tokens if needed.
- Configure PIN — Enables users to set or modify a token PIN.
2.2. User Profile Management
- Change Email — Update the registered email address.
- Change Phone — Update the registered phone number.
- Change Alias — Modify the username (login).
- Change Name — Update first and last name.
- Change Password — Change the Protectimus password.
- Manage User Environment — Manage trusted environments for intelligent identification.
You may also use the All toggle to enable or disable all actions simultaneously.
Click Save to apply the changes.
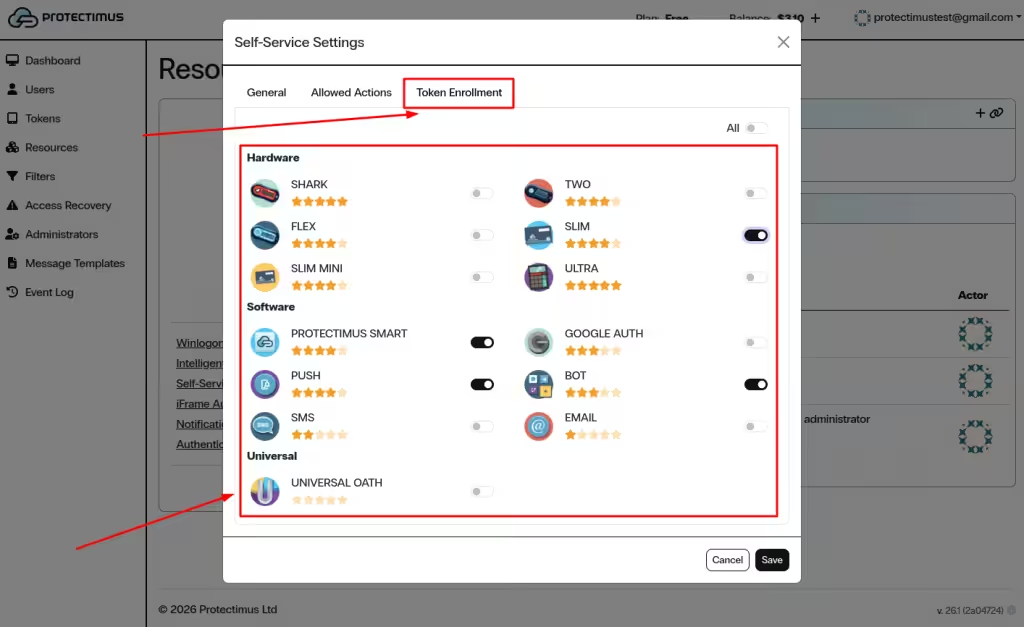
3. Configure Token Enrollment Options
Open the Token Enrollment tab to define which token types users are allowed to enroll through the Self-Service Portal.
Enable only the token types required for your deployment. Use the All toggle if necessary.
Click Save to finalize the configuration.
4. Provide Access to Users
To access the Self-Service Portal, users need:
- The generated Self-Service Page Address.
- Either a password or a registered email address in their user profile.
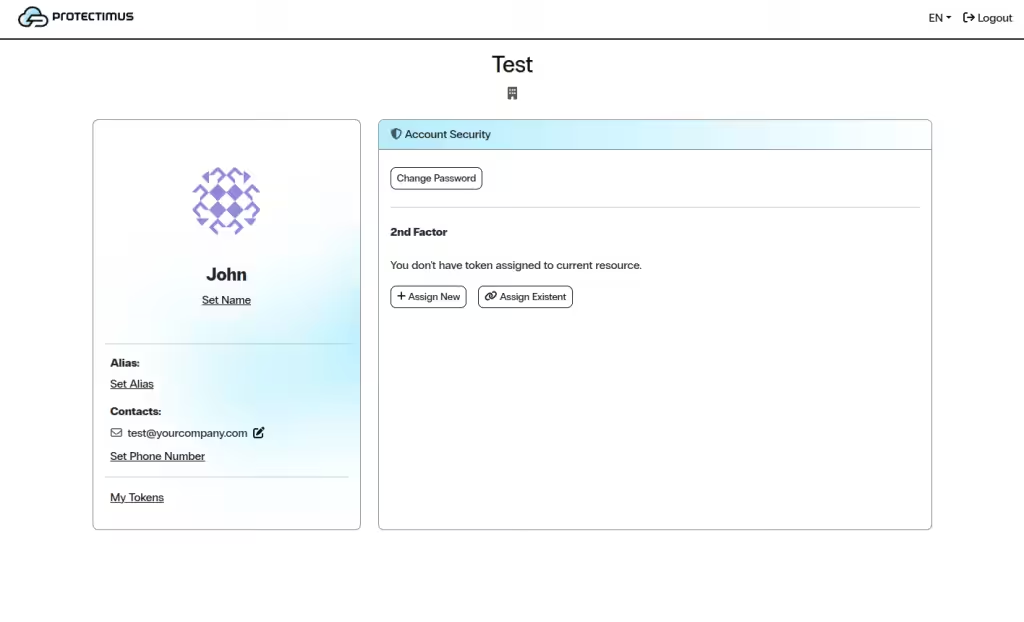
Users should open the provided URL, log in with their credentials, and perform the actions enabled for the Resource.
If you have any questions, please get in touch with
Protectimus customer support service.