MFA Token Management in SaaS Service: Complete Step-by-Step Guide
Visit the Tokens page to learn more about the OTP tokens supported by Protectimus. You can use and combine any token types according to your needs.
Important Notes:
- One User can use only one Token for authentication within one Resource.
- You can enable the Users’ Self-Service Portal to allow users to enroll and manage Tokens themselves.
- The number of Tokens you can add is limited by your Service Plan quota.
1. How to Import Tokens
If you use hardware OTP tokens, you can import a CSV file containing token secret keys into the Protectimus SaaS Service.
-
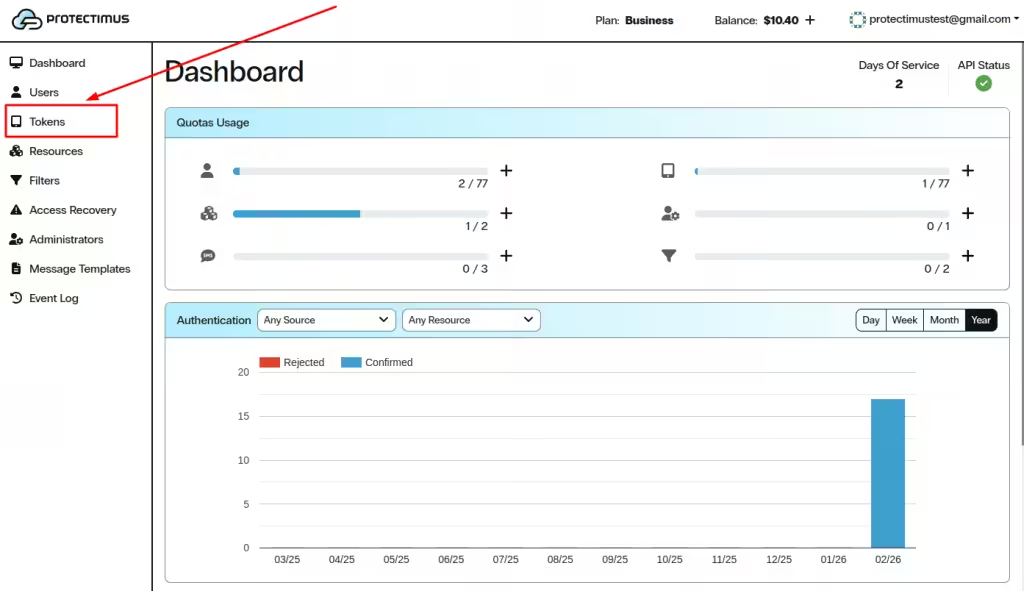
Log in to your Protectimus SaaS Service account and go to the
Tokens page.
-
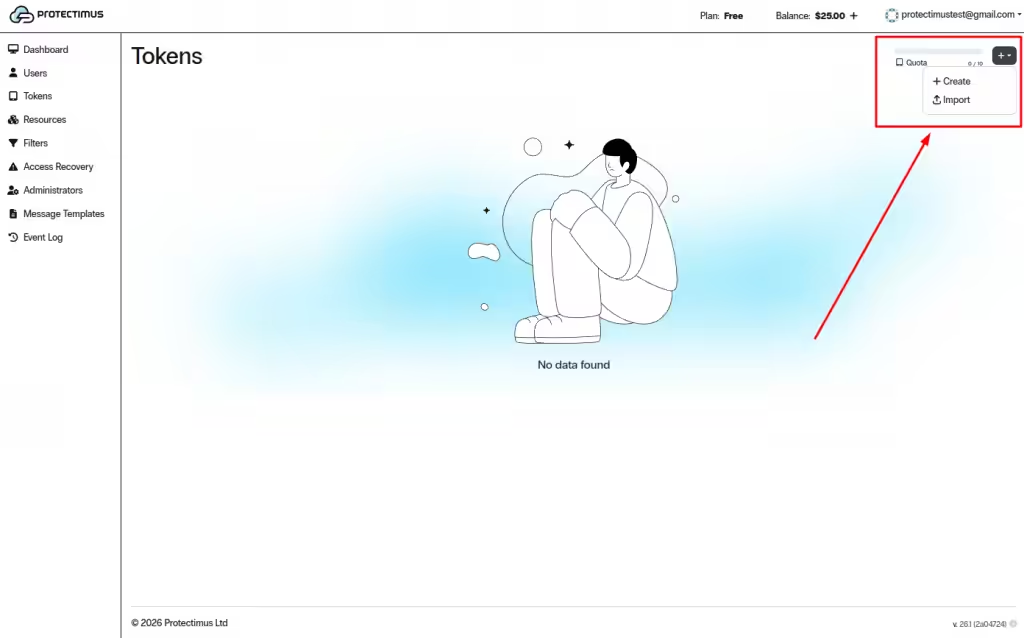
Click the + (Create Token) button in the upper right-hand corner and choose Import.
-
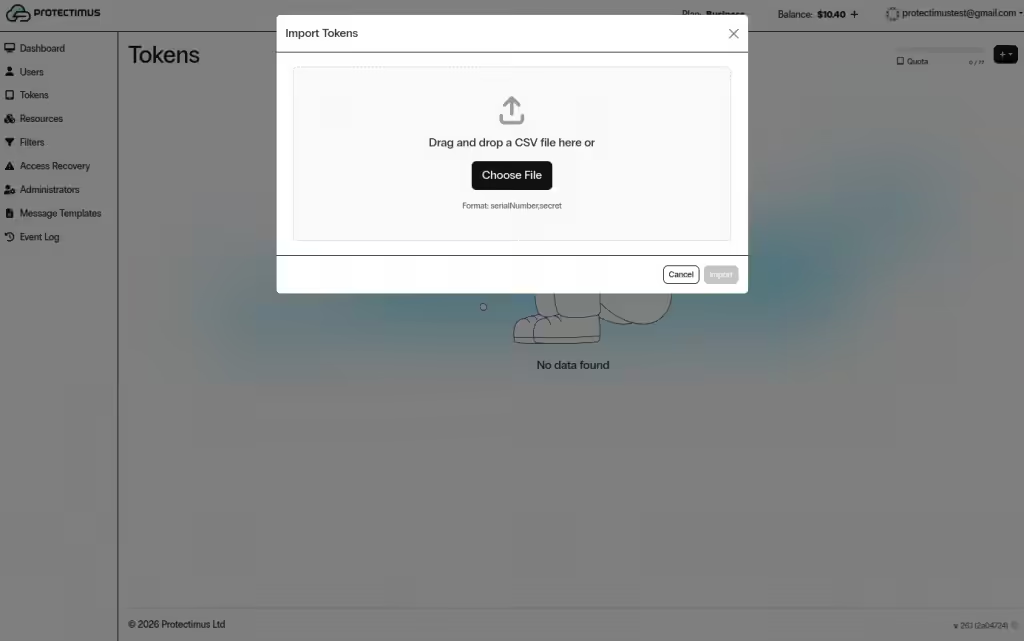
Upload a CSV file in the following format:
serialNumber,secret
2. How to Add Tokens Manually
-
Log in to your Protectimus SaaS Service account and go to the
Tokens page.
-
Click the + (Create Token) button in the upper right-hand corner and choose Create.
-
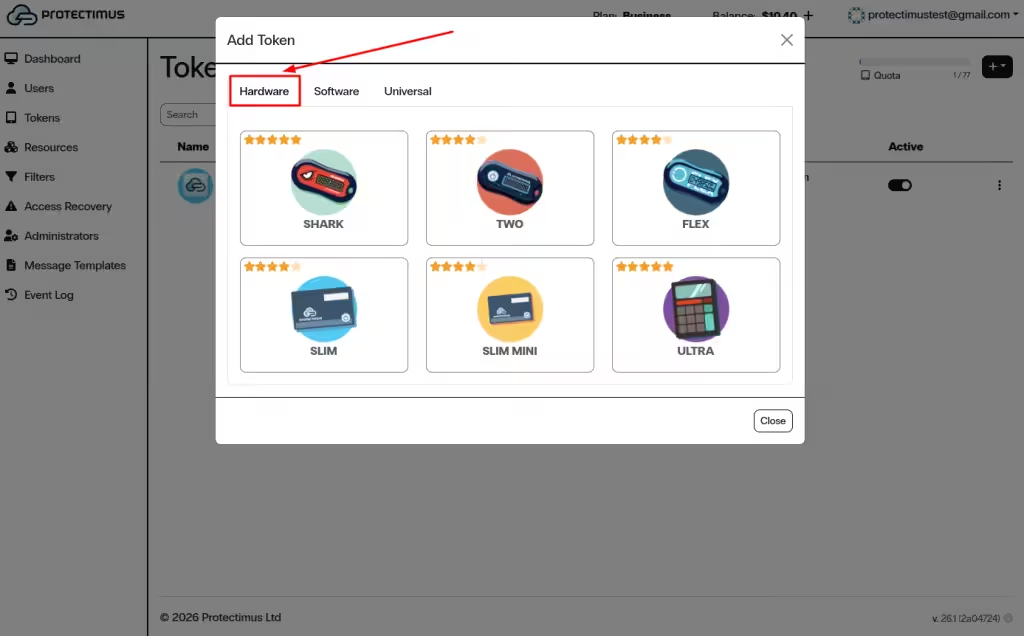
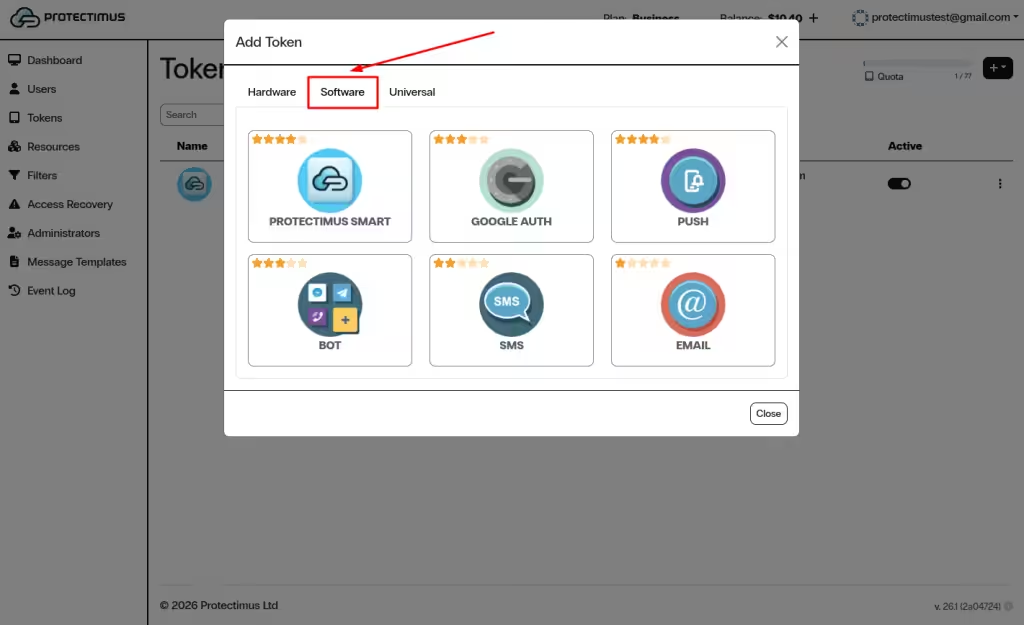
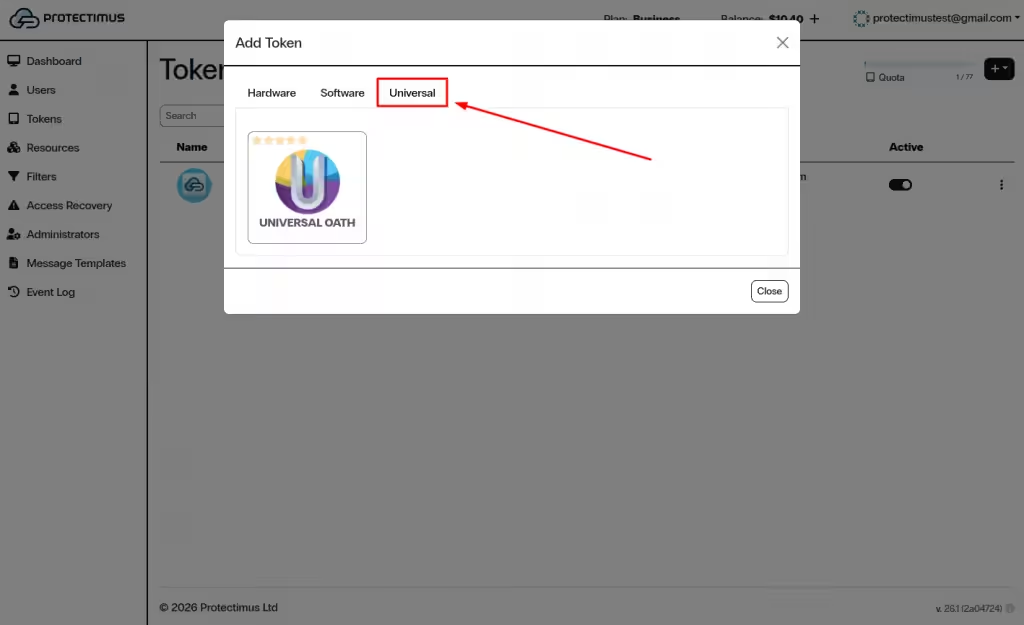
Select the token type: Hardware, Software, or Universal.
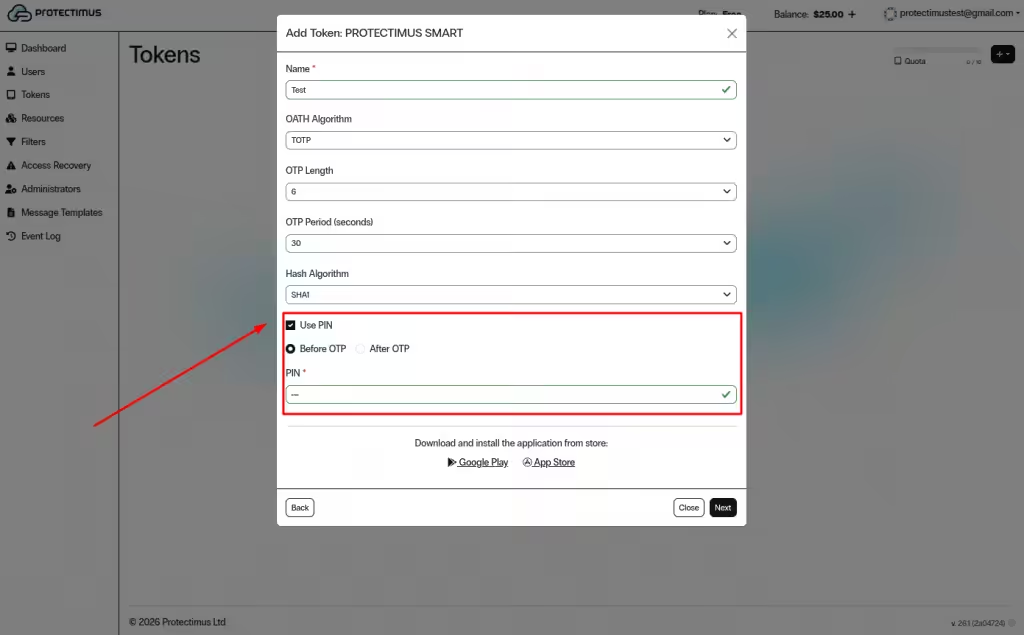
Note: If PIN protection is enabled, the User must enter the PIN together with the one-time password (before or after OTP, depending on administrator settings). The PIN and OTP must be entered as a single string without spaces. This provides an additional layer of security.
2.1. Hardware Tokens
Hardware tokens are Protectimus physical OTP devices, such as:
- Protectimus Two
- Protectimus Slim / Slim Mini
- Protectimus Flex
- Protectimus Ultra
To add a hardware token:
-
Select Hardware and choose the required hardware token model.
-
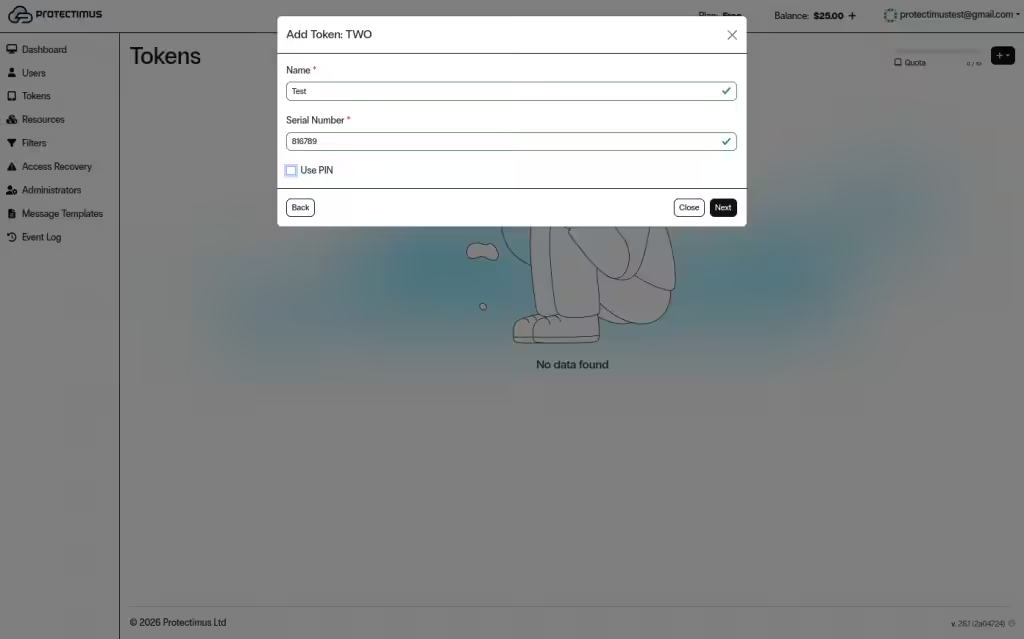
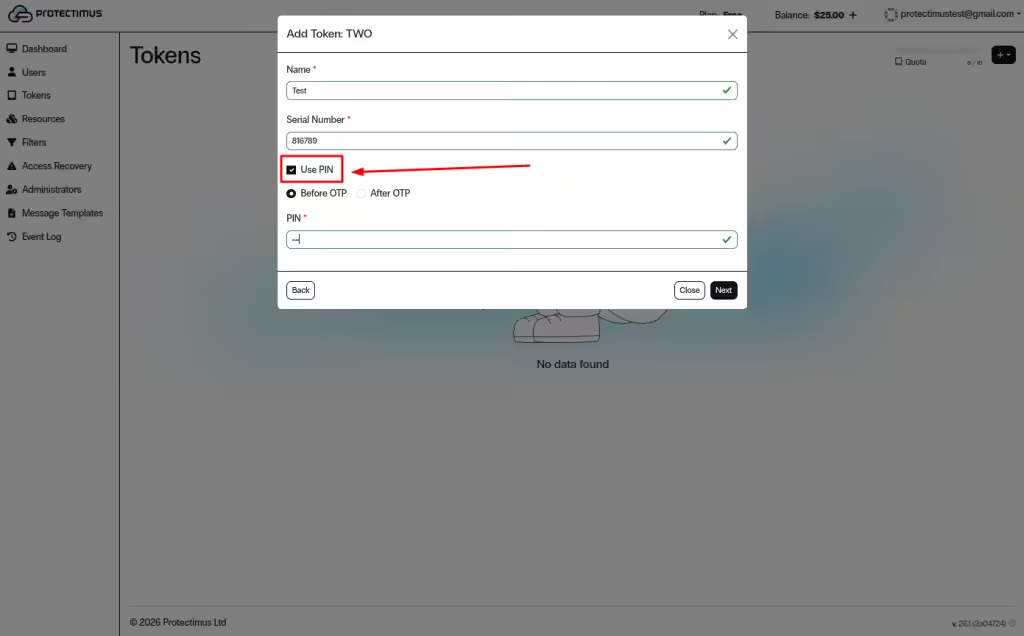
Enter the required fields, such as Name and Serial Number (or OTP Period (seconds), depending on the model).
-
(Optional) Enable Use PIN if you want to add a PIN, then click Next to complete the setup.
2.2. Software Tokens
Software tokens include app-based and delivery-based methods, such as:
- Protectimus Smart
- Google Authenticator (and other TOTP apps)
- Push
- SMS
- Email
- Bot
To add a software token:
-
Select Software and choose the required token type.
-
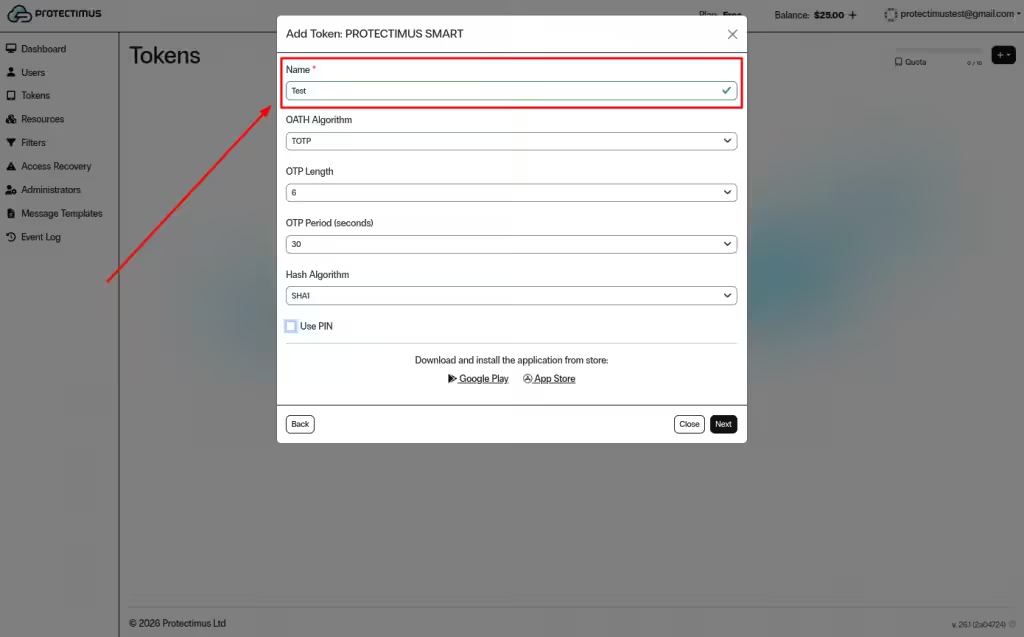
Fill in the required parameters (for example, Name and OATH settings such as OTP length, period, and hash algorithm).
-
(Optional) Enable Use PIN and choose whether the PIN is entered Before OTP or After OTP, then click Next.
-
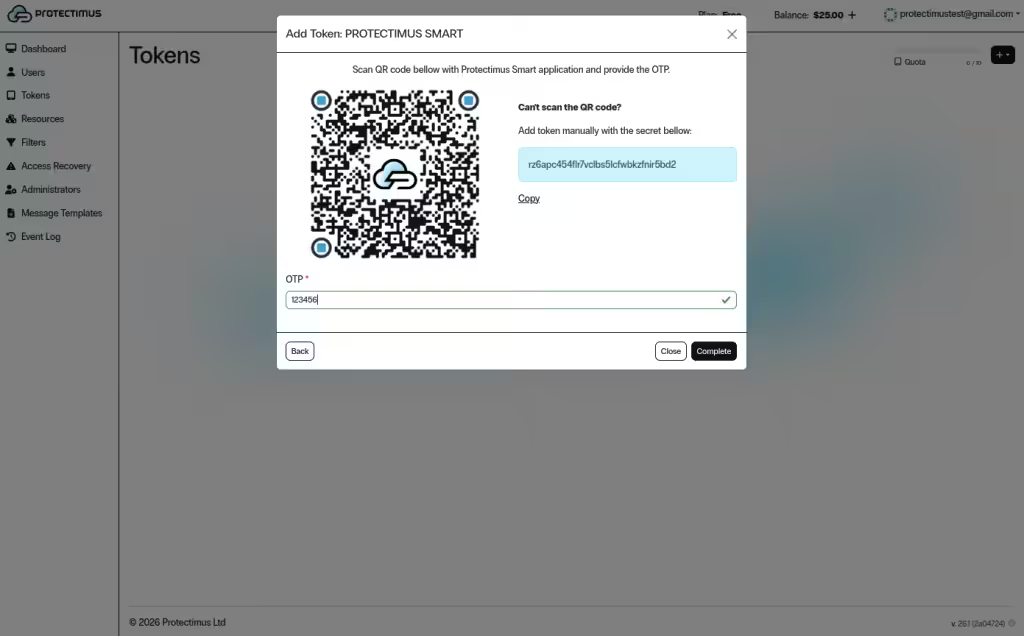
Scan the QR code using an authenticator app or enter the secret manually (depending on the selected token type).
-
Enter a valid OTP and click Complete.
2.3. Universal Tokens
Universal tokens allow you to add any OATH-compatible token from another vendor. You will need the token secret.
To add a universal token:
- Select Universal.
-
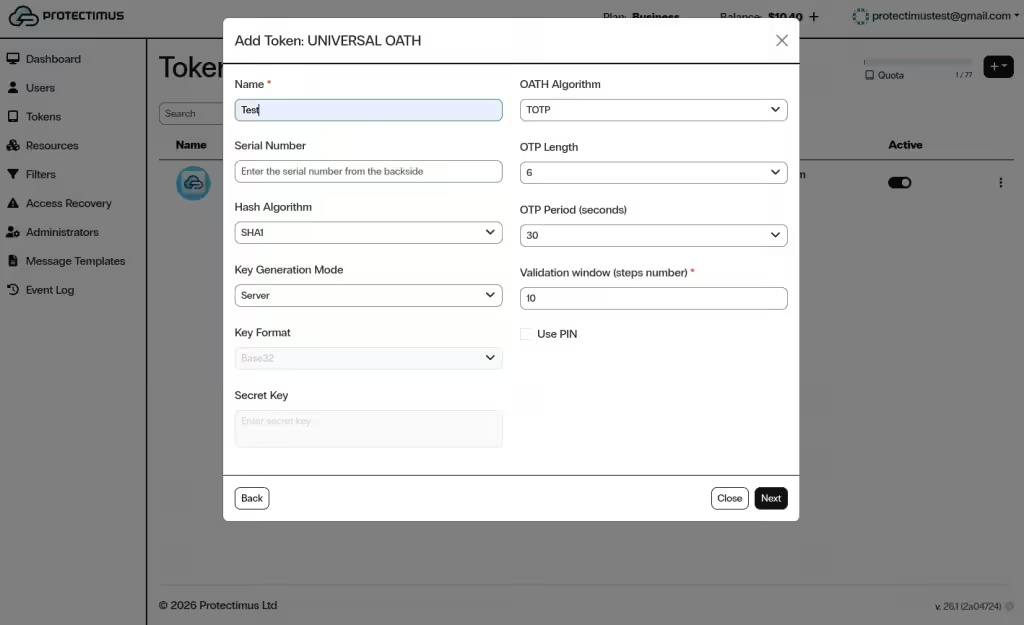
Enter the required fields (for example, Name, Serial Number, and the Secret).
-
(Optional) Enable Use PIN and choose whether the PIN is entered Before OTP or After OTP, then click Next.
Important: After adding a Token, you must assign it to a specific User and assign the User and Token to a Resource.
3. Managing a Token
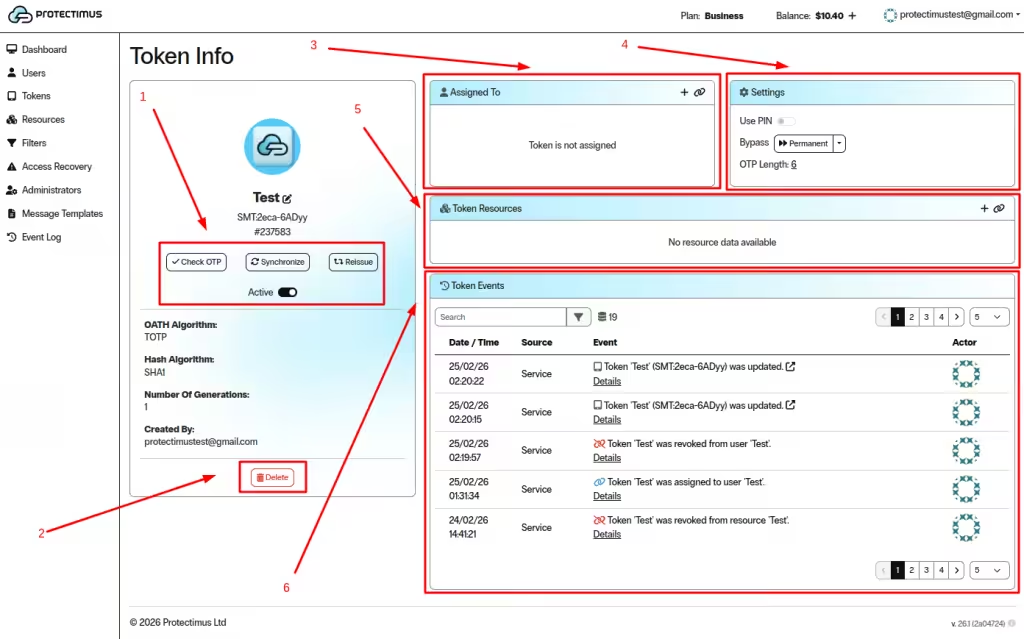
To manage a Token, open the Tokens page and click the token Name.
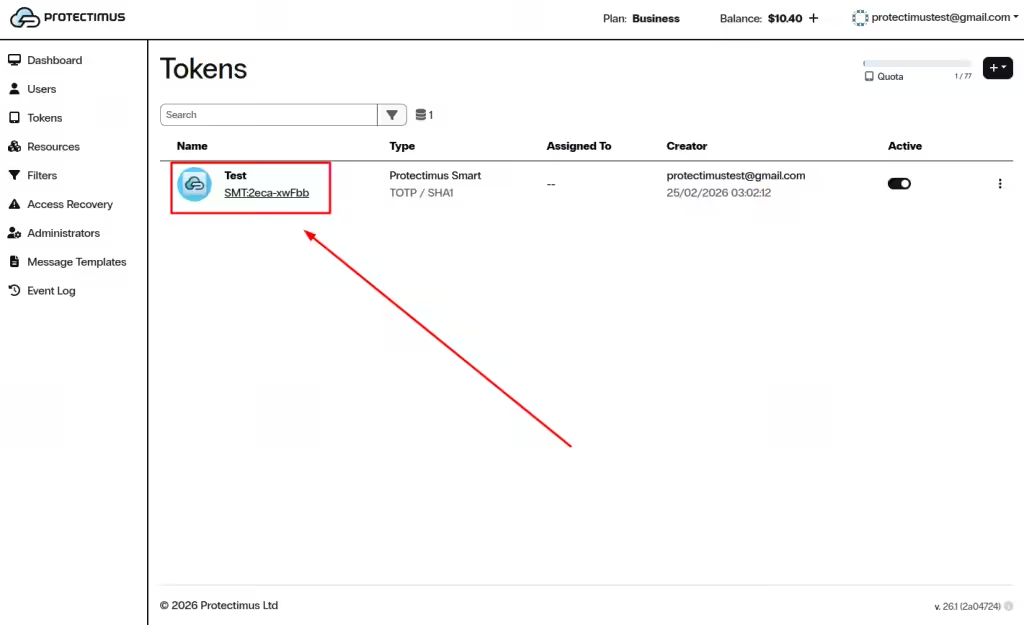
This opens the Token Info page.
3.1. Token Actions
The following actions are available in the token panel:
- Check OTP — verify that the Token generates a valid one-time password.
- Synchronize — synchronize the Token with the server (primarily for hardware tokens).
- Reissue — generate a new secret if the User loses access to the Token.
- Active toggle — enable or disable the Token.
If the Token is inactive, it cannot be used for authentication.
3.2. Delete the Token
- Click Delete to permanently remove the Token.
- This action cannot be undone.
3.3. Assigned To (User Assignment)
The Assigned To section shows which User the Token is linked to.
- Click the + icon to create a new User and assign the Token.
- Click the link icon to assign the Token to an existing User.
If the Token is not assigned, it cannot be used for User authentication.
3.4. Settings
The Settings section allows you to configure:
- Use PIN — enable or disable PIN protection.
- Bypass — temporarily or permanently bypass OTP verification.
- OTP Length — change the length of the one-time password (if supported).
When bypass is enabled, authentication may succeed without OTP verification.
3.5. Token Resources
The Token Resources section defines which Resources the Token can be used for.
- Click the + icon to assign the Token to a new Resource.
- Click the link icon to link the Token to an existing Resource.
The Token must be assigned to a Resource to be used within that Resource.
3.6. Token Events
The Token Events section displays all actions related to the Token.
- View Token updates, assignments, revocations, and synchronization events.
- Use the Search field to filter events.
- Use pagination controls to browse event history.
4. Temporary or Permanent Bypass (Deactivating OTP Verification)
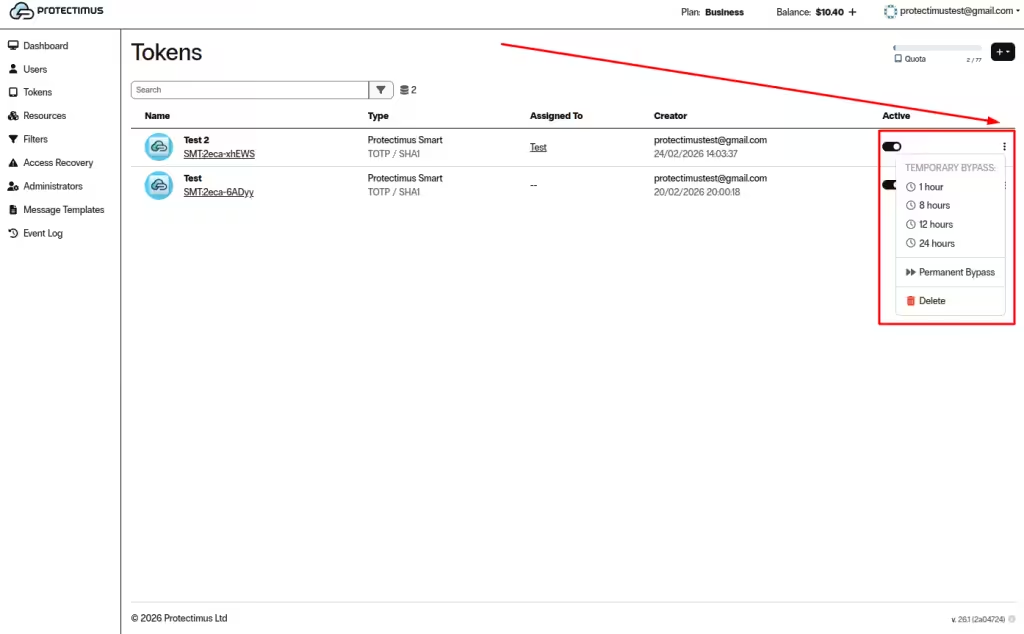
You can temporarily or permanently bypass OTP verification for a Token from the Tokens list (via the menu in the Active column).
- Temporary bypass: 1 hour, 8 hours, 12 hours, or 24 hours
- Permanent bypass: remains active until manually disabled
Warning: When bypass is enabled, authentication may succeed without OTP verification.
If you have any questions, please contact Protectimus customer support.