
> How to Set Up Two-Factor Authentication in Volet
How to Set Up Two-Factor Authentication in Volet
- Log in to your Volet account and navigate to the Security Settings page.
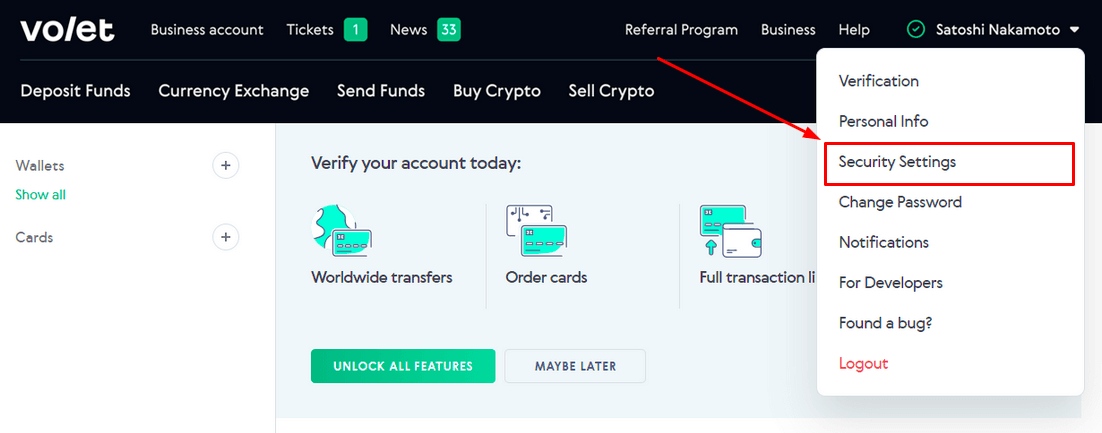
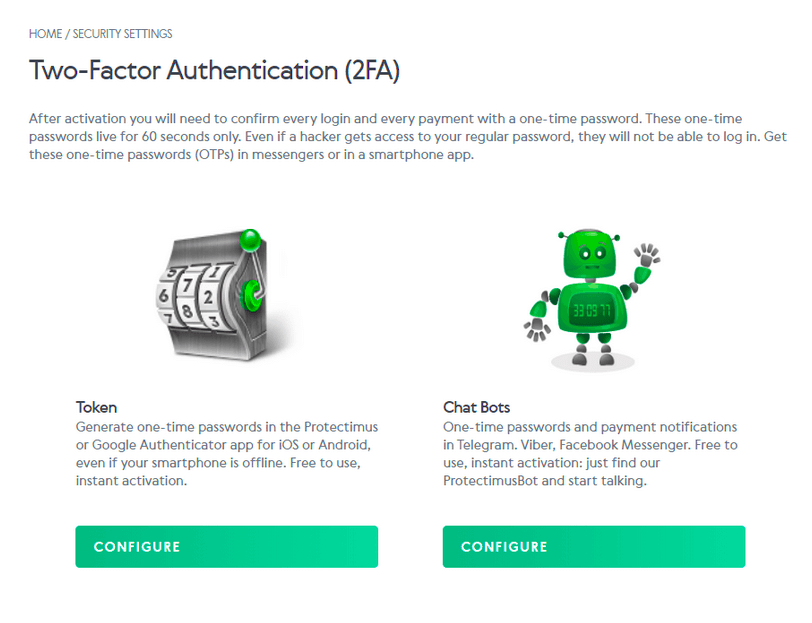
- Scroll down to the Two-Factor Authentication (2FA) settings and click the CONFIGURE button.

-
Choose your preferred two-factor authentication method for receiving one-time passwords.
There are two options:
1. Setting up the Protectimus SMART OTP Authenticator App
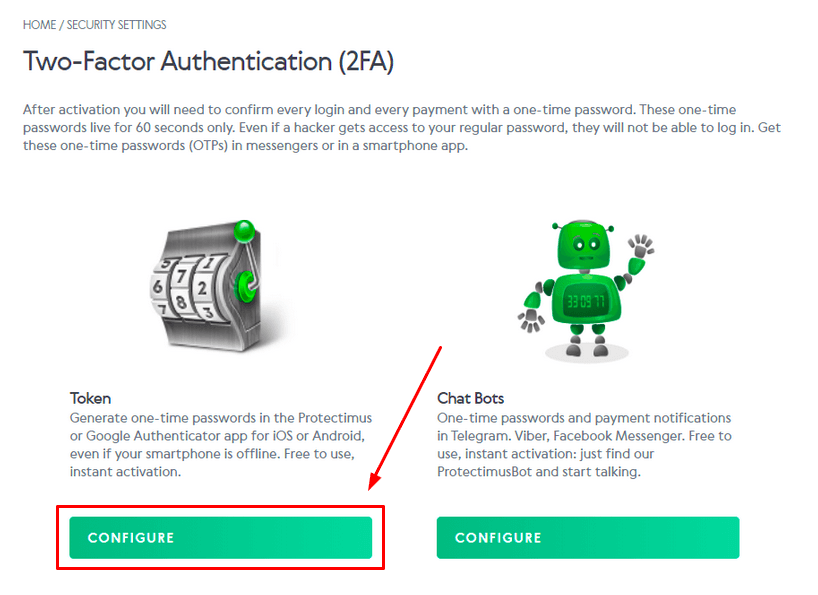
- If you plan to use the Protectimus SMART OTP authenticator app for generating one-time passwords, select the Token option and click on CONFIGURE.
- Next, press the SOFTWARE TOKEN button.
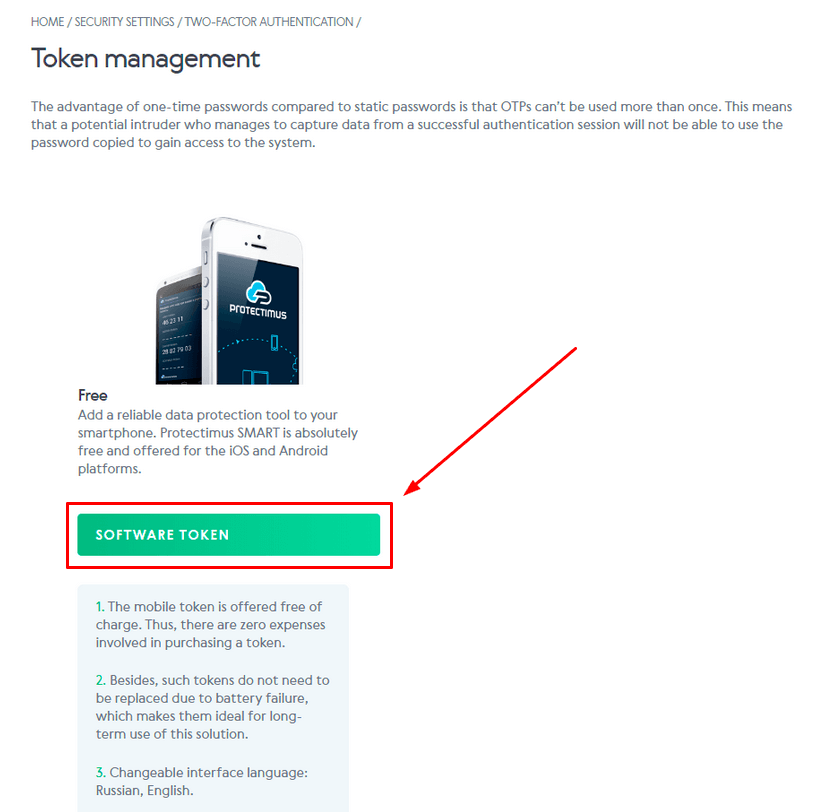
- At this stage, you will need the Protectimus SMART OTP application. Download the application from Google Play Store if you are using an Android phone, or from App Store if you are using an iOS phone.
The application is available for free. To download, use the provided link or scan the corresponding QR code below.


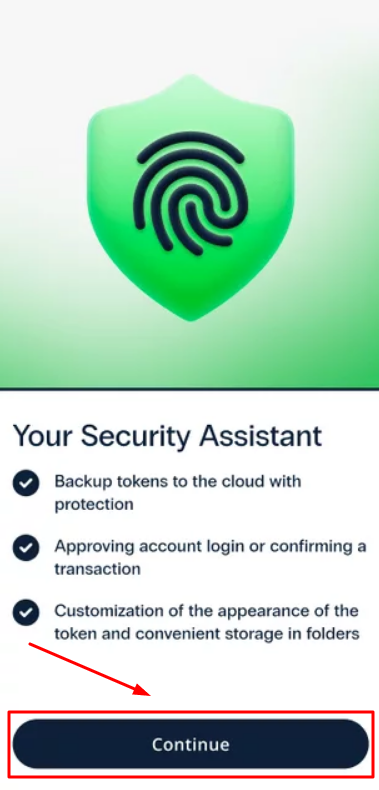
- After installing the application, open it. You will see the welcome screen. Press Continue.
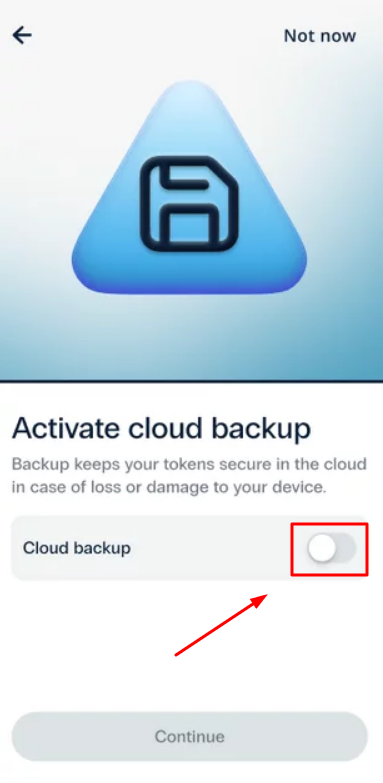
- Next, you will be prompted to activate Cloud Backup.
We strongly recommend using the cloud backup feature to ensure the preservation of your OTP tokens in case of loss, phone damage, or accidental deletion of the two-factor authentication app.
To activate cloud backup, select the Cloud Backup option.
Select your account in Google Cloud or iCloud and log in if necessary, providing all the required permissions.
Set a password for the backup file – it can be any password from 3 to 16 characters. Enter the password, repeat it, and press Continue.
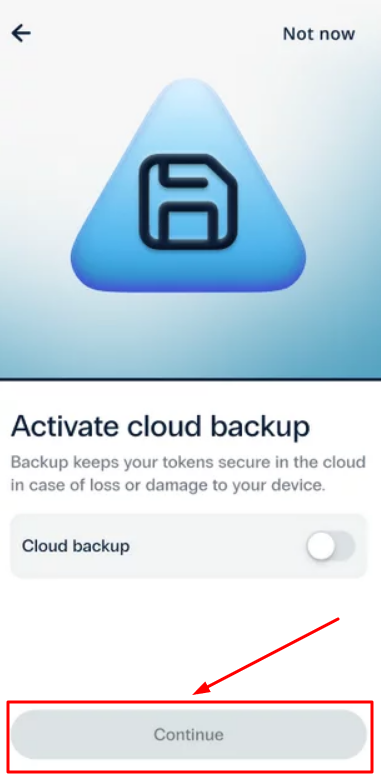
After activating cloud backup, press Continue to proceed to token enrollment.
-
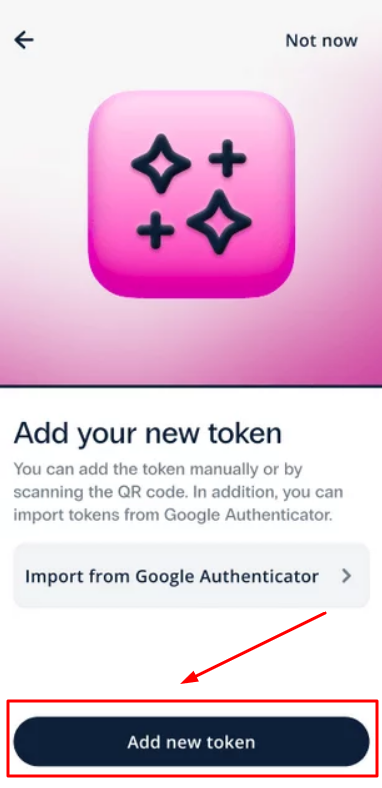
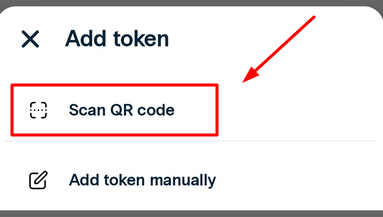
Now you can add a new token. Click on the Add new token button.
Select Scan QR code.
Point your smartphone camera at the QR code displayed on the Volet page.
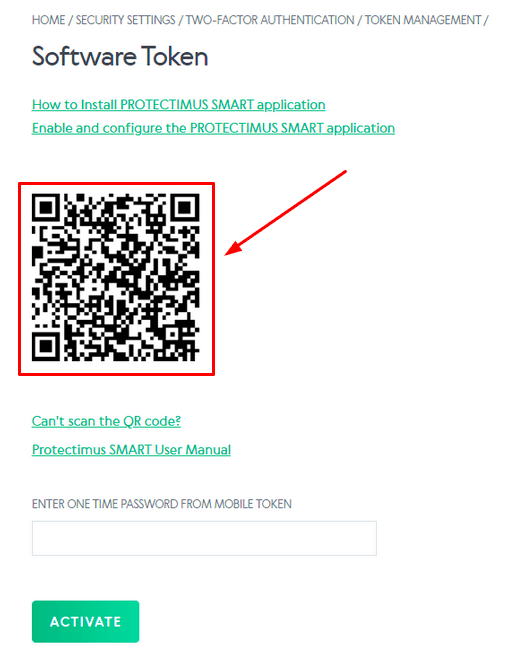
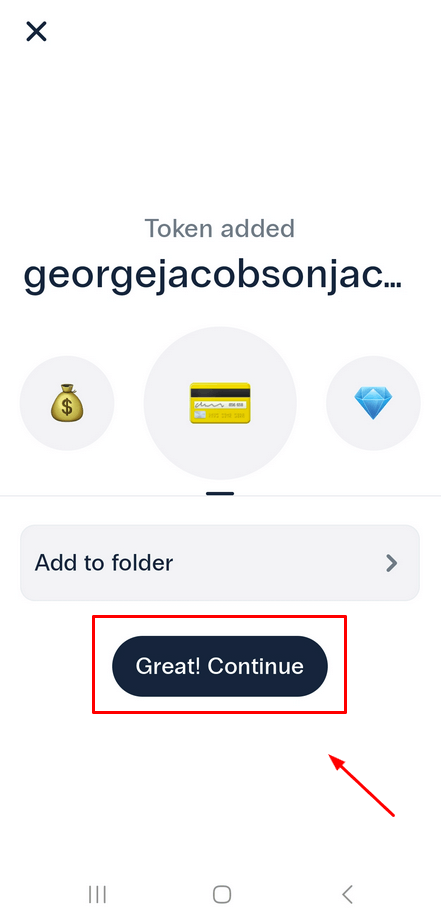
The application will scan the QR code containing the secret key and enroll the token.
Note: In case you’re unable to scan the QR code for any reason, you also have the option to manually add the secret key to the application.
- Enter the one-time password displayed in the application into the corresponding field in Volet and click the ACTIVATE button.
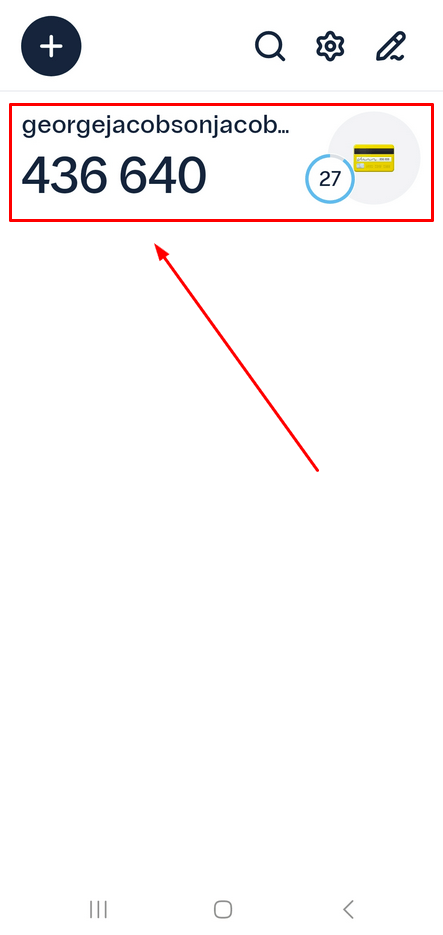
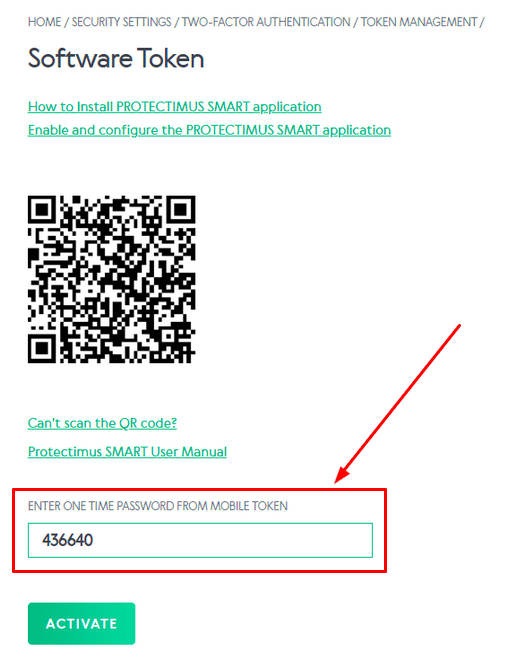
- You have successfully registered a two-factor authentication token for your Volet account. From now on, each time you log in, you will start by entering your standard username and password, followed by the one-time password generated by the Protectimus Smart OTP application.
Note: Do not uninstall the application from your smartphone. If you want to deactivate or remove the token from your Volet account, you will also need to enter a one-time password.
1.1. How to Manually Add a Secret Key to the Protectimus Smart OTP App
- Click on the “Can’t scan the QR code?” option on your Volet Software Token settings page.
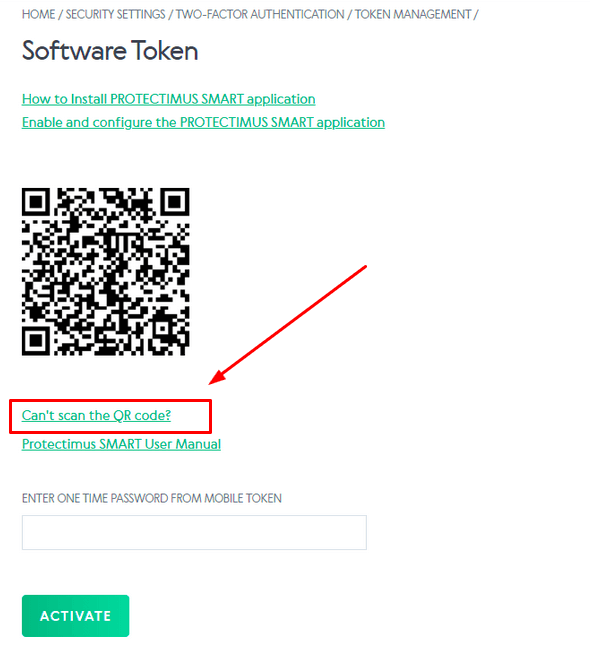
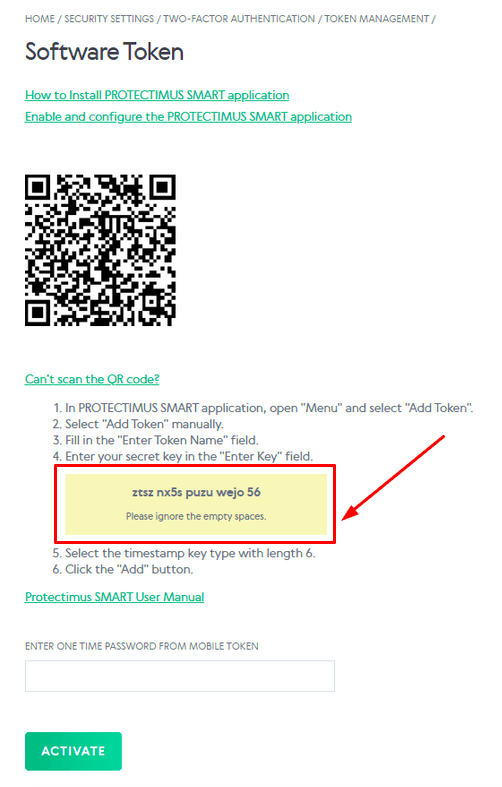
- A secret key will be displayed, which you need to add to the Protectimus Smart OTP App.
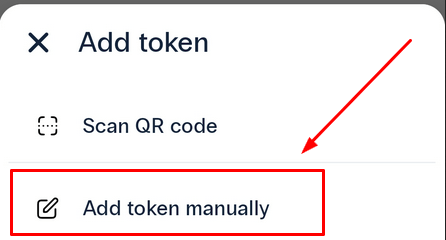
- In the Protectimus Smart OTP App, click on the Add new token button.
or
- Select Add token manually.
- Fill in the required fields:
| Issuer: | Volet |
| Login: | This is the name of the token; add any name you wish. |
| Additional Information: | You may leave this field empty or add a note if you wish. |
| Token key: | Enter the secret key from your Volet Software Token settings page (without empty spaces). |
| Protectimus checksum: | Leave as it is. |
| OTP Type: | Leave as it is – By time (TOTP). |
| Algorithm: | Leave as it is – SHA1. |
| OTP Length: | Leave as it is – 6 digits. |
| OTP Lifetime: | Leave as it is – 30 seconds. |
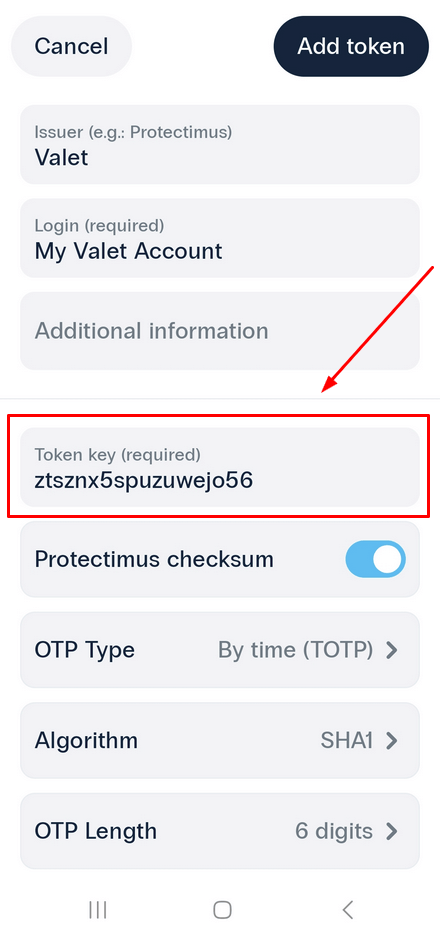
Save the changes by tapping the Add token button in the upper right corner.

- Enter the one-time password displayed in the application into the corresponding field and click the ACTIVATE button.

- You have successfully registered a two-factor authentication token for your Volet account. From now on, each time you log in, you will start by entering your standard username and password, followed by the one-time password generated by the Protectimus Smart OTP application.
Note: Do not uninstall the application from your smartphone. If you want to deactivate or remove the token from your Volet account, you will also need to enter a one-time password.
2. Additional Protectimus SMART OTP Application Settings
With the Protectimus Smart OTP 2FA authenticator, you can generate one-time passwords (OTPs) on your mobile device that can be used as the second factor in the authentication process not only on Volet, but on any website that supports MFA.The Protectimus Smart two-factor authentication app offers many advantages, including:
- Encrypted cloud backup;
- Ability to transfer tokens to a new phone;
- Ability to import tokens from Google Authenticator;
- PIN and biometric authentication protection (Touch ID and Face ID);
- Support for all OATH one-time password generation algorithms (HOTP, TOTP, and OCRA);
- 6 and 8 digit one-time passwords;
- Multiple language support: English, French, German, Italian, Spanish, Russian, and Ukrainian;
- Convenient distribution of OTP tokens by folders;
- Customization of tokens with different emojis and descriptions.
2.1. Adding Tokens for Other Accounts or Websites
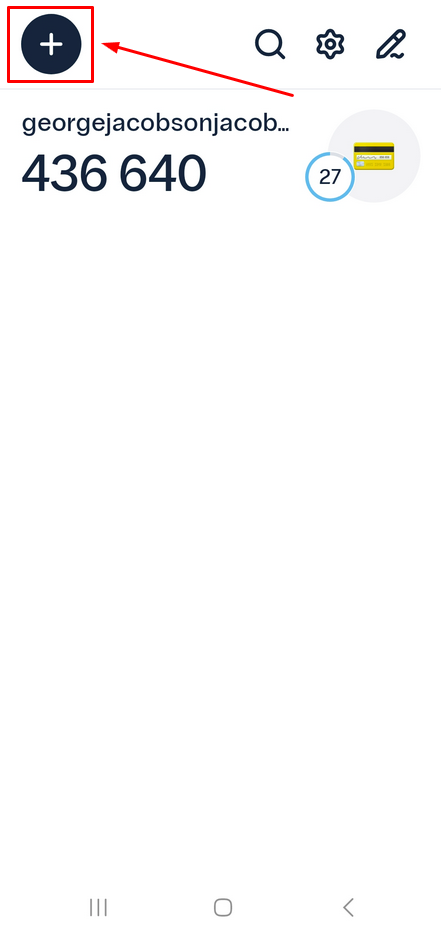
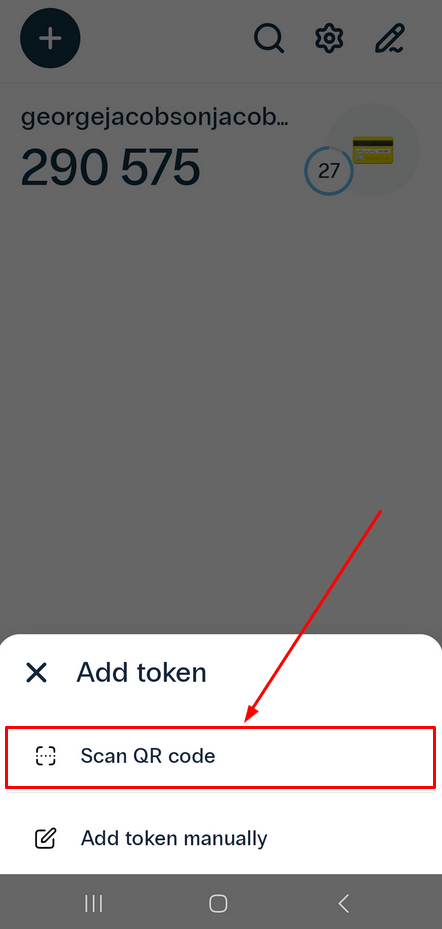
- To add a new token, open the Protectimus Smart OTP two-factor auth app and tap on the plus sign in the upper left corner.
- You can choose to add the token by scanning a QR code or by entering the secret key manually.
If you choose to Scan QR code, simply point your smartphone’s camera at the code on the security settings page of the website you want to protect with two-factor authentication. The app will automatically scan the QR code and create a token.
-
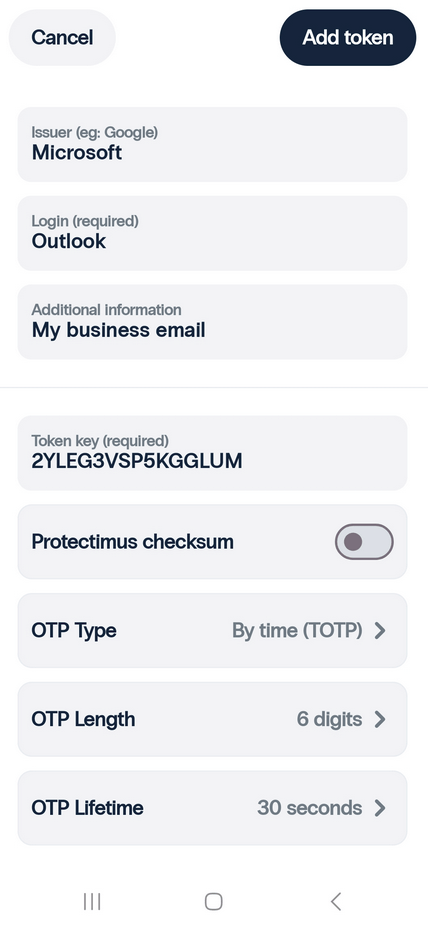
If you choose to Add token manually, you’ll need to enter the token name (Login), the secret key (Token key), choose the OTP generation algorithm (OTP Type), the one-time passwords length, and lifetime. Then save the changes tapping the Add token button in the right upper corner.
Note that if you’re using a two-factor authentication system other than Protectimus, you should uncheck the Protectimus checksum checkbox.
2.2. Editing and Deleting Tokens in the Protectimus SMART OTP App
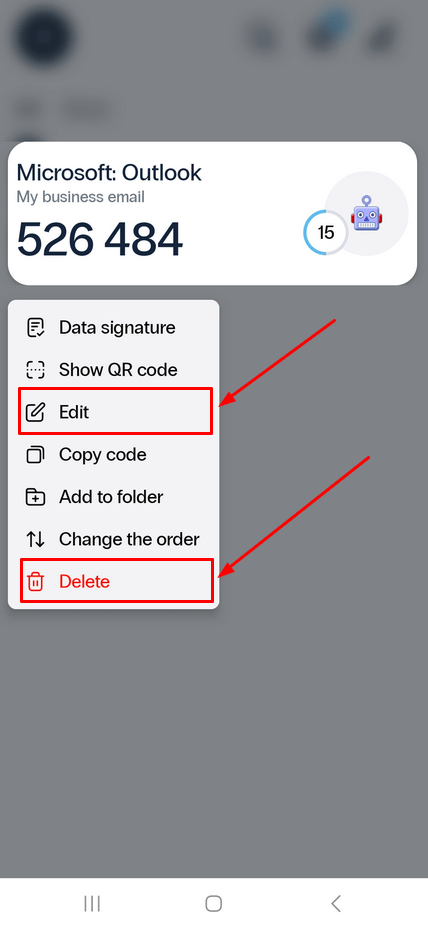
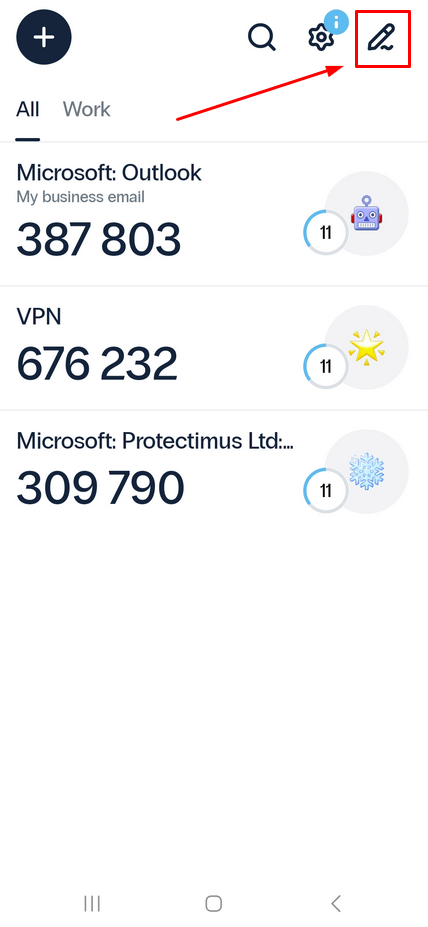
- To edit or delete a token, long-press on its name and choose the desired action. Alternatively, you can open the Edit Token menu by tapping the pen icon in the upper-right corner and selecting the token you want to modify.
-
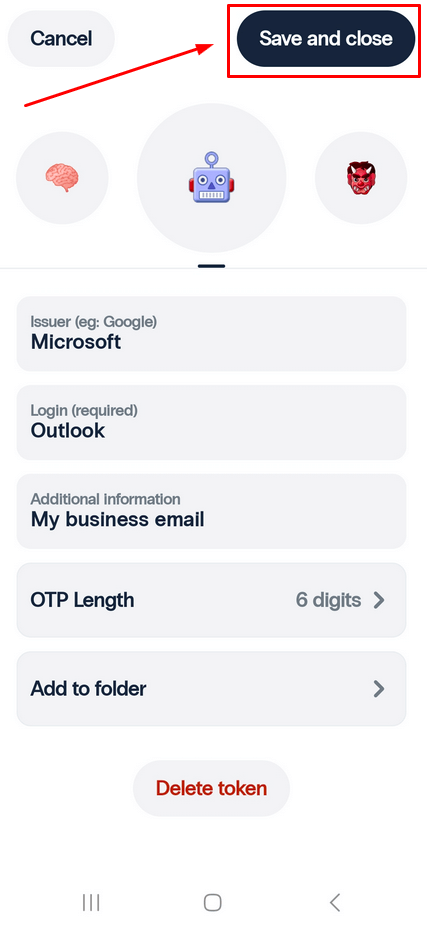
Once you’re in the Edit Token menu, you can customize the token by:
- changing its emoji,
- setting the issuer,
- updating its name (Login),
- adding a description (Additional information),
- adjusting the OTP length,
- assigning it to a folder.
Once you’ve made your changes, click Save and close in the upper-right corner to confirm.
2.3. Grouping Tokens by Folders
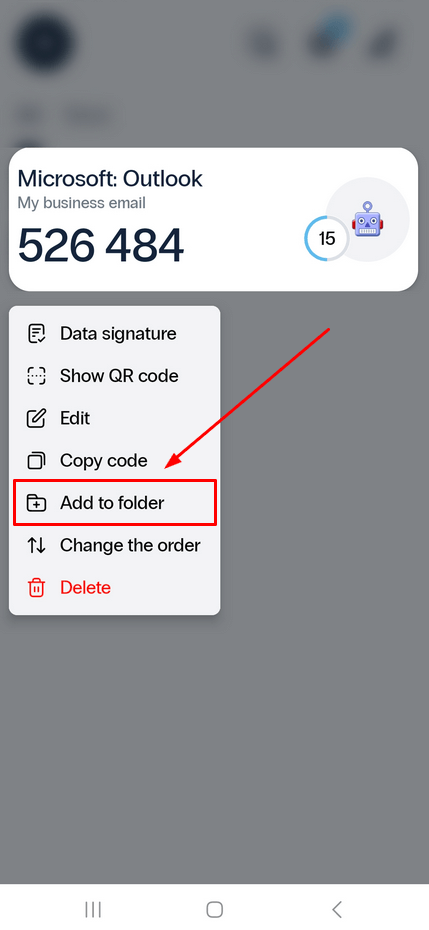
- To keep your tokens organized, you can group them into folders.
To add a token to a folder, simply long-press its name and select Add to folder.
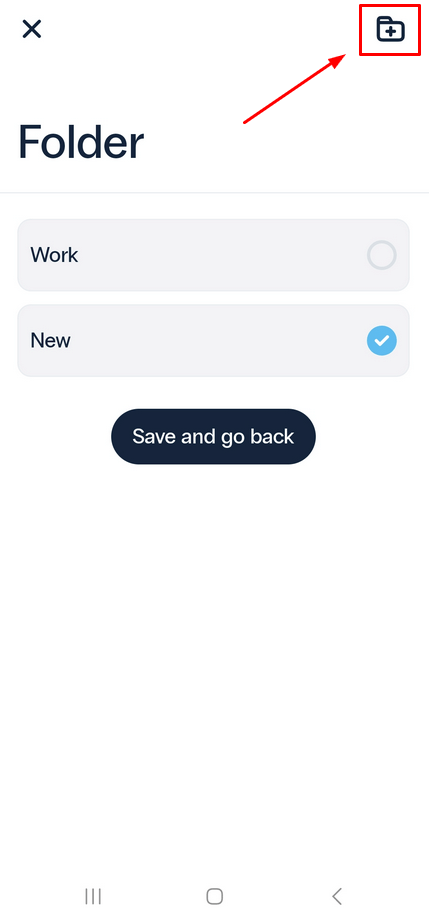
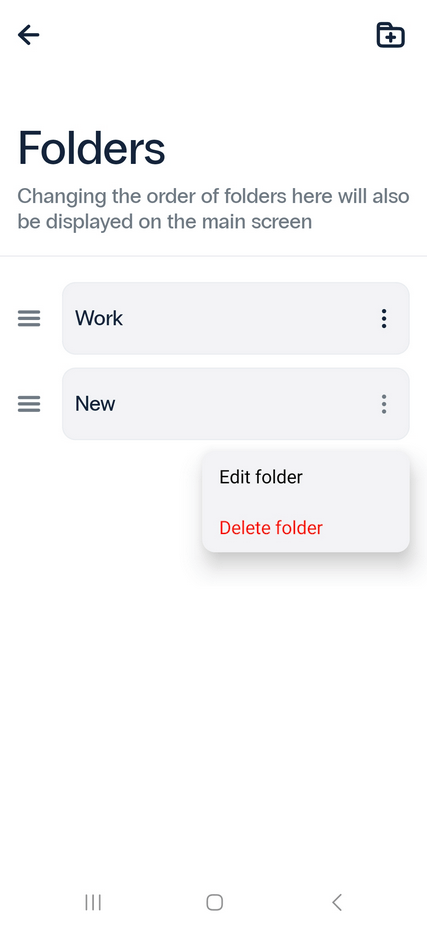
- You’ll be taken to the folder settings menu, where you can either choose an existing folder or create a new one. If you want to create a new folder, click on the icon in the top right corner.
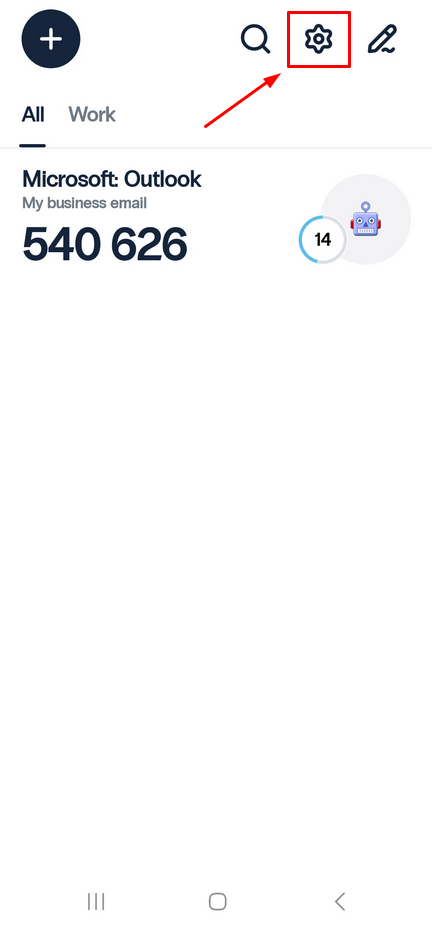
- To manage your folders, click on the gear icon in the upper right corner to go to the Settings page.
- Select Folder Settings.
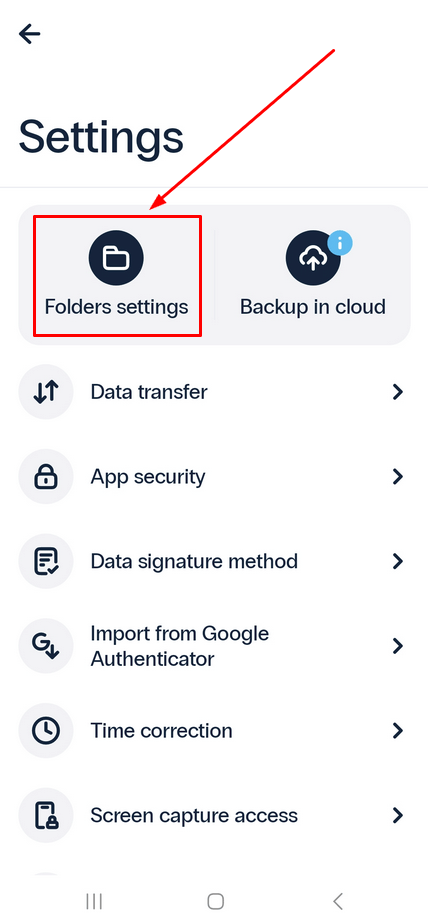
- From here, you can edit, delete, and create new folders, as well as edit tokens in any folder.
2.4. Changing the Order of Tokens
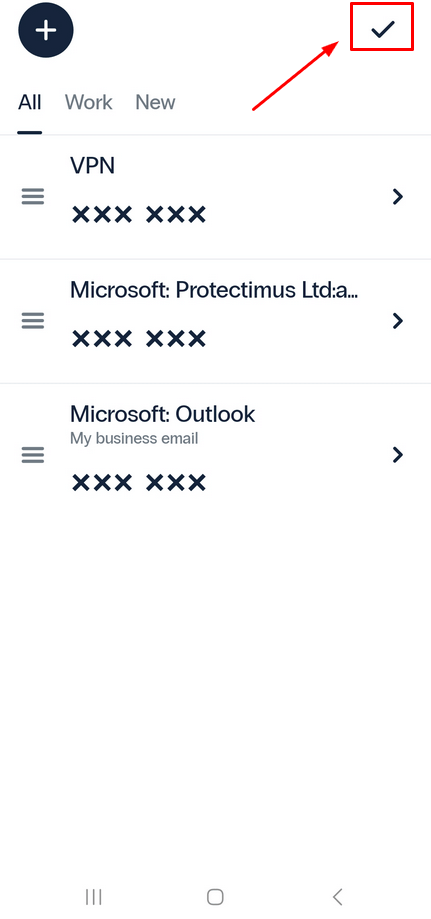
You can customize the order of your tokens to suit your needs. With this feature, you can quickly access your most frequently used tokens.- To do so, open the Edit Token menu by tapping the pen icon in the upper-right corner.
- From there, simply drag the tokens to rearrange them in the desired order. Save the changes by clicking on the checkmark in the upper right corner.
2.5. Cloud Backup
To safeguard your OTP tokens in case of device loss or accidental deletion of the 2FA app, we strongly recommend using the Cloud Backup feature. Additionally, we strongly advise protecting the backup file with a password for added security.To manage your backup files, simply navigate to the Backup page where you can activate, update, restore or delete your backup.
By utilizing this feature, you can ensure that your OTP tokens are always available and secure, even in unexpected circumstances.
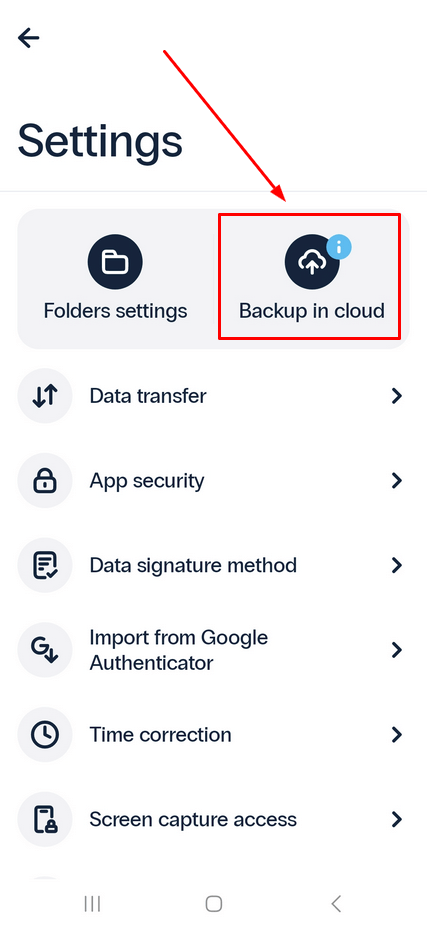
- Go to Settings.
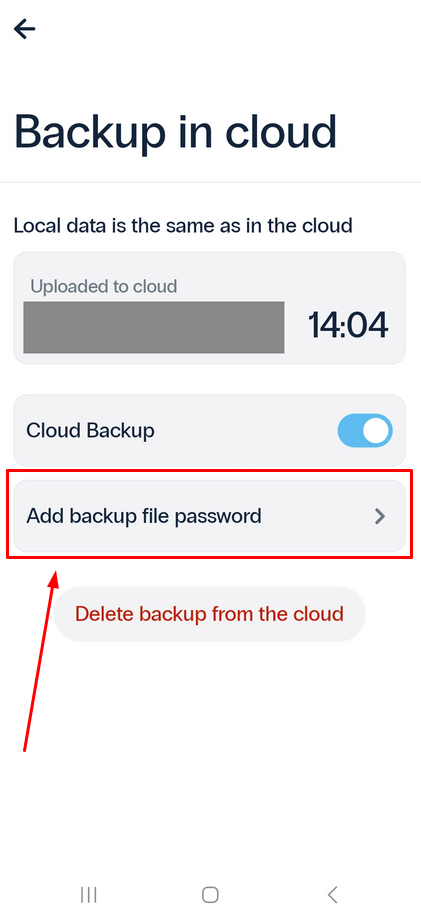
- Tap Backup in cloud.
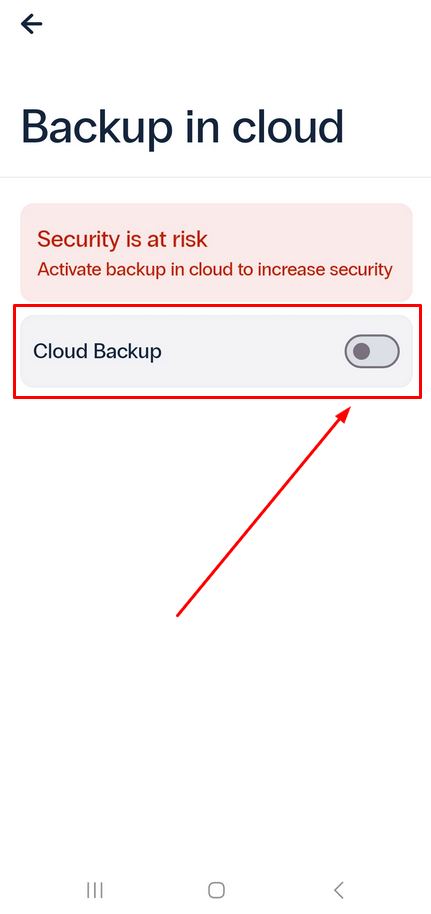
- If the backup function is not activated yet, enable it.
- If the backup function has been activated and you have made any changes, you can Restore the previous version or Update the backup file. Tap the Upload button to upload the latest changes to the cloud.
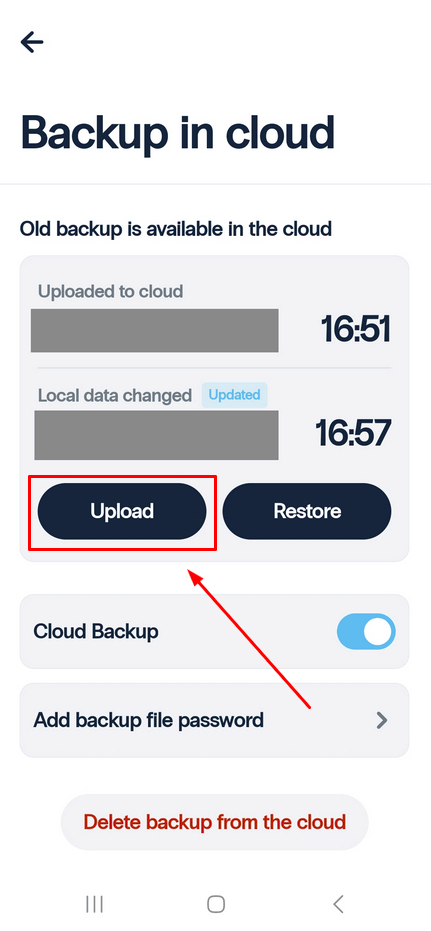
- You will see the allert message. If you are sure that you want to upload current OTP tokens in the cloud, tap Update. Please note that this will erase previous backup.

Please note! To secure you backup file, we recommend adding a password, use the Add backup file password button.
2.6. App Security (PIN and Biometric Authentication)
For optimal security, it is highly recommended that you safeguard access to the Protectimus Smart OTP two-factor authentication application with either a PIN or biometric authentication.To enable PIN or biometric authentication with fingerprint or face ID, follow these steps:
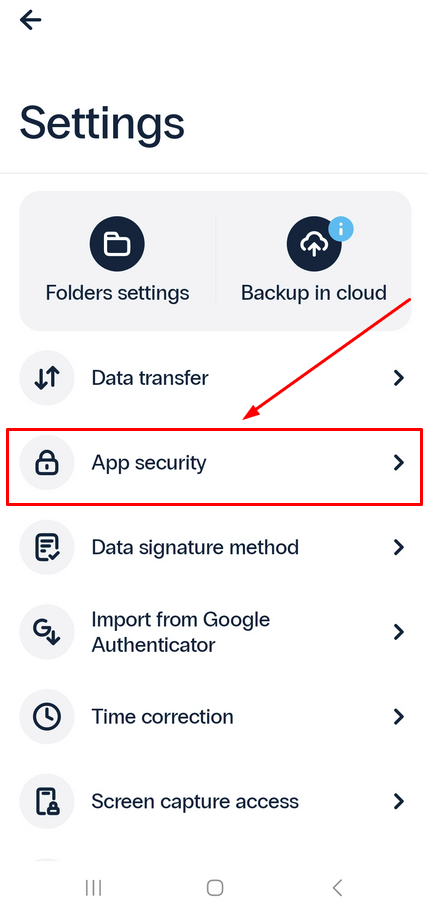
- Go to the Settings menu.
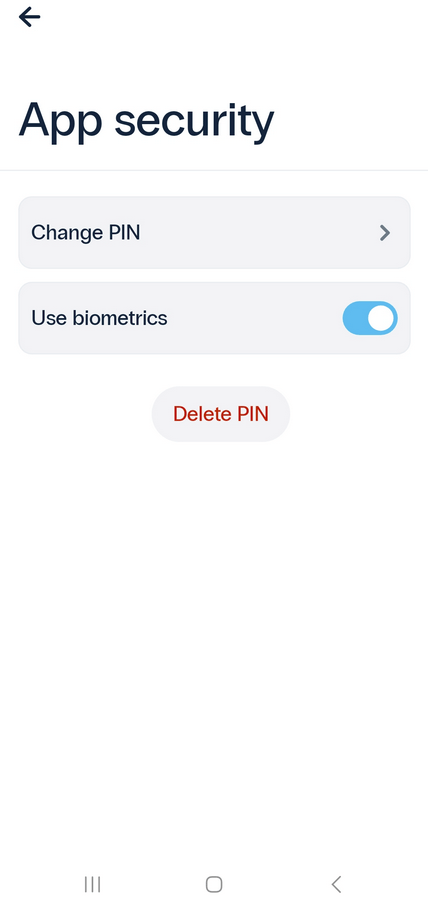
- Select App security.
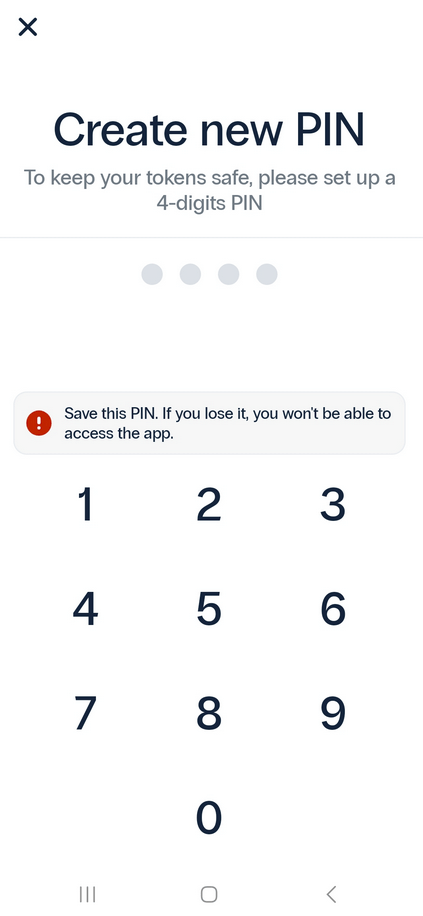
- Create a unique PIN for the application.
- The app will prompt you to allow biometric authentication for easier access.
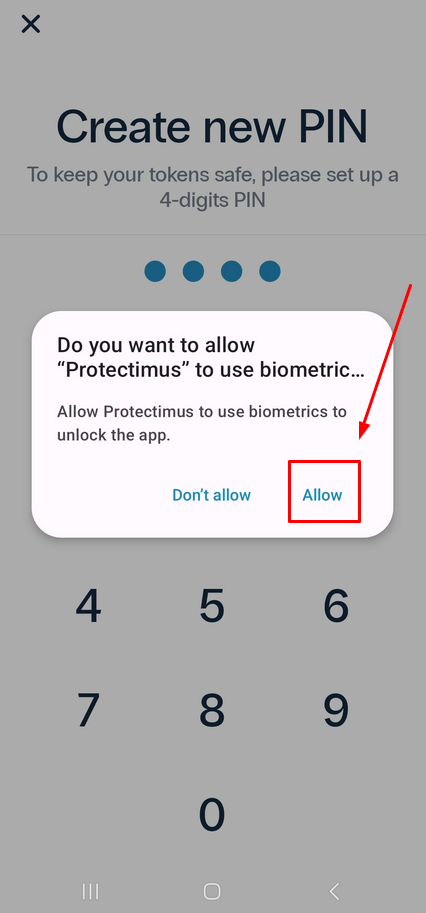
- Once both PIN and biometric protection are enabled, you can manage your PIN, and turn biometric authentication on or off from the App security page.
By taking these simple steps, you can ensure that your Protectimus Smart OTP two-factor authentication application is as secure as possible.
2.7. Transferring Tokens to a New Phone
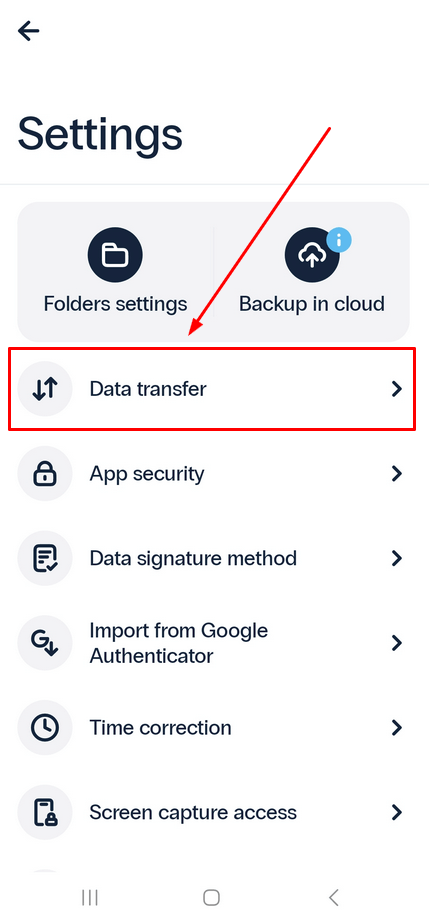
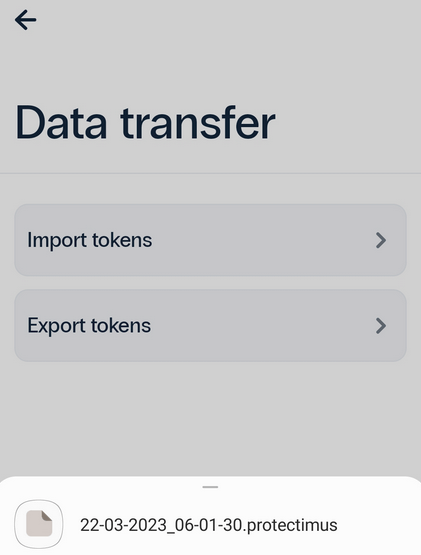
Protectimus Smart OTP authenticator offers a convenient Data Transfer feature that enables you to effortlessly move your tokens from one phone to another or download and store the backup file in the place you like. With this feature, you can export your data into an encrypted file with password protection for added security.- To get started, simply navigate to the Settings menu.
- Tap on the Data transfer option.
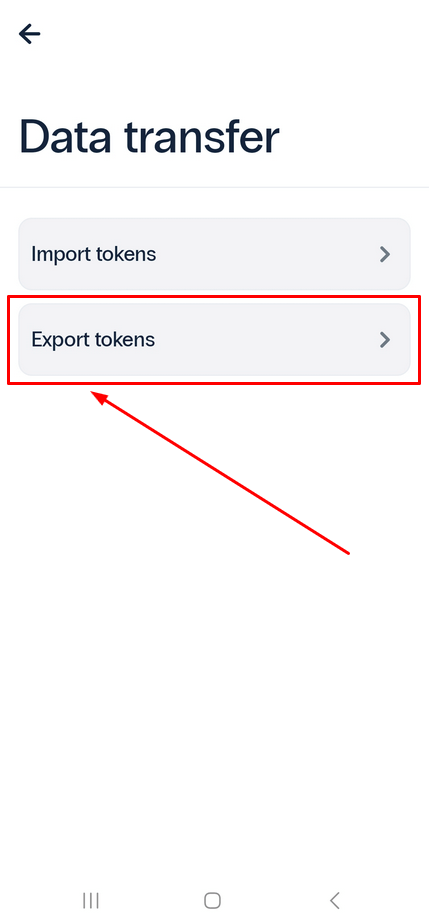
- If you want to transfer tokens from your current device to another, choose Export tokens. Alternatively, if you want to import saved data onto your device, select Import tokens.
- If you choose to export tokens, create a strong password and click on Continue to generate the file containing all your data.
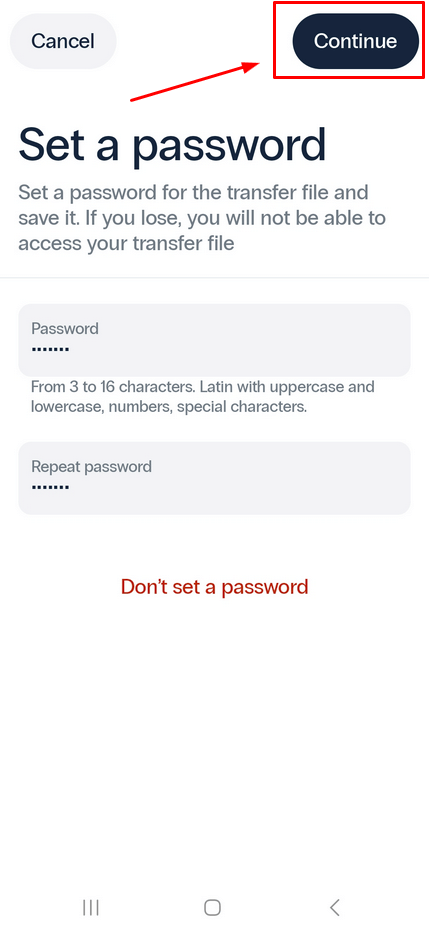
- Remember to save this file so you can import your tokens onto the new device later.
2.8. Importing from Google Authenticator
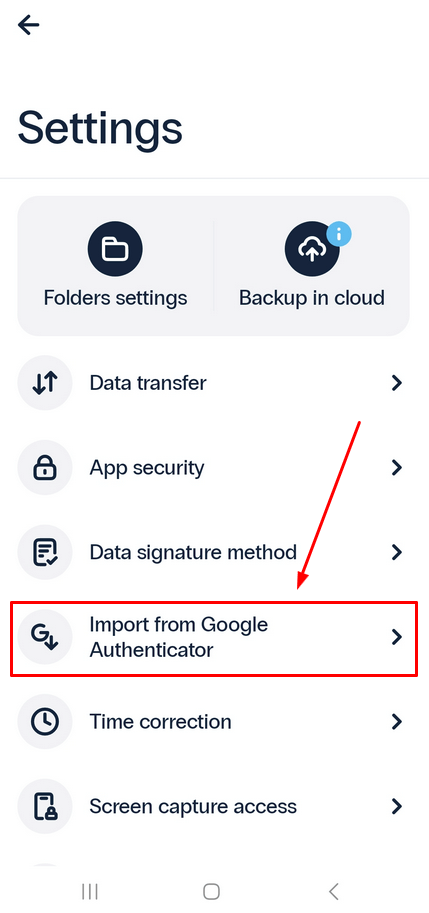
You can easily transfer your tokens from Google Authenticator 2FA app to the Protectimus Smart OTP.To get started, open your Google Authenticator application and:
- tap the menu button located at the top-right corner;
- select Transfer accounts;
- then choose Export accounts;
- select the tokens you wish to transfer to Protectimus Smart OTP;
- tap Next, and you will see a QR code, scan this QR code using the Protectimus Smart OTP app.
In the Protectimus Smart OTP app:
- Go to Settings.
- Select Import from Google Authenticator, scan the QR code generated by Google Authenticator and wait for the import process to complete.
2.9. Time Correction
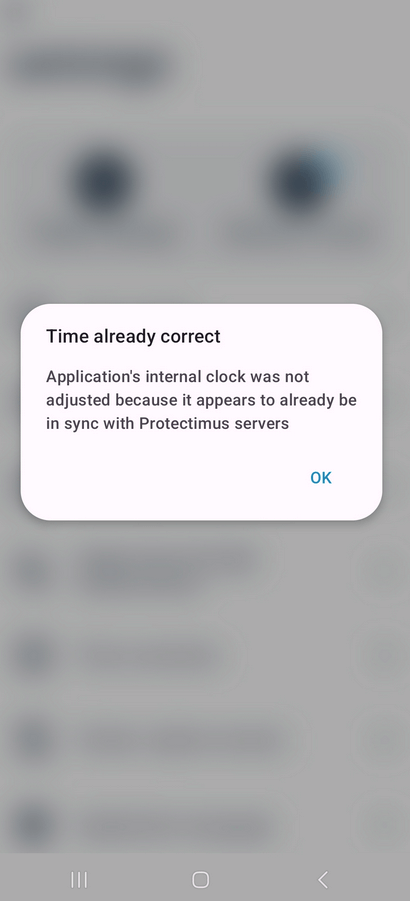
If you see the message “The one-time code is invalid” when attempting to enter a one-time password, it may be due to a time drift between your token and the two-factor authentication server. To resolve this issue, a time correction may be necessary.To synchronize your Protectimus Smart OTP app’s internal clock with Protectimus servers:
- Navigate to Settings.
- Select the Time correction option.
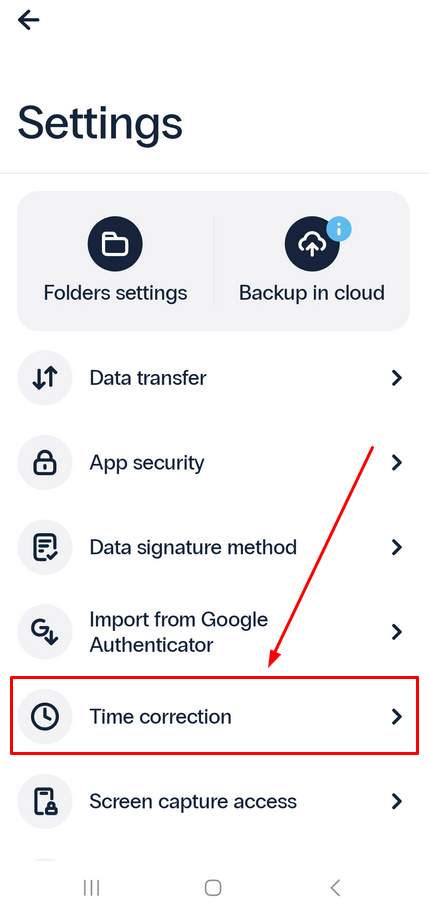
- If everything is in order, you will see a message confirming that the time is already correct.
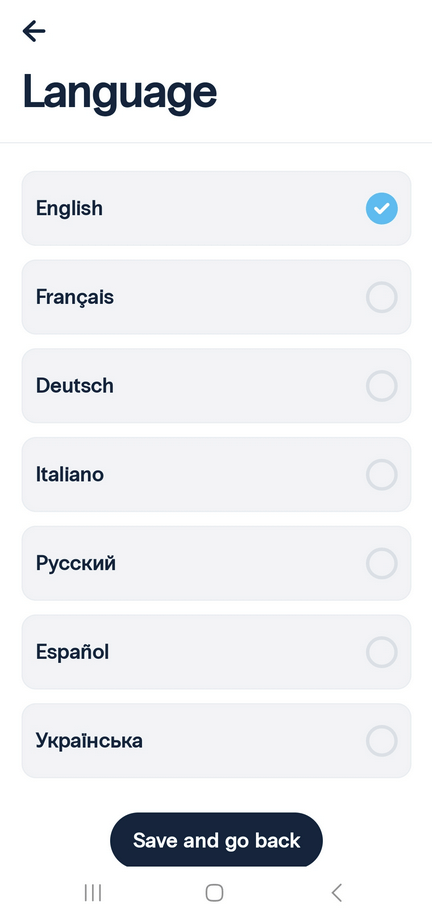
2.10. Application Language
To select the desired language, go to the application settings.Choose Application language, and select the language you prefer.
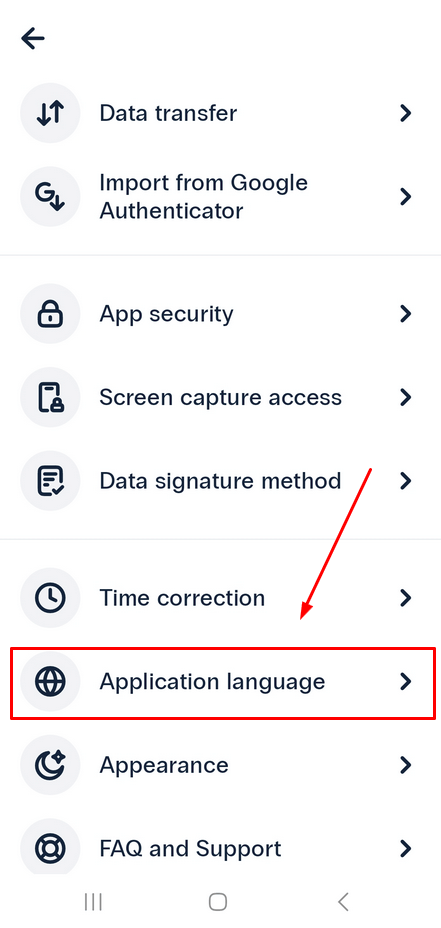
Currently, the Protectimus Smart OTP authenticator is available in English, French, German, Italian, Spanish, Russian, and Ukrainian.
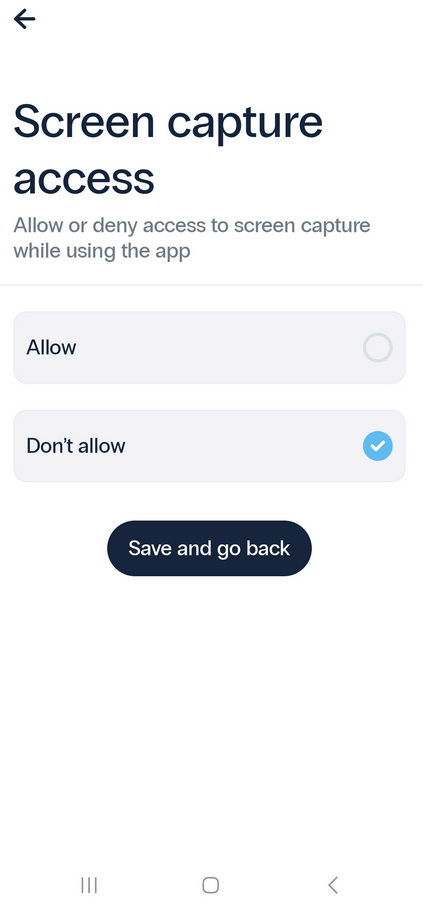
2.11. Screen Capture Access
You can enable or disable Screen Capture Access. To enhance your security, we advise against enabling screen capture access.To change this setting, go to the application settings.
Tap on Screen capture access.
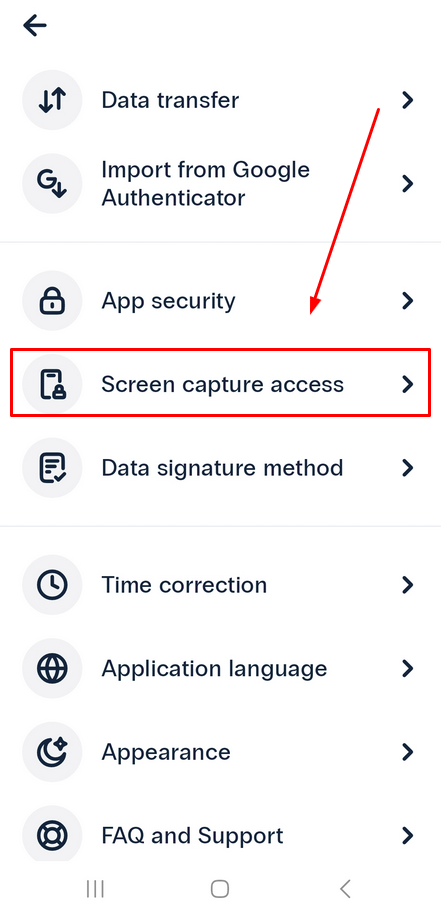
And allow or deny access to screen capture.
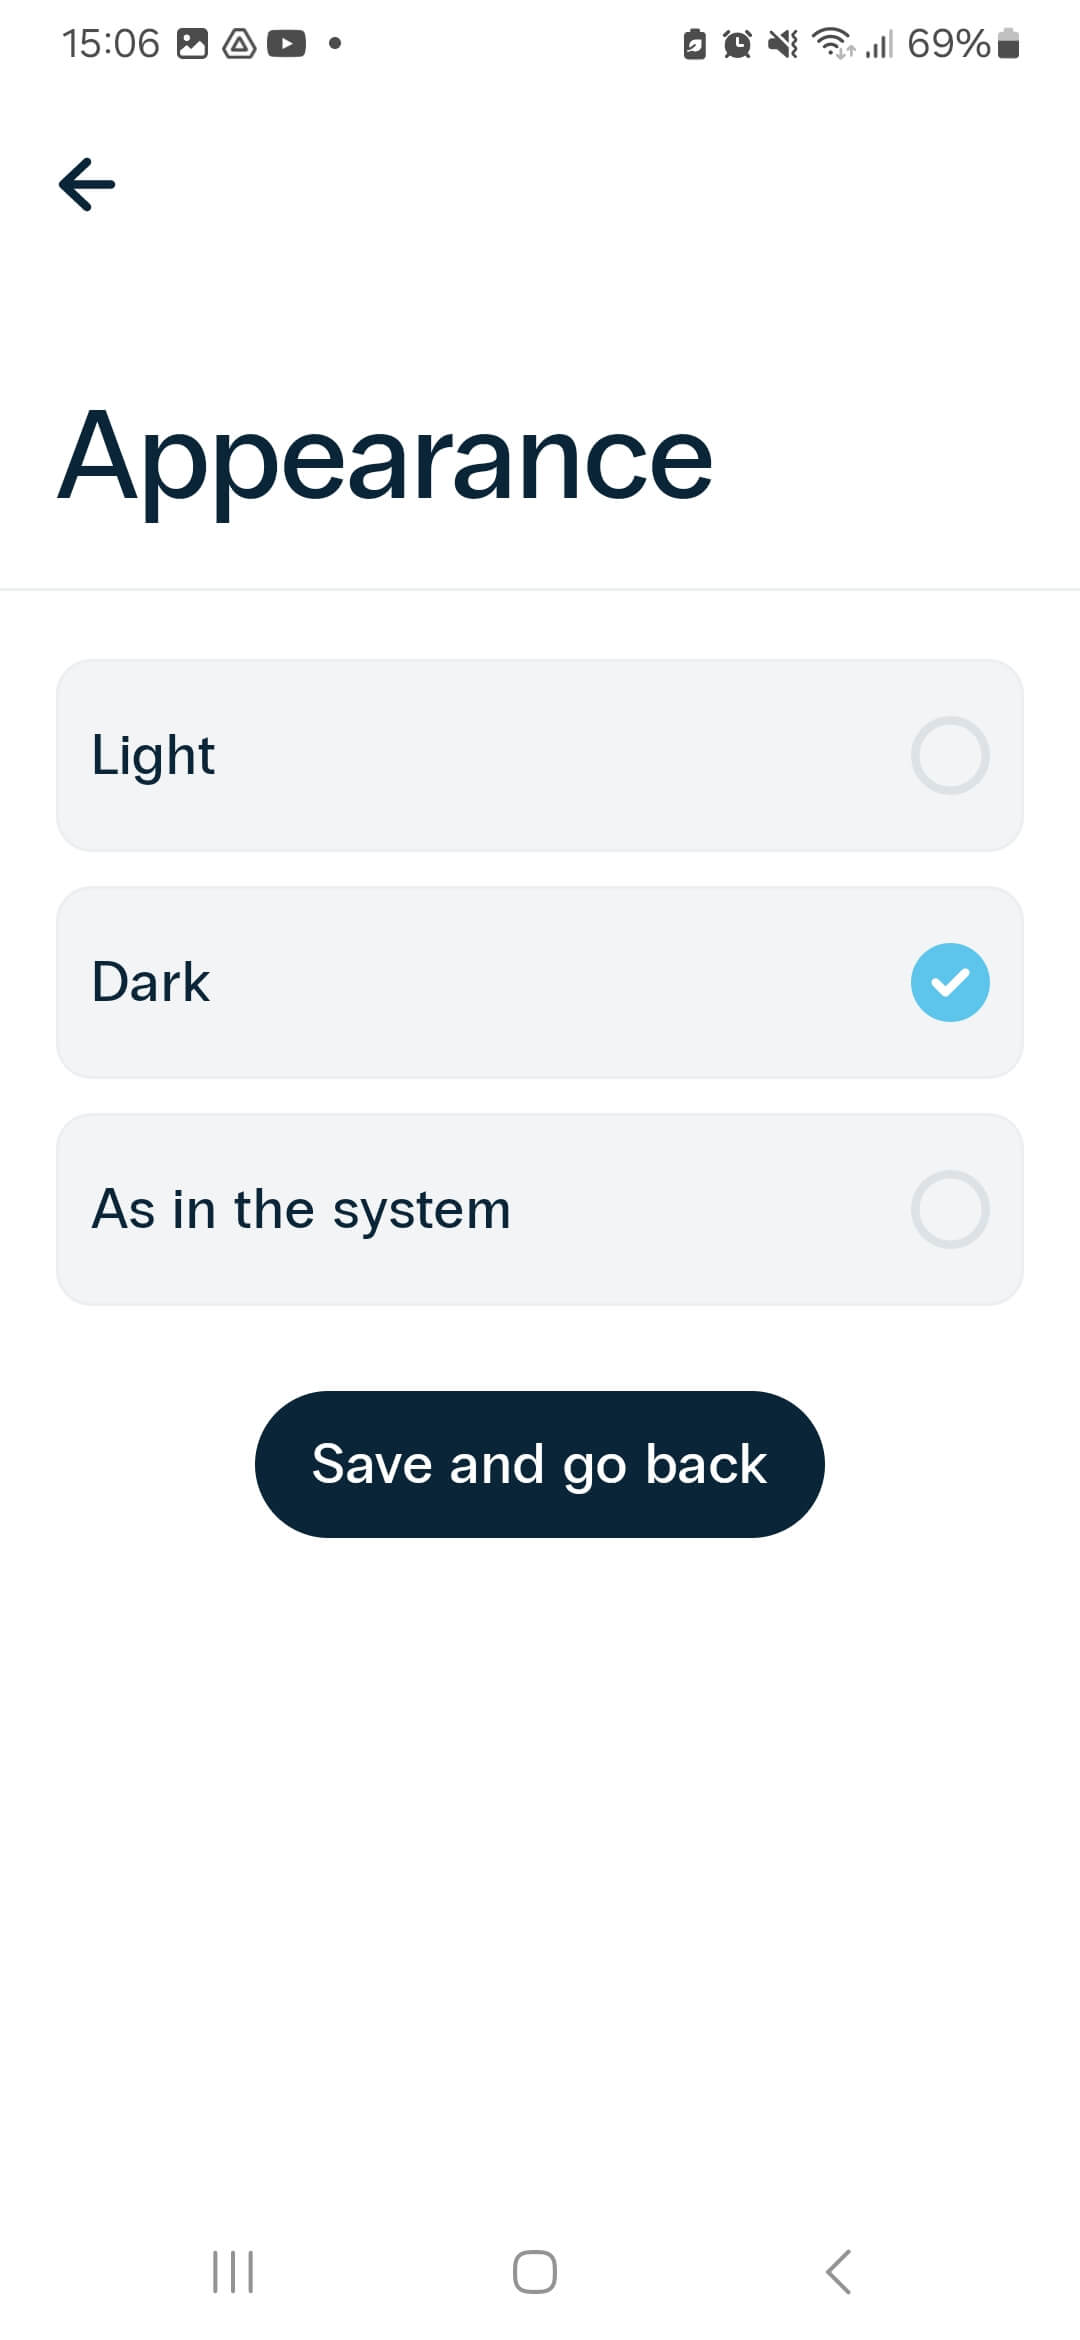
2.12. Changing Light and Dark Appearance
You may also choose between a dark or bright app appearance to suit your preferences.To change this setting, go to the application settings.
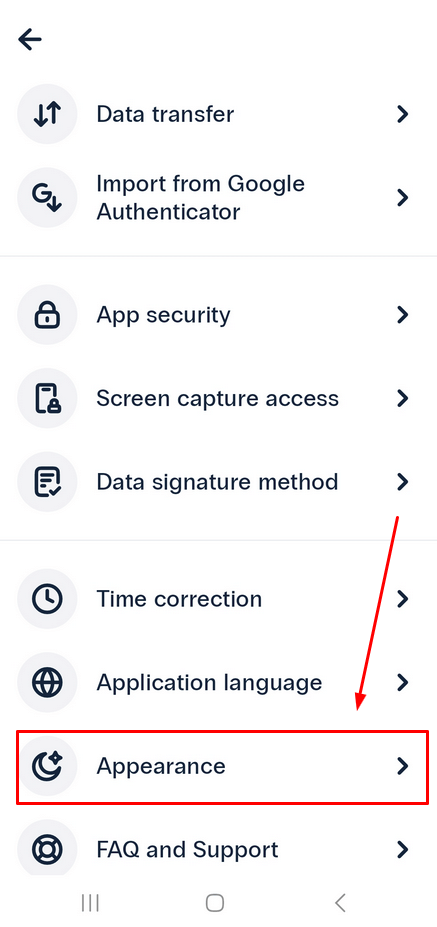
Tap on Appearance.
Choose the desired option and click Save and go back.
3. Setting up 2FA Chatbot on Telegram, Viber, or Messenger
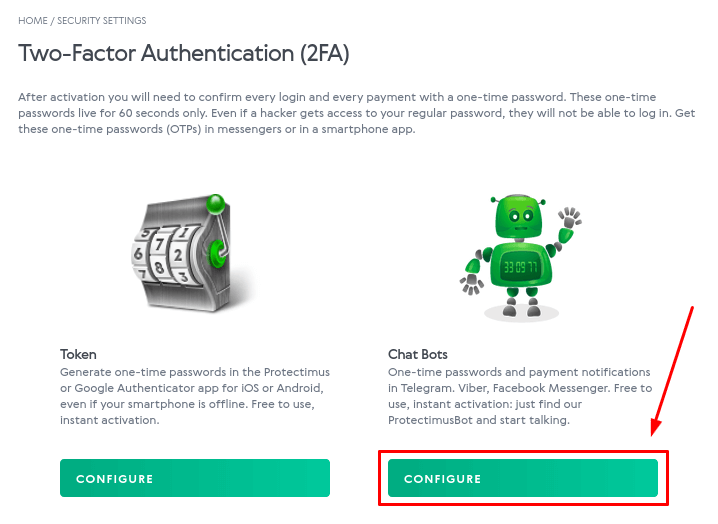
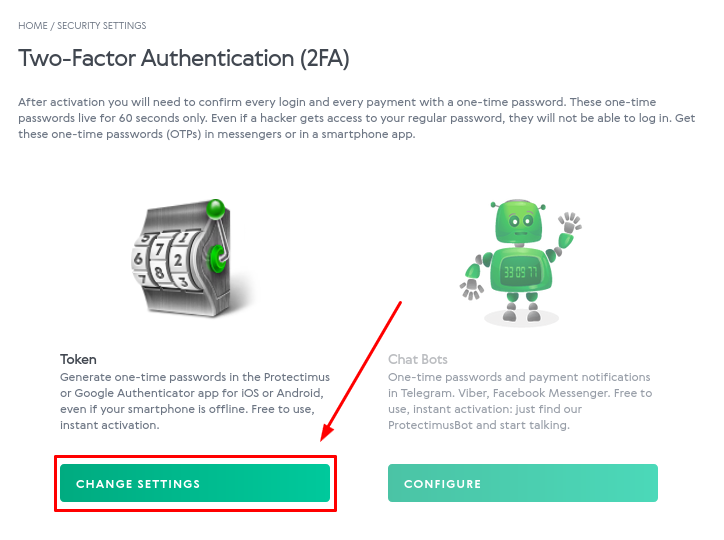
- If you’re opting for the two-factor authentication chatbot on Telegram, Viber, or Facebook Messenger, select the Chat Bots option and click CONFIGURE.
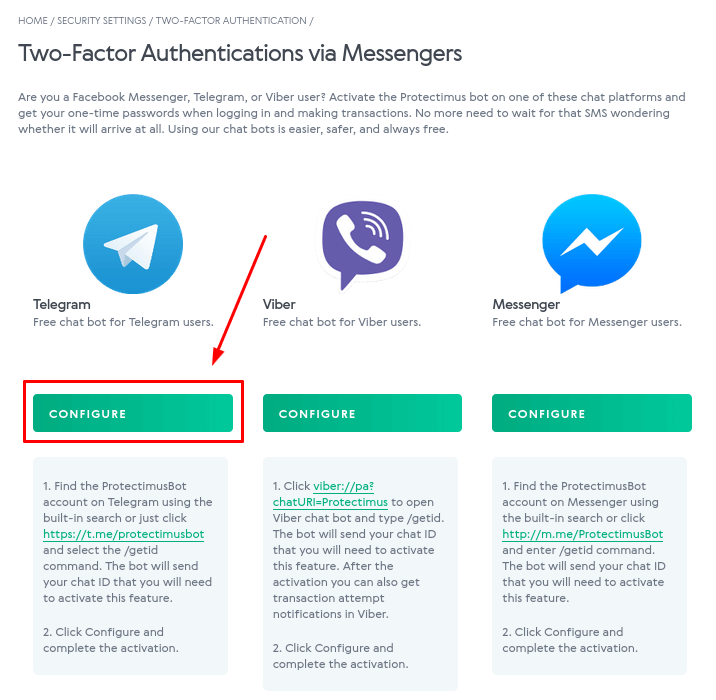
- Choose the messaging app you prefer and find the ProtectimusBot chatbot within the messaging app.
- Telegram – find ProtectimusBot by using the built-in search or use this link https://t.me/protectimusbot.
- Facebook Messenger – find ProtectimusBot through the app’s search function or click http://m.me/ProtectimusBot.
- Viber – copy the link viber://pa?chatURI=Protectimus, add it to your Notes in Viber to make it clickable, then click it to open the Protectimus chatbot in Viber.
- Click CONFIGURE.
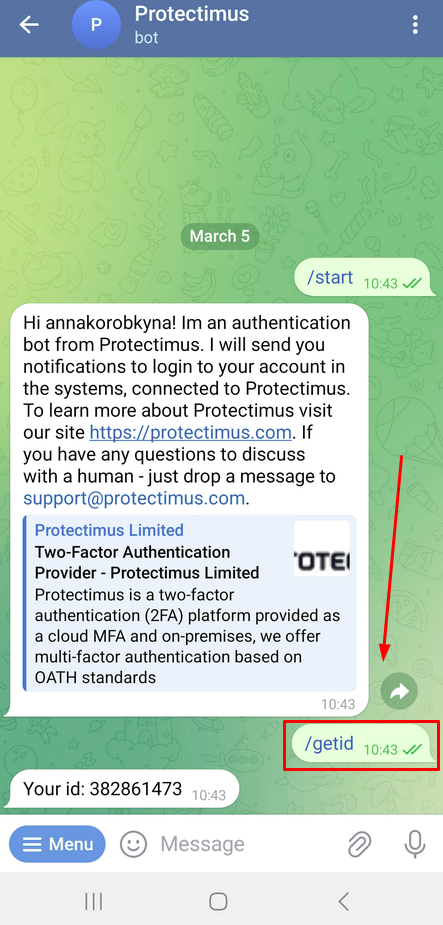
- Enter the /getid command in the chatbot.
Afterward, you will see your chat ID, which needs to be added to the Volet system for token enrollment.
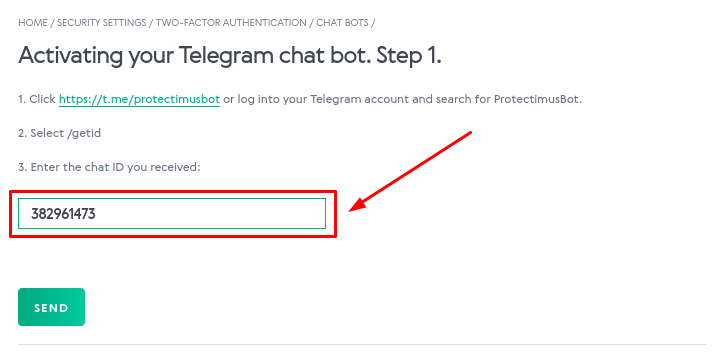
- Enter the chat ID you received into the corresponding field in Volet and click SEND.
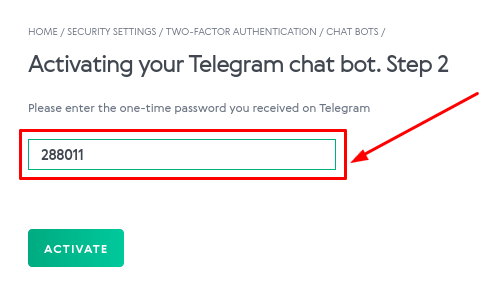
- Then, enter the one-time password from the Protectimus chatbot to complete the token registration.
4. How to Delete or Deactivate a Two-Factor Authentication Token in Volet
You can delete or deactivate your Volet two-factor authentication token, whether you are using the 2FA app Protectimus Smart OTP or a 2FA chatbot in the messaging app. In both cases, you’ll need to enter your one-time password to complete the action.To deactivate or delete your two-factor authentication token in Volet:
- Navigate to the Security Settings page.
- Scroll down to the Two-Factor Authentication (2FA) settings and click the CONFIGURE button.
- Click on CHANGE SETTINGS for the two-factor authentication method you use.
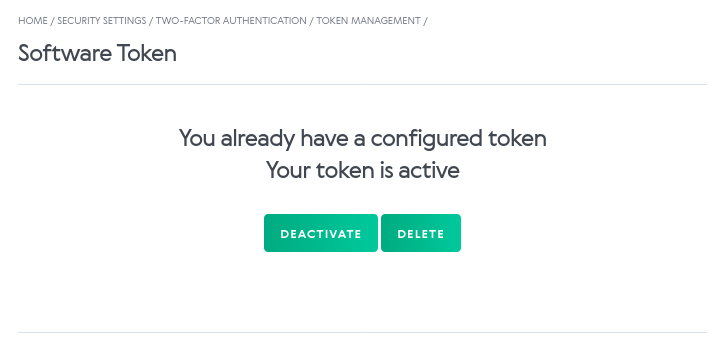
- If you are deactivating or deleting the Protectimus Smart OTP software token, click on the SOFTWARE TOKEN button.
- Choose whether you would like to DEACTIVATE or DELETE the token.
- If you DEACTIVATE the token, you can activate it again; for this, you’ll need the one-time code from your token.
- If you DELETE the token, you cannot reactivate it; you’ll need to enroll a new one.
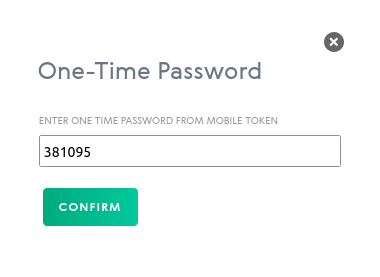
- Enter the one-time password and click CONFIRM.
If you have any questions, please, contact Protectimus customer support service.
Last updated on 2024-03-19