There are two options in the distribution of Protectimus Two-Factor Authentication Server:
- Cloud Service – a cloud-based (SaaS) solution, which enables you to have an easy start and to maintain the authentication infrastructure effectively.
- On-Premise Platform – an on-premises solution for installation in the customer’s environment to handle all the processes. You’ll find instructions on installing the Protectimus On-Premise Platform in our Protectimus On-Premise Platform Installation Guide.
ATTENTION! We suggest you start testing Protectimus two-factor authentication system by setting up the cloud service. Switching between cloud and on-premise authentication servers is as simple as changing a few strings in the configuration file.
To register in the Service open the registration page https://service.protectimus.com, fill out the registration form and click Register.
The confirmation email will be sent to the provided email address. After clicking the link in the email your address will be confirmed and you will be able to use Protectimus cloud-based authentication Service.
When using the Service, you’ll need to activate a payment plan for the API. To do so, navigate to the “Service plans” page at http://service.protectimus.com/pricing and activate the plan you’d like to use.
Your account won’t be charged until you activate a plan, but you won’t be able to use the API until you do so. You can also deactivate a payment plan at any moment if for some reason you won’t need to use the service for more than one day. When you deactivate a plan, a one-time fee is charged to your account for that day, according to the rates in the active plan. When a plan is active, you’ll be charged once per day automatically.
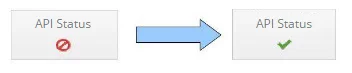
After activating a payment plan, the API status icon will change to the “enabled” state, indicating that the service is ready for operation through the API.
Integrate the Protectimus Cloud Service with the system you plan to protect with two-factor authentication and configure the necessary settings. To do this, download the instructions and the integration component you require on the Docs page: https://www.protectimus.com/integrations/.
Basic settings, required for the operation of Protectimus two-factor authentication Service or Platform, include:
Also, some additional features are available: