Blog Feed
How to Set Up Two-Factor Authentication on Exmo with Protectimus Slim NFC

Learn more about Protectimus Slim NFC token or order one here: Protectimus Slim NFC The best 2FA token to protect your Exmo account! How to enable the Exmo two-factor authentication with Protectimus Slim NFC OTP token. First of all, make sure that your Android smartphone supports NFC, and download the Protectimus TOTP Burner application. Login to Exmo account and initiate the enrolment of the software token: Enter “Settings” section from the drop-down menu -> Choose “Protection” section -> Choose “Google Authenticator” -> Click the “Generate a new key” button, then you will see the QR code with the secret key (seed). Use it to program the Protectimus Slim NFC token. After that click the “Save settings” button. Program the Protectimus Slim NFC token by scanning the QR code. Learn how to program Protectimus Slim NFC token here. To finish the token enrollment enter the one-time password from Protectimus Slim NFC token and press “Yes”. Enjoy reliable and convenient protection for your Livecoin account — make hackers’ lives...
read moreHow to Set Up Two-Factor Authentication on Evernote with Protectimus Slim NFC

Learn more about Protectimus Slim NFC token or order one here: Protectimus Slim NFC The best 2FA token to protect your Evernote account! How to enable the Evernote two-factor authentication with hardware OTP token Protectimus Slim NFC. Make sure that your Android smartphone supports NFC and download the Protectimus TOTP Burner application. Log in your Evernote account and initiate the enrolment of the software token: Go to “Settings” in the account navigation menu -> Choose the “Security Summary” section -> Enable Two-Step Verification -> Continue setup -> Consider important things to know and press “Continue” -> Verify your e-mail and phone number -> Choose “Continue with Android” -> You will see the QR code with the secret key (seed). Program the Protectimus Slim NFC token by scanning the QR code. Learn how to program Protectimus Slim NFC token here. Enter the one-time password from Protectimus Slim NFC token in the field “Enter your code”, and press continue. Then save backup...
read moreHow to Set Up Two-Factor Authentication on Bitfinex with Protectimus Slim NFC

Learn more about Protectimus Slim NFC token or order one here: Protectimus Slim NFC The best 2FA token to protect your Bitfinex account! How to enable Bitfinex two-factor authentication with hardware OTP token Protectimus Slim NFC. Download the Protectimus TOTP Burner application. Login to your Bitfinex account and initiate the enrolment of the software token: Go to the “Security” section -> Find “Two-Factor Authentication” -> Choose Google Authentication and press the “SETUP” button -> You will see the QR code with the secret key (seed). Use it to program the Protectimus Slim NFC token. Program the Protectimus Slim NFC token by scanning the QR code. Learn how to program Protectimus Slim NFC token here. To finish the token enrollment enter the one-time password from Protectimus Slim NFC token in the field “2FA token” and press the “ENABLE” button. Enjoy reliable and convenient protection for your Bitfinex...
read moreHow to Set Up Two-Factor Authentication on Bitstamp with Protectimus Slim NFC

Learn more about Protectimus Slim NFC token or order one here: Protectimus Slim NFC The best 2FA token to protect your Bitstamp account! How to add hardware OTP token Protectimus Slim NFC to Bitstamp cryptocurrency exchange. Download the Protectimus TOTP Burner application. Login to your Bitstamp account and initiate the enrolment of software token: Go to the account settings -> Go to “Security” and click the “ENABLE TWO-FACTOR AUTHENTICATION” button -> You will see the QR code with the secret key (seed). Use it to program the Protectimus Slim NFC token. Program the Protectimus Slim NFC token by scanning the QR code. Learn how to program Protectimus Slim NFC token here. Write down or print your authentication key to use it as a backup in future if needed. To finish the token enrollment enter the one-time password from Protectimus Slim NFC in the field “Verification Code” and press the “ENABLE TWO-FACTOR AUTHENTICATION” button. Enjoy reliable and convenient protection for your Bitstamp...
read moreHow to Set Up Two-Factor Authentication on BitKonan with Protectimus Slim NFC
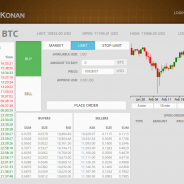
Learn more about Protectimus Slim NFC token or order one here: Protectimus Slim NFC The best 2FA token to protect your BitKonan account! How to enable two-factor authentication with hardware OTP token Protectimus Slim NFC in BitKonan cryptocurrency exchange. Make sure that your Android smartphone supports NFC and download the Protectimus TOTP Burner application. Log in your BitKonan account and initiate the enrolment of the software token: Choose Account settings section on the main page -> Click “Security” and choose “Two-Factor Authorization” -> Click “Enable two-factor authentication” -> You will see the QR code with the secret key (seed). Use it to program the Protectimus Slim NFC token. Program the Protectimus Slim NFC token by scanning the QR code. Learn how to program Protectimus Slim NFC token here. Save the QR code in a very safe place to use it as a backup in the future if you wish. To finish the token enrollment enter the one-time password from Protectimus Slim NFC in the field “Authentication code” and click “Enable two-factor authentication”. Enjoy reliable and convenient protection for your BitKonan...
read moreHow to Set Up Two-Factor Authentication on Coinbase with Protectimus Slim NFC

Learn more about Protectimus Slim NFC token or order one here: Protectimus Slim NFC The best 2FA token to protect your Coinbase account! How to enable two-factor authentication with hardware OTP token Protectimus Slim NFC in Coinbase cryptocurrency exchange. Download the Protectimus TOTP Burner application. Login to your Coinbase account and initiate the enrolment of software token: Go to “Settings” -> Choose “Security” section -> Click the button “Enable Authenticator” -> You will see the QR code with the secret key (seed). Use it to program the Protectimus Slim NFC token. Program the Protectimus Slim NFC token by scanning the QR code. Learn how to program Protectimus Slim NFC token here. You may save the QR code to use it as a backup in the future if needed. To finish the token enrollment enter the one-time password from Protectimus Slim NFC in the corresponding field and press the button “Enable”. Enjoy reliable and convenient protection for your Coinbase...
read moreHow to Set Up Two-Factor Authentication on LocalBitcoins with Protectimus Slim NFC
Learn more about Protectimus Slim NFC token or order one here: Protectimus Slim NFC The best 2FA token to protect your LocalBitcoins account! How to enable two-factor authentication with hardware 2FA token Protectimus Slim NFC in LocalBitcoins cryptocurrency exchange. Make sure that your Android smartphone supports NFC technology and download the Protectimus TOTP Burner application. Log in your LocalBitcoins account and initiate the enrolment of the software token: Choose “Edit profile” from the pop-up menu in the right upper corner -> Go to “Security” section -> Click “Edit Security options” -> Click “Enable two-factor authentication” -> Choose “Mobile app based two-factor authentication” and click “Proceed to activation” -> You will see the QR code with the secret key (seed). Use it to program the Protectimus Slim NFC token. Program the Protectimus Slim NFC token by scanning the QR code. Learn how to program Protectimus Slim NFC token here. Save the QR code in a very safe place to use it as a backup in the future. To finish the token enrollment enter the one-time password from Protectimus Slim NFC in the field “Authentication code” and tick the checkbox below if you saved the secret code. Enjoy reliable and convenient protection for your LocalBitcoins...
read moreHow to Set Up Two-Factor Authentication on EpicNPC with Protectimus Slim NFC
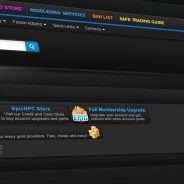
Learn more about Protectimus Slim NFC token or order one here: Protectimus Slim NFC The best 2FA token to protect your EpicNPC account! How to enable EpicNPC two-factor authentication with hardware OTP token Protectimus Slim NFC. Download the Protectimus TOTP Burner application. Login to EpicNPC account and initiate the enrolment of the software token: Choose “Settings” section on the main bar -> Choose “Two-Factor AUthentication” from the settings list -> Click the “Enable Two-FActor Authentication” button -> You will see the QR code with the secret key (seed). Use it to program the Protectimus Slim NFC token. Program the Protectimus Slim NFC token by scanning the QR code. Learn how to program Protectimus Slim NFC token here. To finish the token enrollment enter the one-time password from Protectimus Slim NFC token in the field “Code Validation”. Enjoy reliable and convenient protection for your EpicNPC...
read moreHow to Set Up Two-Factor Authentication on CEX.io with Protectimus Slim NFC

Learn more about Protectimus Slim NFC token or order one here: Protectimus Slim NFC The best 2FA token to protect your CEX.io account! CEX.io cryptocurrency exchange asks its users to enable 2-factor authentication immediately after registration. But if you don’t use two-factor authentication on CEX.io you can always activate in in security settings. We prepared 3 guides to add hardware security token Protectimus Slim NFC to CEX.io cryptocurrency exchange: For those who are new on CEX.io. For CEX.io users who never activated 2-factor authentication, and now want to enable it with Protectimus Slim NFC. For those who already use 2-factor authentication with software OTP token. Guide 1 How to enable CEX.io 2FA with Protectimus Slim NFC for those who are new on CEX.io. Download the Protectimus TOTP Burner application. Sign up to CEX.io. After registration, choose two-factor authentication via Smartphone app. You will see the QR code with the secret key (seed). Use it to program the Protectimus Slim NFC token. Program the Protectimus Slim NFC token by scanning the QR code. Learn how to program Protectimus Slim NFC token here. Download 2FA backup key. To finish the token enrollment enter the one-time password from Protectimus Slim NFC in the field “Enter 2FA code from the app” and press the button “Next”. Guide 2 How to enable CEX.io 2FA with Protectimus Slim NFC for existing accounts without enabled two-factor authentication. Download the Protectimus TOTP Burner application. Login to your CEX.io account and initiate the enrolment of software token: Choose “Profile” section from the drop-down menu in the right upper corner -> Go to “Security” settings -> Enable two-factor authentication -> Choose 2-factor authentication via Smartphone app. You will see the QR code with the secret key (seed). Use it to program the Protectimus Slim NFC token. Program the Protectimus Slim NFC token by scanning the QR code. Learn how to program Protectimus Slim NFC token here. Download 2FA backup key. To finish the token enrollment enter the one-time password from Protectimus Slim NFC in the field “Enter 2FA code from the app” and press the button “Next”. Guide 3 How to enable CEX.io 2FA with Protectimus Slim NFC for those who already use 2-factor authentication with software OTP token. Note: DON’T delete Google Authenticator or another application you use for OTP generation until you finish the Protectimus Slim NFC setup. Download the Protectimus TOTP Burner application. Login to your CEX.io account and disable 2-factor authentication with software token: Choose “Profile” section from the drop-down menu in the right upper corner -> Go to “Security” settings -> Click the “Edit settings” button -> Deactivate 2FA -> Enter one-time password from your software authenticator to disable authentication app -> Confirm your actions -> Click the button “I’d like to proceed anyway”. Initiate the enrolment of software token one more time: Choose “Profile” section from the drop-down menu in the right upper corner -> Go to “Security” settings -> Enable two-factor authentication -> Choose 2-factor authentication via Smartphone app. You will see the QR code with the secret key (seed). Use it to program the Protectimus Slim NFC token. Program the Protectimus Slim NFC token by scanning the QR code. Learn how to program Protectimus Slim NFC token here. Download 2FA backup key. To finish the token enrollment enter the one-time password...
read moreHow to Set Up Two-Factor Authentication on Bitlio with Protectimus Slim NFC

Learn more about Protectimus Slim NFC token or order one here: Protectimus Slim NFC The best 2FA token to protect your Bitlio account! How to enable two-factor authentication with hardware 2FA token Protectimus Slim NFC in Bitlio cryptocurrency exchange. Make sure that your Android smartphone supports NFC technology and download the Protectimus TOTP Burner application. Login your Bitlio account and initiate the enrolment of the software token: Click “My Account” and choose “Activate 2-Factor Authentication” from the drop-down menu -> Click the “Get Started” button -> You will see the QR code with the secret key (seed). Use it to program the Protectimus Slim NFC token. Program the Protectimus Slim NFC token by scanning the QR code. Learn how to program Protectimus Slim NFC token here. Save the QR code in a very safe place to use it as a backup in the future. To finish the token enrollment enter the one-time password from Protectimus Slim NFC OTP token in the corresponding field and click “Verify”. Congratulations! Now, 2FA is...
read more